
Jan 4, 2023
6 Basic Steps of eCommerce App Development

Adam Creamer
Read More

The transformation brought about by digital advancements in mobile app testing and mobile applications, is remarkable. As per a report by Statista, the globe currently boasts over 6 billion smartphone subscriptions, a figure set to rise to nearly 7.7 billion by 2027.
This spike in mobile devices and smartphone usage has sparked an insatiable demand for mobile applications, drastically changing how businesses and customers interact. It’s fascinating to see how these apps have simplified the complex web of human connectivity.
However, to truly grasp their impact, it’s essential to delve into an often-underplayed process that is the cornerstone of any successful mobile application – mobile application testing. When discovering how to test mobile app components, understanding the mobile app testing process is crucial, and there are some guiding principles to keep in mind.

Mobile app testing is a structured process for confirming that an application is robust, usable, and behaves as intended before release. It puts the app through its paces on three fronts at once: its technical capability, whether it delivers what the business needs it to, and whether it holds up as an experience a user would choose to keep. Running that examination properly is what keeps significant glitches from reaching production and souring the experience for everyone who installs it.
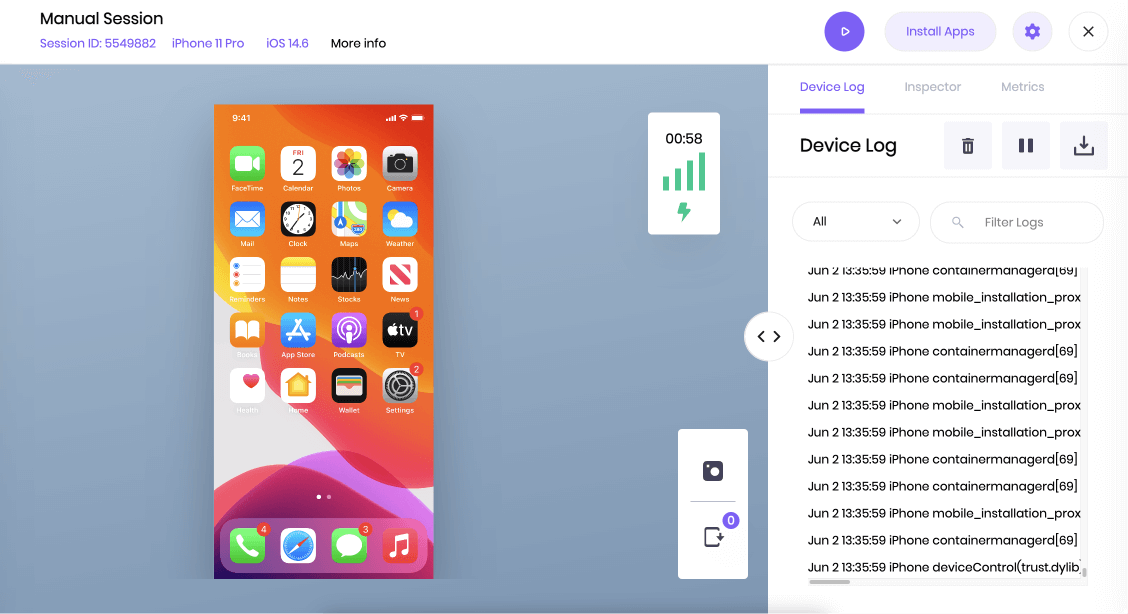
There’s a lot to cover when it comes to mobile application testing; fortunately, Kobiton professionals are able to help you make sense of cutting-edge tools, and support improved experiences for users as well.
First, it’s important to acknowledge that a thorough testing strategy ensures a robust, user-friendly application. Development channels consider data obtained from any number of testing procedures, which in turn impact the end product.
The best mobile app testing tools – and the process itself – identify issues related to the mobile experience that might hinder the user experience: things like bugs, the likelihood of a crash, or issues related to performance. When we iron out these issues effectively by employing well-designed app testing strategies and the right mobile testing step, then our objective has been accomplished.
Think, for just a moment, about why we’re driven to create mobile apps in the first place. It’s because we want to broaden business horizons to reach more users worldwide.
However, an app riddled with bugs or providing a poor user experience will likely fall out of its audience’s favor. First impressions can make or break an app’s reputation; a sudden crash or a glitch in functionality can cause users to abandon the app. When they do, it translates to lost customers and dwindling revenue.
It helps to be specific about what users actually abandon apps over, because it is rarely the feature you spent the sprint on. They delete apps that eat storage, apps that lag on the mid-range phone they actually own, apps that drain the battery on a normal day, and apps that lose their place after a phone call. None of these register as bugs in a functional test pass — every feature works exactly as specified — which is precisely why they survive to production and turn into one-star reviews.
That is the case for treating performance, storage, battery, and interruption handling as first-class testing concerns rather than things you check if there is time left. They are where users make the keep-or-delete decision.
Like any other important process, we know that making the most of mobile app testing tools is a step-by-step process.
Mobile application testing is an absolute necessity in today’s digital world. By enabling the delivery of high-quality mobile apps, businesses can offer optimized user experiences, a game-changer in the highly competitive realm of mobile apps. Ultimately, adequate mobile app testing is the bottom line for meeting user demands and offering stellar user experiences.
Laid out as twelve steps, this can read like a phase that happens once, after development finishes. In practice it runs continuously, and most of it runs more than once per release. Agile sprints compress the window for testing to the point where preparing test cases has to happen alongside development rather than after it, and continuous integration means code arrives in small, frequent increments instead of one large drop.
What changes is not the steps but their frequency. A useful way to split them:
| Cadence | What runs | Scope |
| On every commit or nightly build | Automated smoke and unit tests (steps 5 and 12 in miniature) | Tier 1 devices only, minutes not hours |
| Every sprint | Exploratory and usability passes on new features, test case design for what is being built (steps 3, 5, 6) | Whatever the sprint touched |
| Every release candidate | Full regression, compatibility, performance, and security passes (steps 7 through 9) | The full device matrix, in parallel |
| Before a major launch | Beta, extended device coverage, full end-to-end validation (steps 10 and 12) | Widest matrix, including edge devices |
One caution worth building in early: tests that pass on a developer’s machine and fail in CI are usually failing on environment differences rather than test logic. System animations left enabled, a missing set of Google Play services, an unpinned locale or timezone, and a clean state on every run are the usual culprits — check those before you start editing the test.
In the constantly evolving landscape of mobile applications, establishing efficient and robust app testing strategies is fundamental to ensuring the success of an app. These strategies aim to ensure flawless performance across various platforms, enhance user experience, and secure sensitive user data, among other vital aspects.
Strategies that elevate the way we learn how to test mobile app components will always raise the bar for QA. There are some guiding principles to keep in mind, and this section provides a deep dive into the most effective strategies for mobile app testing.
Users choose their own devices and operating systems, so your app has to behave the same across all of them. Pairing emulators and simulators with physical device testing keeps this affordable: use virtual devices for fast layout checks during development, and real hardware for everything that has to be right.
Users hand sensitive data to your app constantly. A serious security strategy starts by understanding the platforms the app runs on and mapping the attack vectors each one exposes, then builds layered defenses against them. The step teams skip is the last one: testing the app from an attacker’s perspective rather than a user’s, which is how you find the weaknesses an ordinary test pass walks straight past.
Plenty of your users are not on fast, stable connections. Test the app across the full range — weak cellular signal, LTE, WiFi — and then test the transitions, because that is where the failures live: switching from WiFi to mobile data mid-session, losing signal entirely partway through a request, and recovering when it returns.
Devices differ in screen size, resolution, and pixel density, and layout bugs follow those differences closely. Testing across dimensions catches the clipping, overlap, and truncation that quietly degrade the experience on any handset that is not the one your designer used.
Some app behaviors are far more expensive than others: streaming media, syncing large payloads, and anything that holds a geolocation fix open. Identify which parts of your app drive consumption, measure them on real hardware, and optimize the worst offenders. An app users associate with a dead battery gets uninstalled regardless of how good its features are.
Users routinely decline to install apps that demand too much space, and they uninstall the ones that grow. Optimize the download and installed size without cutting into usability, and treat size as a budget you hold across releases rather than something you check once at launch.
A long list of permission requests reads as a warning sign to users. Verify that the app asks for nothing it does not need for functionality, and that permission prompts belonging to removed features have gone with them. Then test both directions of the decision — what happens when a user denies a permission, and what happens when they grant it later — because apps that assume a granted permission tend to fail silently.
Real users almost never arrive at your latest build through a clean install; they upgrade over an existing one. Upgrade testing confirms the app survives a version mismatch and, critically, that user preferences, saved data, and active sessions carry across. A clean install hides every migration bug you have.
Performance testing measures response time and latency across realistic scenarios, especially under heavy concurrent load. Measure it on a mid-range or older device rather than a flagship — that is where slow startup and memory pressure show up first, and it is where most of your users are.
Mobile apps are interrupted constantly, and a desktop-shaped test plan never accounts for it. Break the session on purpose and check what survives: an incoming call or alarm partway through a form, a push notification during checkout, the app backgrounded for ten minutes and resumed, the device rotated or moved into split-screen, and battery-saver mode kicking in mid-task.
What you are looking for in every case is state restoration. The app should come back to the screen the user left, with the data they entered still there. Scripted happy-path suites almost never cover this, which is exactly why it fails in production.
Everything a user experiences before your first screen renders is also your responsibility. Confirm the app installs cleanly on a device that is low on storage and fails with a readable message when it runs out, that a cold first launch completes without hanging on a slow connection, that updating from the previously published version preserves data and sessions, and that uninstalling clears app data so a reinstall starts genuinely clean.
Before the first test case is written, you need a list of devices to run it against. This is the decision the rest of the process rests on, and it is the one teams most often make by instinct — usually by reaching for whatever handsets are already in the office. The result is a suite that passes on three flagship phones and ships a crash to everyone else.
Build the list from your own install-base analytics rather than a published “most popular phones” ranking. A general market list describes the market; your analytics describe your users, and those two sets overlap less than you would expect. Work through four passes.
1. Coverage. Sort your active devices by user count and take models from the top until you have accounted for roughly 80% of installs. For most consumer apps this is a surprisingly short list.
2. OS spread. Add the current and previous iOS versions. Android needs wider coverage — the newest release plus the two or three before it — because Android upgrades reach users far more slowly and unevenly than iOS ones.
3. Risk edges. Add a low-RAM Android handset, a tablet, and a foldable or large-screen device if your analytics show any usage at all. These surface memory and layout defects that flagship phones never reveal.
4. Vendor skins. Add at least one device running a manufacturer skin such as One UI, HyperOS, or ColorOS alongside stock Android. Permission prompts, background execution limits, and notification behavior all differ from stock, and those differences break apps.
For most teams this lands somewhere between eight and fifteen device-OS combinations per release, with a wider set reserved for major launches. Not every combination needs to run on every build — tier them by how often they earn a run:
| Tier | What it covers | When it runs | Where it runs |
| Tier 1 | Your single highest-usage Android device and iPhone, on the current OS | Every build | Real devices, automated smoke suite |
| Tier 2 | The rest of your 80% coverage list, plus the previous major OS on each platform | Every release candidate | Real devices, full regression in parallel |
| Tier 3 | Low-RAM Android, tablet, foldable, one vendor skin | Every release candidate, targeted checks | Real devices, layout and memory checks |
| Tier 4 | Screen sizes and OS versions you only need to eyeball during development | Ad hoc | Emulators and simulators |
Review the matrix once a quarter. Device usage shifts steadily, and a list built two years ago has quietly stopped describing your users. If holding that range of hardware in-house is impractical — and for most teams it is — a mobile device cloud gives you the same devices on demand without the procurement and upkeep.
Creating a high-quality mobile application takes a thorough, step-by-step testing process that holds functionality, usability, performance, and security to the same standard. The twelve steps below are the sequence we see working across enterprise mobile teams — from the first strategy conversation through to the final end-to-end pass before release. Not every team runs all twelve on every build, but every team that ships reliably has an answer for each one.
The process begins by outlining the testing strategy, including determining prerequisites, identifying the targeted devices, figuring out the app type, and creating a test plan for the cases that need to be executed. Deciding on the manual or automated testing type is essential at this stage. Automation is beneficial for frequent use cases, tests with predictable outcomes, tests needed for various devices, and unit testing.
App type is not a labeling exercise it changes what the rest of the plan looks like:
| App type | What it is | What that changes for testing |
| Native | Built for one platform in its own language — Kotlin or Java on Android, Swift or Objective-C on iOS | Two separate suites. Espresso and XCUITest give the fastest, least flaky runs. Full hardware and sensor coverage is in scope. |
| Hybrid | Web code inside a native shell, typically via React Native, Flutter, or Ionic | One codebase, but rendering still differs per platform. Test the web layer and the native bridge separately — defects hide at the boundary. |
| Mobile web / PWA | A mobile-optimized site running in the browser, with no install step | Browser and browser-version fragmentation replaces device fragmentation as the primary variable. No install or update path to test, but limited hardware access to verify. |
Settle this before you size the device matrix. A mobile web app needs breadth across browsers; a native app needs breadth across hardware; a hybrid app needs some of both.
Manual, automated, and cloud simulators test to make sure that the mobile application performs optimally across all Android and iOS devices. This approach helps uncover potential defects and ensures the app meets its objectives.
Test cases, which consist of a series of steps to execute a specific app test, are crucial to the process. While test cases are used during manual testing, test scripts find applications in automation testing. These are designed according to the mobile app’s scenarios.
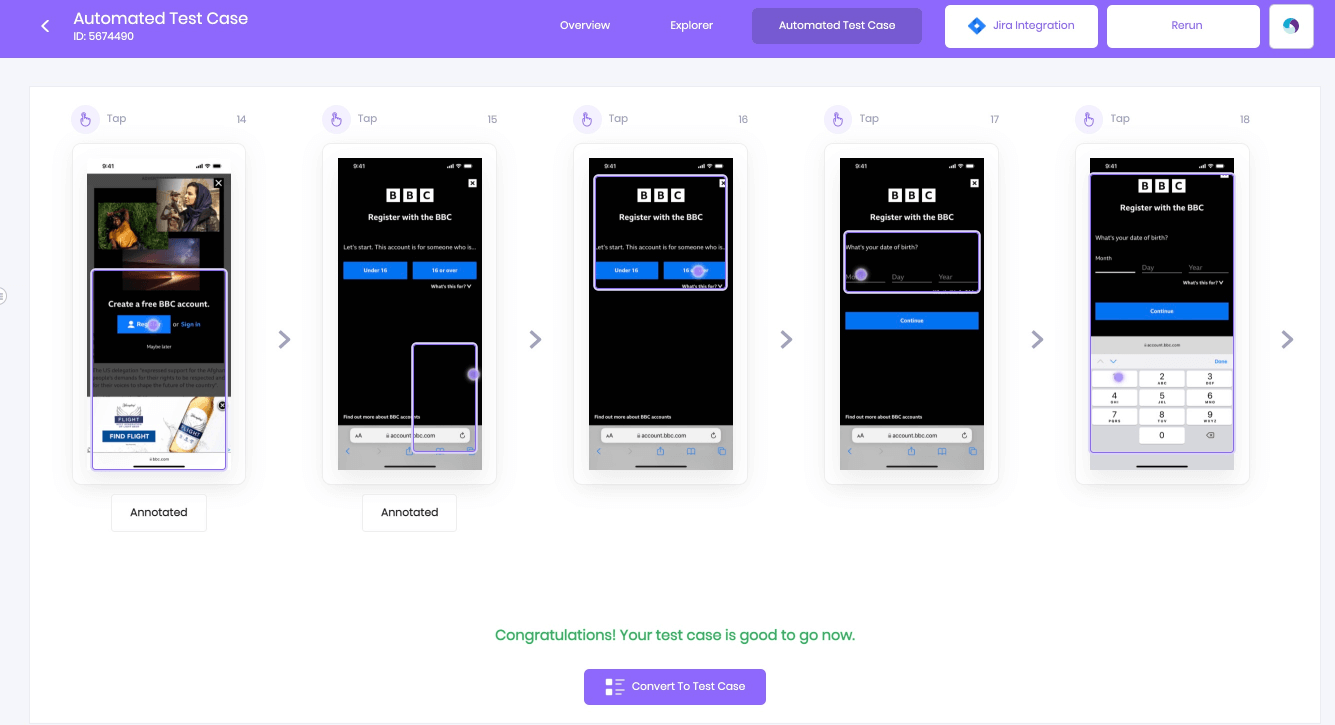
The testing environment comprises the codes and devices used for mobile app testing, and its configuration depends on the app in question. Ensuring the proper test environment setup is vital for the success of the testing process.
Part of that configuration is deciding what your tests run on. “Emulator”, “simulator”, and “real device” get used interchangeably, but they are three different things and they prove three different levels of confidence.
| What you are validating | Virtual device | Real device |
| Layout, screen sizes, basic navigation | Sufficient | Not required early |
| Battery and CPU consumption | Not reliable | Required |
| Camera, GPS, biometrics, NFC | Cannot reproduce | Required |
| Real network latency and signal loss | Simulated only | Required |
| Thermal throttling and memory pressure | Cannot reproduce | Required |
| Setup cost and maintenance | Low | Higher, unless accessed via a device cloud |
The practical rule: anything that touches physical hardware needs physical hardware. A suite that is green only on virtual devices has not tested battery drain, sensor behavior, biometric authentication, or camera capture — and those are the areas where production defects concentrate.
The core functionalities of the app are evaluated through manual and automated testing. This stage is critical for identifying and rectifying flaws for the enhanced performance of the application.
The app undergoes usability testing to confirm it’s easy to use, effective, and satisfactory for end-users. UI testing ensures the app features a simple, intuitive interface that users can effortlessly navigate and operate. Accessibility belongs in this step rather than in a separate exercise at the end. Run the app with TalkBack enabled on Android and VoiceOver on iOS, and check three things: every interactive element is announced with a meaningful label, focus order follows the visual order of the screen, and tap targets stay usable at the largest system font size. Layouts that look fine at default settings frequently collapse at 200% text scaling.
For regulated industries this is not optional — accessibility standards such as WCAG carry legal weight under the ADA and equivalent legislation elsewhere. Even where it is not mandated, it overlaps heavily with general usability: an interface a screen reader can navigate cleanly is usually one that is well structured for everyone.
This stage tests the application across various browsers, devices, networks, and operating systems to confirm compatibility. It verifies that the app works well across all platforms and configurations.
The app’s stability, interoperability, and other vital aspects are checked under load conditions and usage scenarios. This testing process validates the app’s working capacity, response time, and overall performance.
The overall security of the app is verified during this stage. This includes analyzing potential risks and preventing unauthorized access to ensure the app’s safety and the security of sensitive user data.
Usability testing checks if an app’s features function as intended and are convenient for users. Beta testing allows users to test the application, helping developers understand which features users need and the app’s direction.
Finding a defect is only useful if it reliably reaches the person who can fix it. Every issue coming out of the previous steps needs to be logged with enough context to reproduce it — device and OS version, build number, exact steps, and a screen recording where the behavior is visual — then prioritized so the team knows what blocks the release and what can wait.
| Priority | What it means | Example |
| Blocker | Critical functionality unavailable, no workaround | App crashes on launch, or checkout cannot complete |
| High | Critical functionality impaired, workaround exists | Payment fails on first attempt but succeeds on retry |
| Medium | Functional issue with a straightforward workaround | A filter returns wrong results unless applied twice |
| Low | Cosmetic, no functional impact | Truncated label, minor spacing inconsistency on one device |
Track these in whatever the development team already uses — Jira, Azure DevOps, Linear — rather than a separate QA-only system, because a defect in a system developers do not open is a defect nobody is fixing. Test results that carry device logs, network logs, and session video attached to the issue remove most of the back-and-forth about whether a bug is reproducible.
Then iterate. Fixes come back into the suite as retests, and anything that broke once earns a permanent regression test so it cannot break again unnoticed. Beta and usability feedback from step 10 feeds the same queue: user-reported problems get triaged on the same scale as ones your own testers found, which is what stops real-world friction from being filed as an opinion and ignored.
After all testing stages are complete, an end-to-end testing sprint is run to ensure the application functions as expected on the server level and backend. If there are any issues found, they are fixed, and you can repeat the end-to-end sprint.
The digital revolution, powered by a surge in smartphone usage and the accompanying mobile apps, has transformed our world in ways we are just beginning to understand. However, to ensure these mobile apps truly harness their potential, a critical and often overlooked process requires rigorous mobile app testing.
Testing does not end when the team runs out of time; it ends when agreed exit criteria are met. Define those criteria at the start, in step 1, and hold the release to them at the end. A workable set for most mobile teams:
Close with a short release report the whole team can read: which devices and OS versions were covered, what was tested, how many cases passed and failed, which defects are shipping and why, and a clear recommendation on whether the build is ready. This is also test closure — archive the results, and capture what the cycle taught you so the next one starts further ahead than this one did.
It depends on the size of your device matrix and how much is automated. A first full pass on a medium-complexity app typically takes one to two weeks of dedicated QA effort. Once automation is in place, a regression suite running in parallel across a device cloud finishes in minutes, while the same coverage run by hand across physical devices still takes days.
Fewer than most teams expect. Build the list from your own install-base analytics until you have covered roughly 80% of users, then add a low-RAM handset, a tablet, and one vendor skin. For most consumer apps this lands between eight and fifteen device-OS combinations per release.
Only for part of the work. Emulators and simulators are genuinely useful for layout checks and fast feedback during development. They cannot reproduce battery drain, thermal throttling, biometrics, camera behavior, or real network latency — so a suite that is green only on virtual devices has not tested the areas where production defects concentrate.
Automate what is stable and repeats: regression suites, cross-device compatibility, and anything running on every build. Keep humans on exploratory testing, usability, and flows that resist scripting — biometric prompts, camera capture, complex gestures. A practical rule is to start a new feature with manual exploratory testing and automate the paths once they stop changing.
The whole delivery team, in practice. QA engineers design and run the suite, developers write unit and instrumentation tests alongside the feature code, and a product owner signs off on release readiness against the agreed exit criteria. Treating testing as something handed to QA at the end is what produces the crunch this process is meant to avoid.
Mobile testing is the broader term and can take in the device itself, the network, and the mobile web. Mobile app testing specifically means validating an installed application on that device. In everyday use the two are used interchangeably, but the distinction matters when carrier or hardware behavior is genuinely in scope.
The goal of mobile app testing is simple: building robust, user-friendly applications that exceed user expectations and deliver a delightful experience. But achieving this goal demands meticulous attention to detail – employing sophisticated strategies, emulators, and real devices – and tools to iron out potential glitches and enhance the app’s reliability and appeal.
Studies show that 80% of mobile device users will likely abandon an app that doesn’t meet their expectations, so the stakes in mobile app testing have never been higher. Sophisticated testing strategies are essential.
From cross-platform testing to performance testing, security to network connectivity, open source vs. paid, every aspect is vital to creating a seamless app experience. Factors such as battery life, app size, privacy-focused permission settings, and application upgrade scenarios must be considered.
Mobile app testing is a process and a fundamental driver of app quality, business growth, and customer satisfaction. It’s the secret ingredient that separates a good app from a great one, a satisfactory user experience from an exceptional one.
Kobiton provides a number of solutions for organizations seeking to expedite their app release cycles while maintaining the quality of user experience, from manual testing to emulators. As a mobile-first testing platform purpose-built for enterprises, Kobiton provides exceptional service, platform capabilities, and product stability.
Reach out to us today to learn how we can enhance your mobile app testing process and elevate your user experience to new heights.