How to integrate real-device testing into a Bamboo pipeline

Reading Time : 3min read

What Is Bamboo?

Bamboo is a continuous integration (CI) server that can be used to automate the release management for a software application, creating a continuous delivery pipeline.

What does this mean?

CI is a software development methodology in which a build, unit tests, and integration tests are performed, or triggered, whenever code is committed to the repository, to ensure that new changes integrate well into the existing code base. Integration builds provide early ‘fail fast’ feedback on the quality of new changes.

Bamboo assists software development teams by providing:

  • automated building and testing of software source-code status.
  • updates on successful and failed builds.
  • reporting tools for statistical analysis.

Install and Configure Bamboo

We can download and try Bamboo free for 30 days with unlimited users at https://www.atlassian.com/software/bamboo/download. When you set up Bamboo successfully, we can move to the next part.

Set up a Bamboo project with Javascript samples

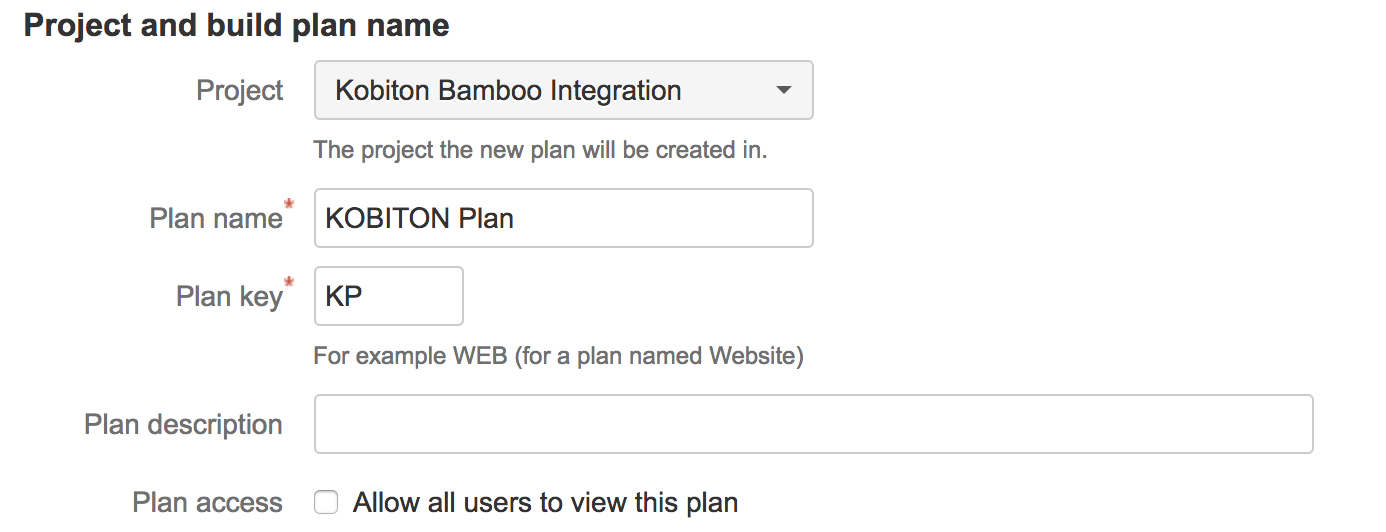
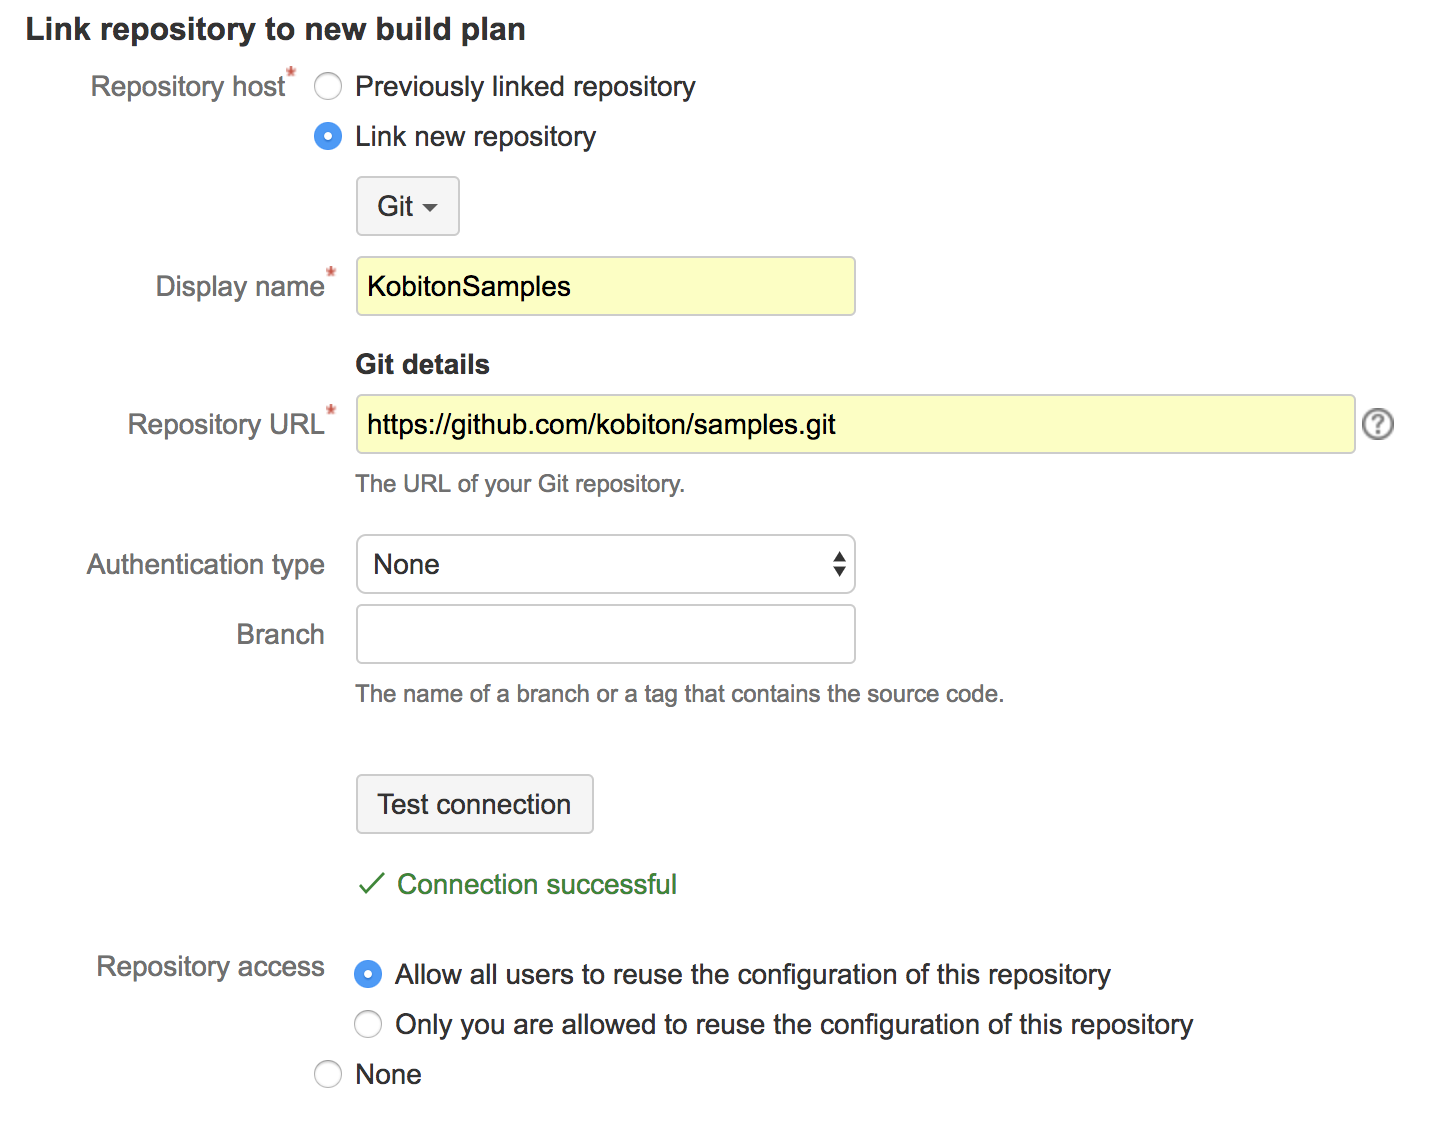
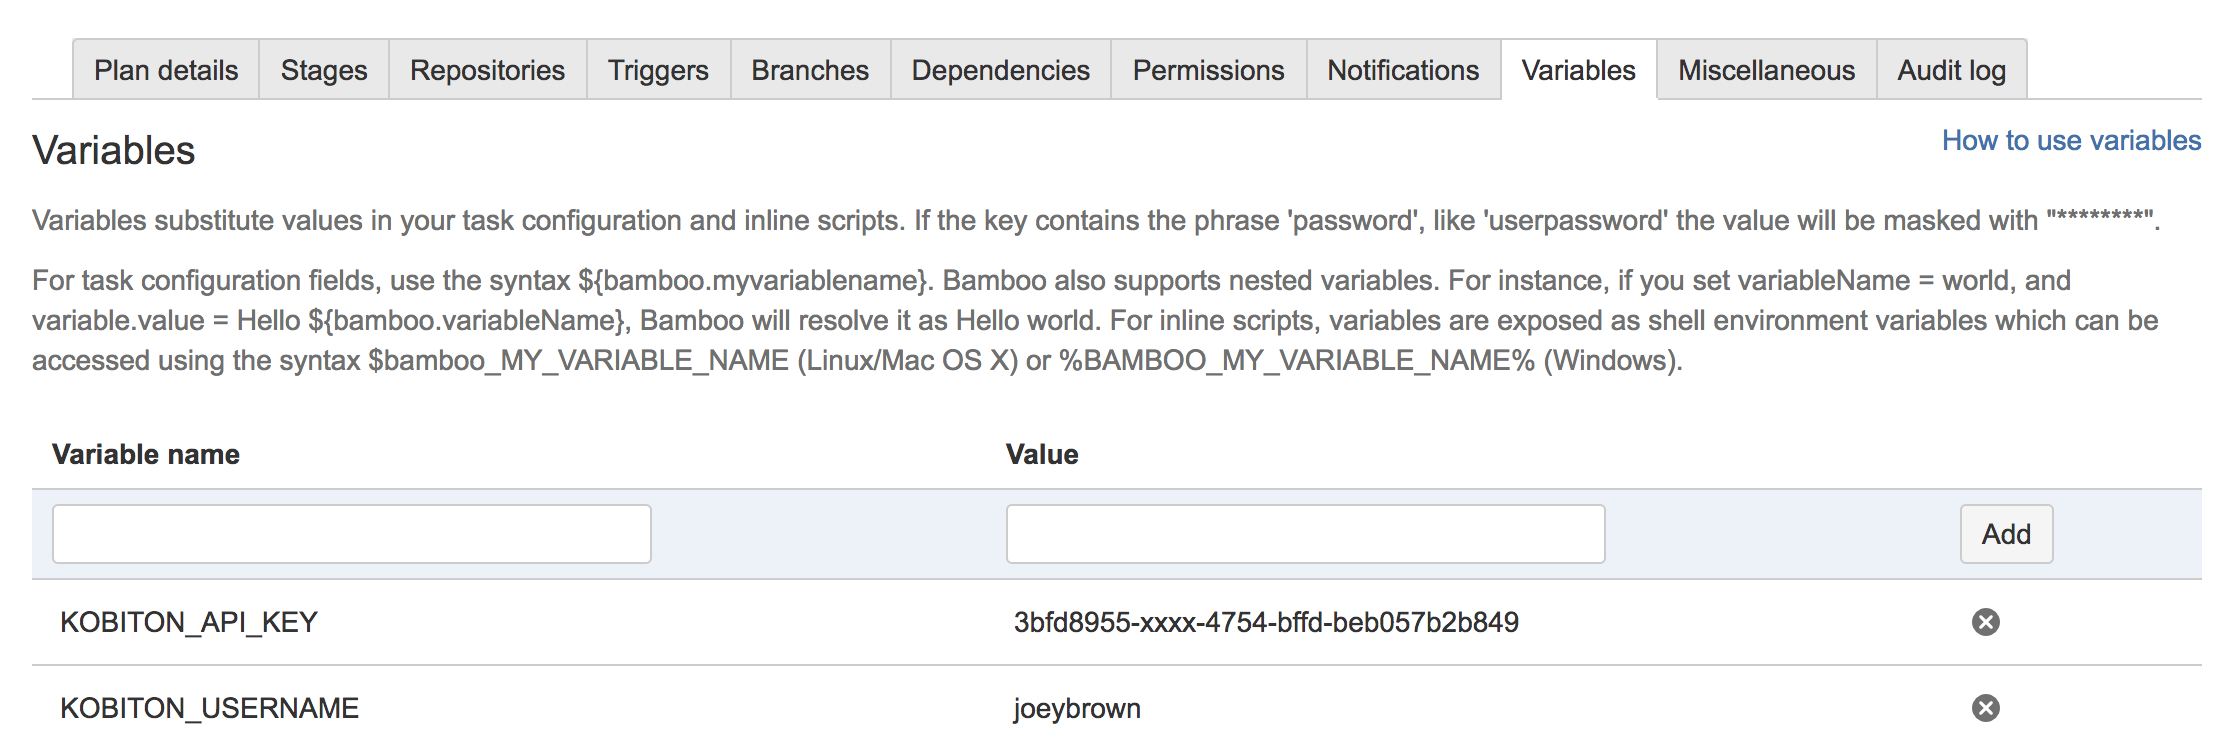
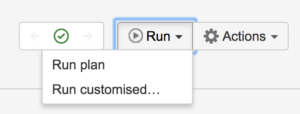
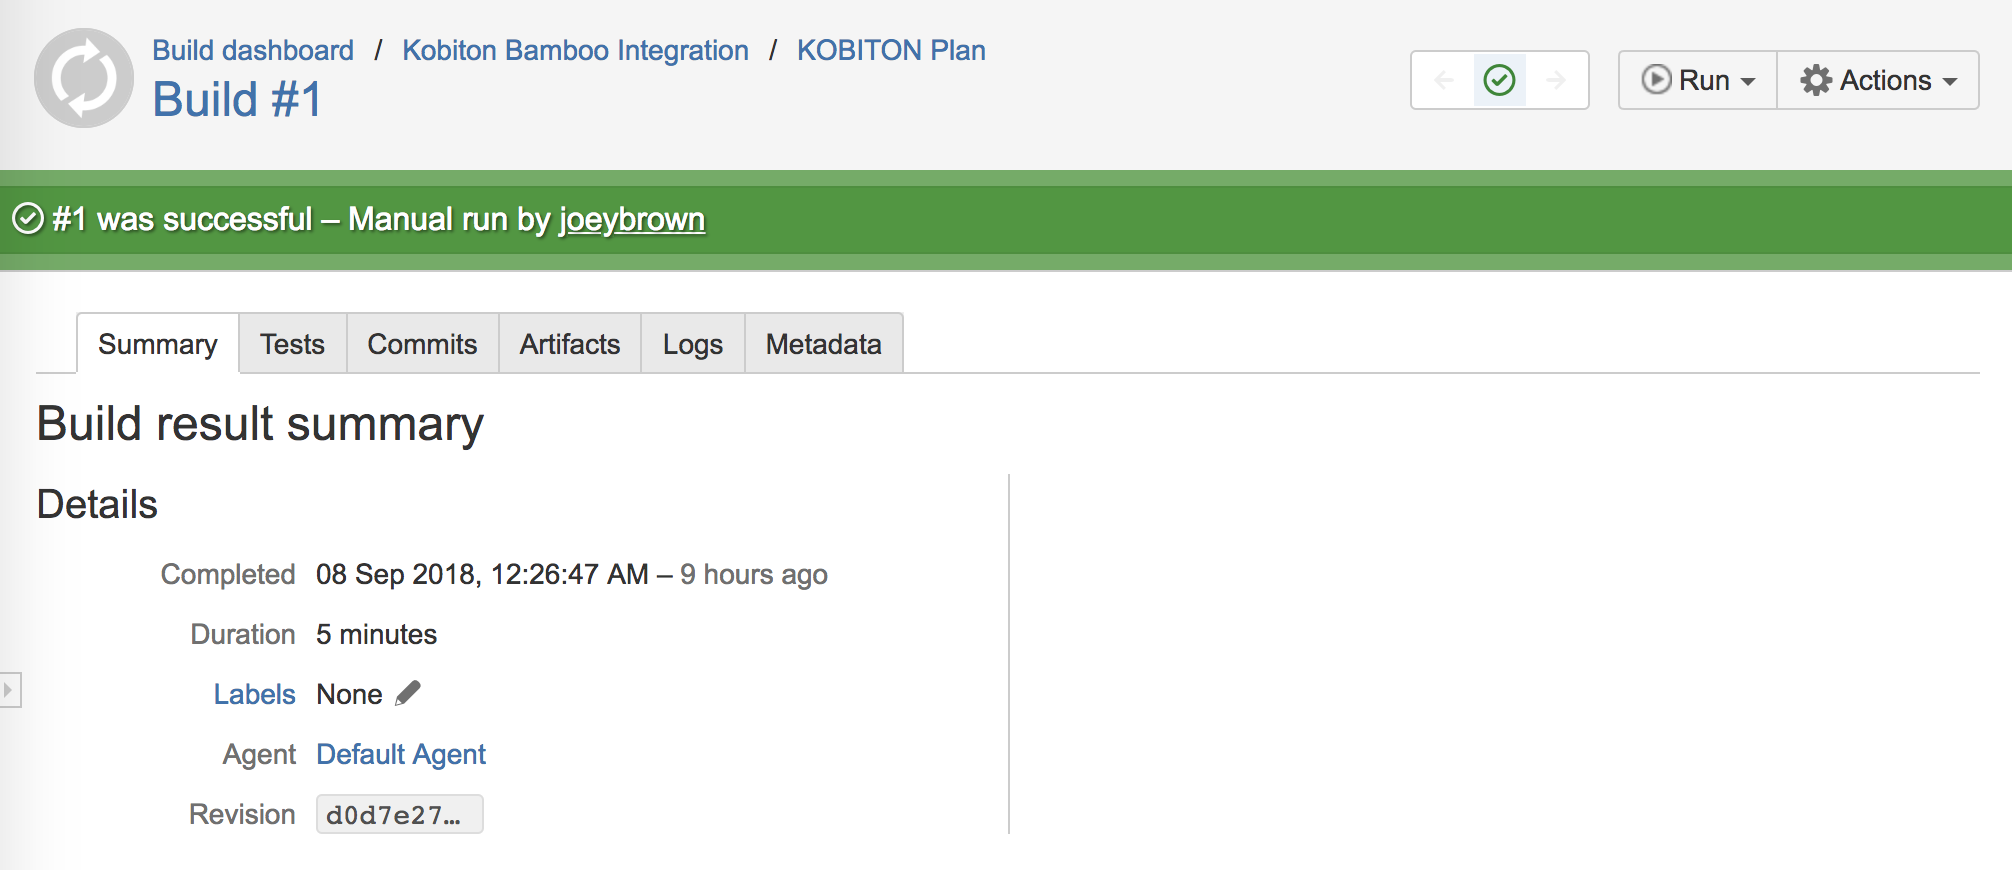
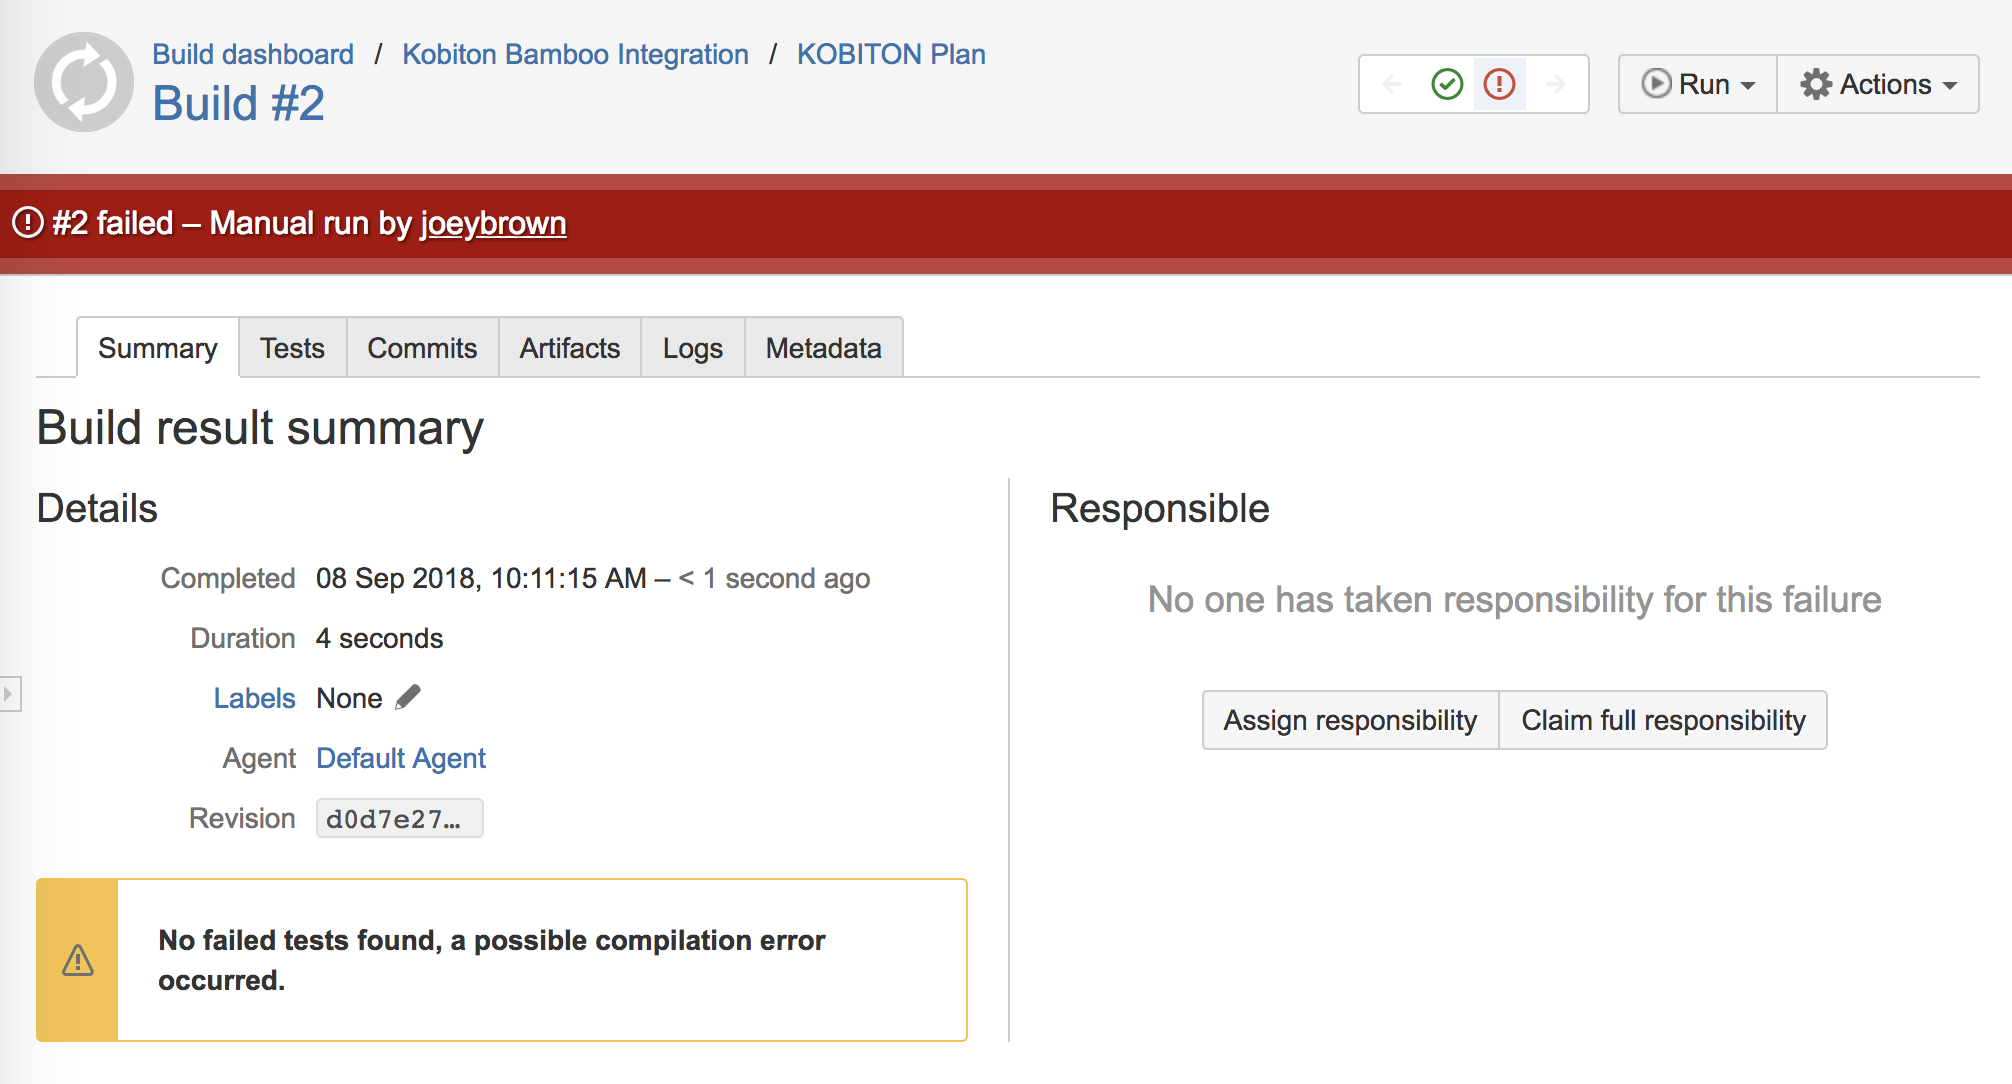
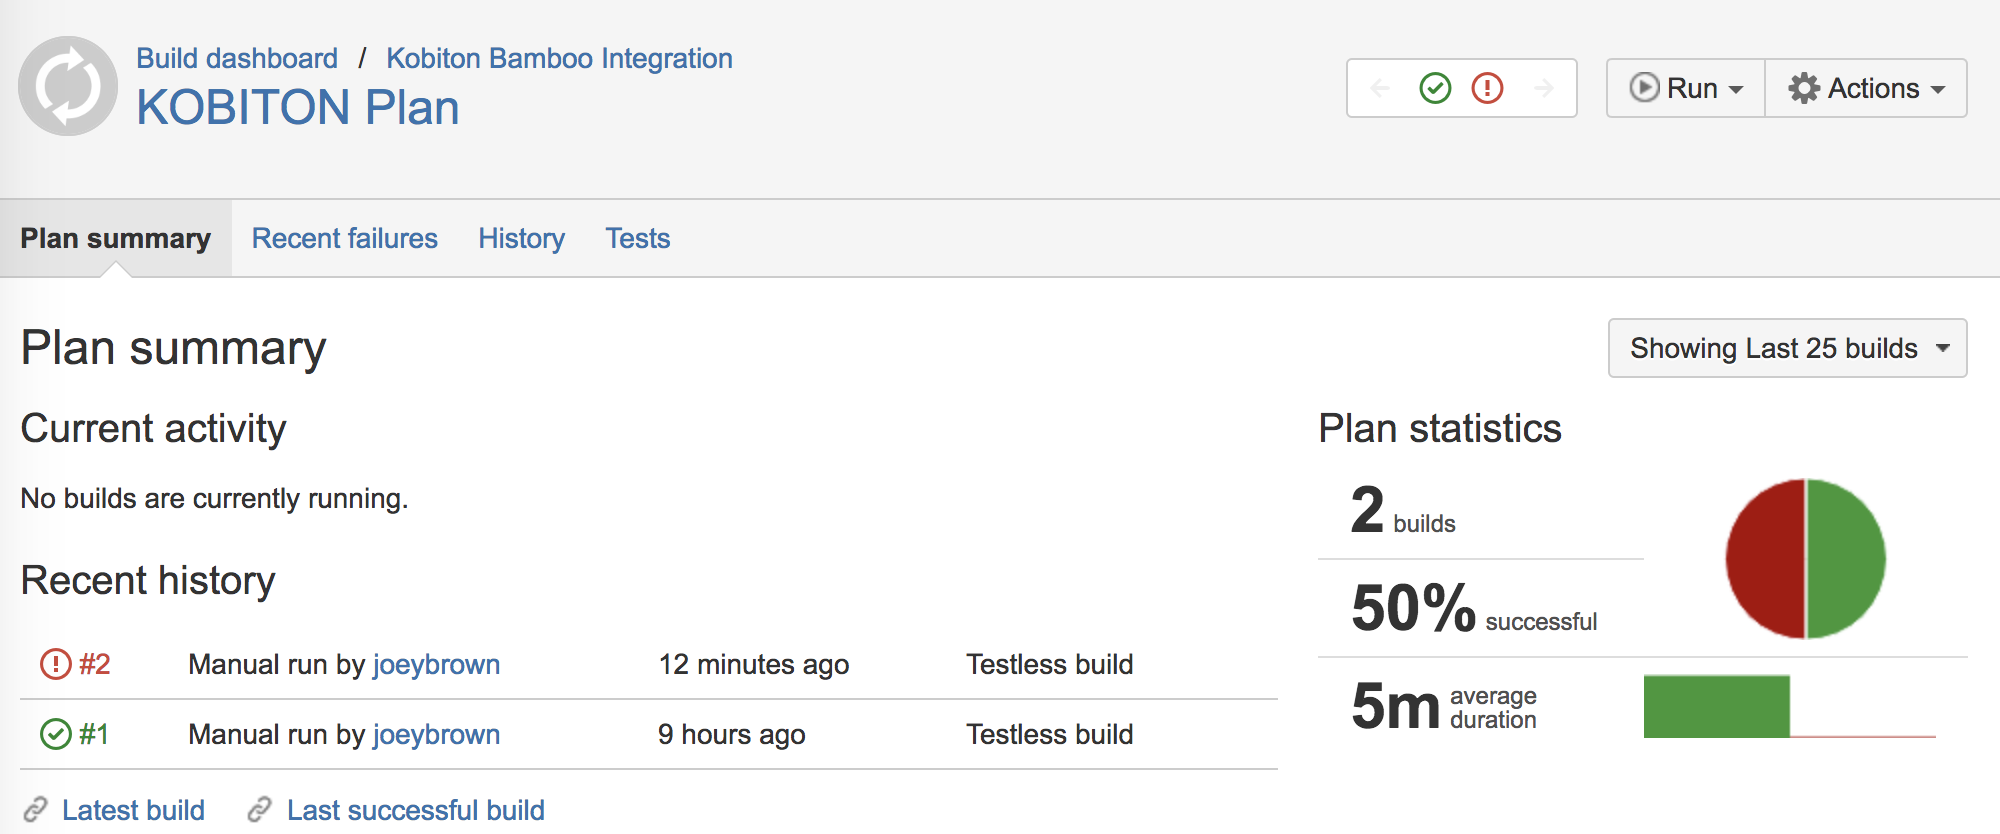
As you know, Bamboo is also one of the famous CI/CD tools. So, in this article, I will teach you how to trigger automation test with Kobiton devices through Bamboo. The language that I use to write scripts is javascript. You can refer to the source code at https://github.com/kobiton/samples.git. Please see the details below:

Create a New Project

  1. From the top menu bar, click Create->Create project
    • Project name: The name of your project
    • Project key: The key of your project
  2. Click Save

Create a New Plan

  1. From the top menu bar, click Create->Create plan
    • Plan name: The name of your plan
    • Plan key: The key of your plan
  2. Link repository to a new build plan
  3. Then, click Configure plan to finish this part

Create Tasks

  1. Click Add task
  2. Enter Script to search Task types
  3. Select Script
  4. Enter Task description
  5. Copy the snippet code below and paste into Script body
  6. Click Save
  7.  Click Save and Continue

cd javascript && npm install
KOBITON_USERNAME=${bamboo.KOBITON_USERNAME} KOBITON_API_KEY=${bamboo.KOBITON_API_KEY} npm run android-web-test
KOBITON_USERNAME=${bamboo.KOBITON_USERNAME} KOBITON_API_KEY=${bamboo.KOBITON_API_KEY} npm run android-app-test
KOBITON_USERNAME=${bamboo.KOBITON_USERNAME} KOBITON_API_KEY=${bamboo.KOBITON_API_KEY} npm run ios-web-test
KOBITON_USERNAME=${bamboo.KOBITON_USERNAME} KOBITON_API_KEY=${bamboo.KOBITON_API_KEY} npm run ios-app-test

Add variables

  1. Select Variables tab
  2. Add two variables

    • KOBITON_API_KEY
    • KOBITON_USERNAME

Enable Plan

  1. On the right corner, select Actions drop-down
  2. Choose Enable plan

Run Plan

  1. Go to Build -> All build plans
  2. Click created plan link
  3. Click Run -> Run Plan option, as shown below.

  1. If the run is successful, then it shows a message in green color.
  2. If the build is failed, then it shows a message in red color.

Reports

  • We can view the report Details by clicking on the Running Job
  • We can also view the overview by clicking on your plan, it lists out all passed/ failed jobs
  • Or access https://portal.kobiton.com/sessions to get your test sessions

Interested in Learning More?

Subscribe today to stay informed and get regular updates from Kobiton

Ready to accelerate delivery of
your mobile apps?

Request a Demo