When it comes to testing on real devices, it is imperative to introduce remote device testing execution into your quality process to ensure the behavior is as expected for your end-users. The mobile ecosystem is particularly fragmented, given the wide range of device manufacturers and different versions of operating systems. The only way of knowing that it really works on real-devices is to test your app on a wide variety of devices.
The question then becomes “how”? After all, it would seem that working with simulators/emulators is much simpler than buying physical devices, which are constantly being released.
Making Remote Device Testing a Breeze
A Cloud Device Provider provides a set of real devices on the cloud at scale. The main purpose of any cloud device provider is to provide the testing infrastructure upon which the test cases will be executed on, so the team is can be focused on producing the test scripts.
The main advantage to use a cloud device service is that you will always have access to the latest (and older) set of devices.
Another advantage is that users can see the test execution details such as screenshots, execution logs, failure log details and even video. And if you have a geographically dispersed team, everybody has access to the devices and the session logs.
Popular cloud device providers include Kobiton, Perfecto, Browserstack and SauceLabs. In this article, we will look at using Kobiton.
Kobiton
Kobiton focuses exclusively on real devices rather than emulators and simulators. Kobiton uses its own Appium Server, so you don’t need to worry about starting your own Appium server – you focus on the test scripts!
Kobiton provides:
Rich test logs for true Root Cause Analysis:
Kobiton provides various analysis and reporting features such as:
Full video recording.
Screenshots.
Capture user interactions.
System metrics reporting.
Full device logs.
Script execution results.
Integration with your favorite tools:
You can also integrate it with various tools such as:
JIRA
Github
HockeyApp
Jenkins
Travis CI
TeamCity
Powerful APIs:
Kobiton provides the full support of Appium with major programming languages such as Java, Python, C#, Node.js, Ruby and PHP and they have also did partnership with Katalon Studio(A highly acclaimed and innovative test automation tool).
Manual, Automated and Parallel testing supported:
It provides support for parallel execution which is necessary for CI/CD process and also supports:
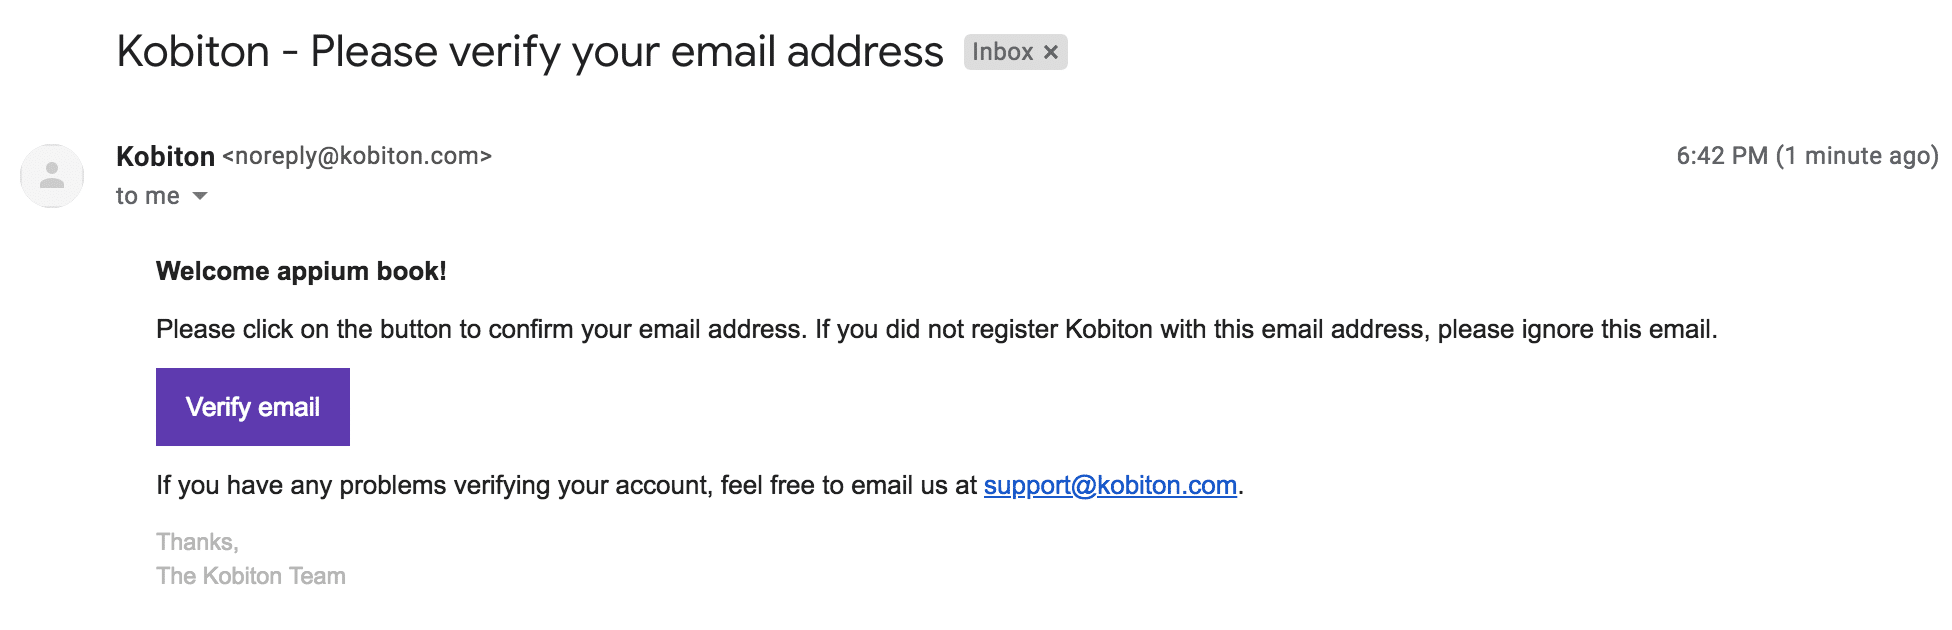
After the successful registration you will get an email for the confirmation from the Kobiton so you can confirm it.
Figure-2: Kobiton Confirmation Email.
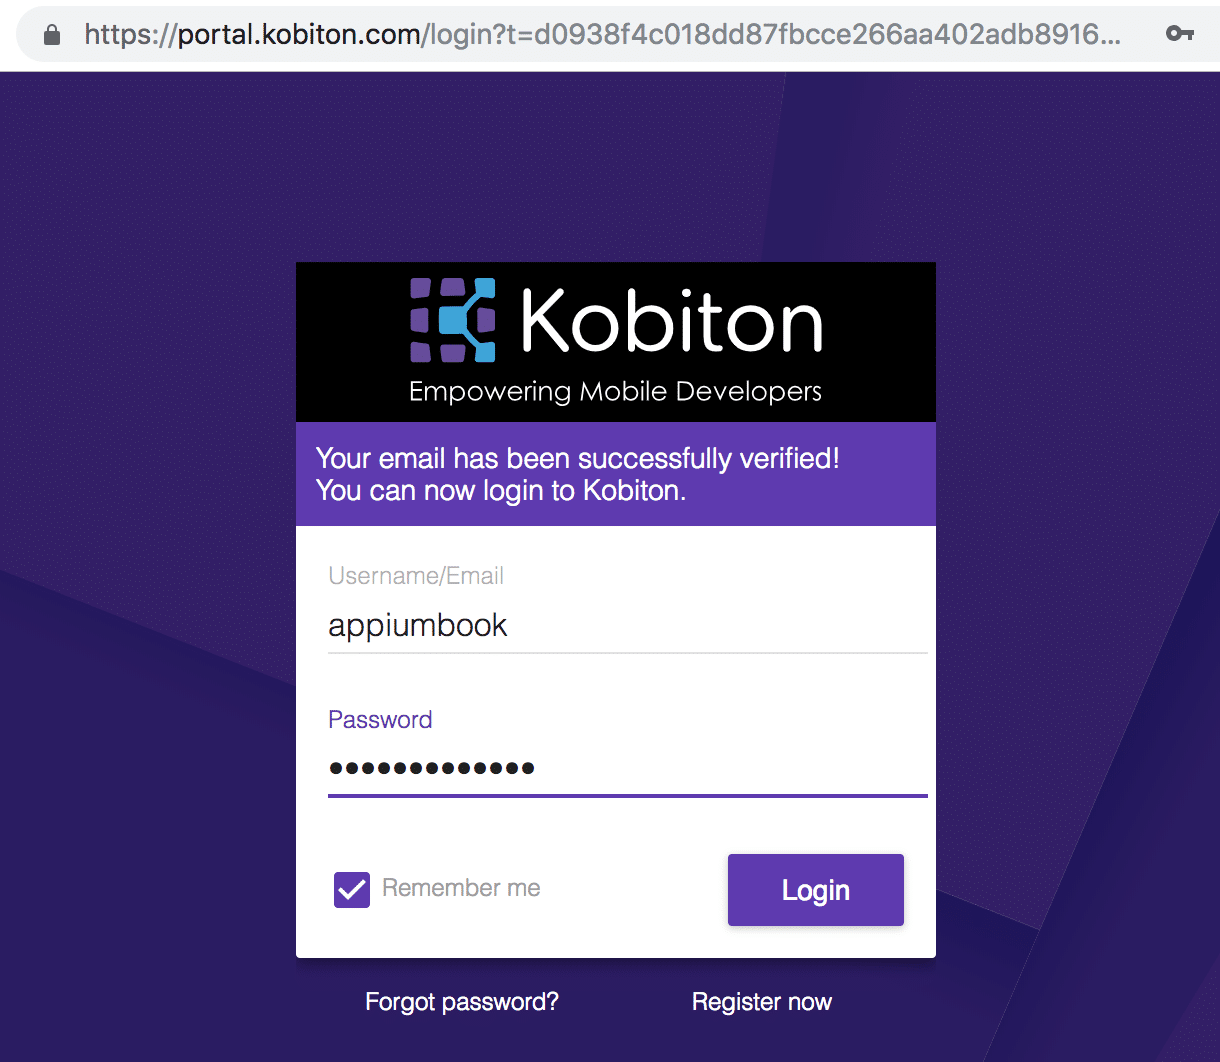
Now you can access the Kobiton portal by providing valid credentials.
Figure-3: Kobiton Login Page.
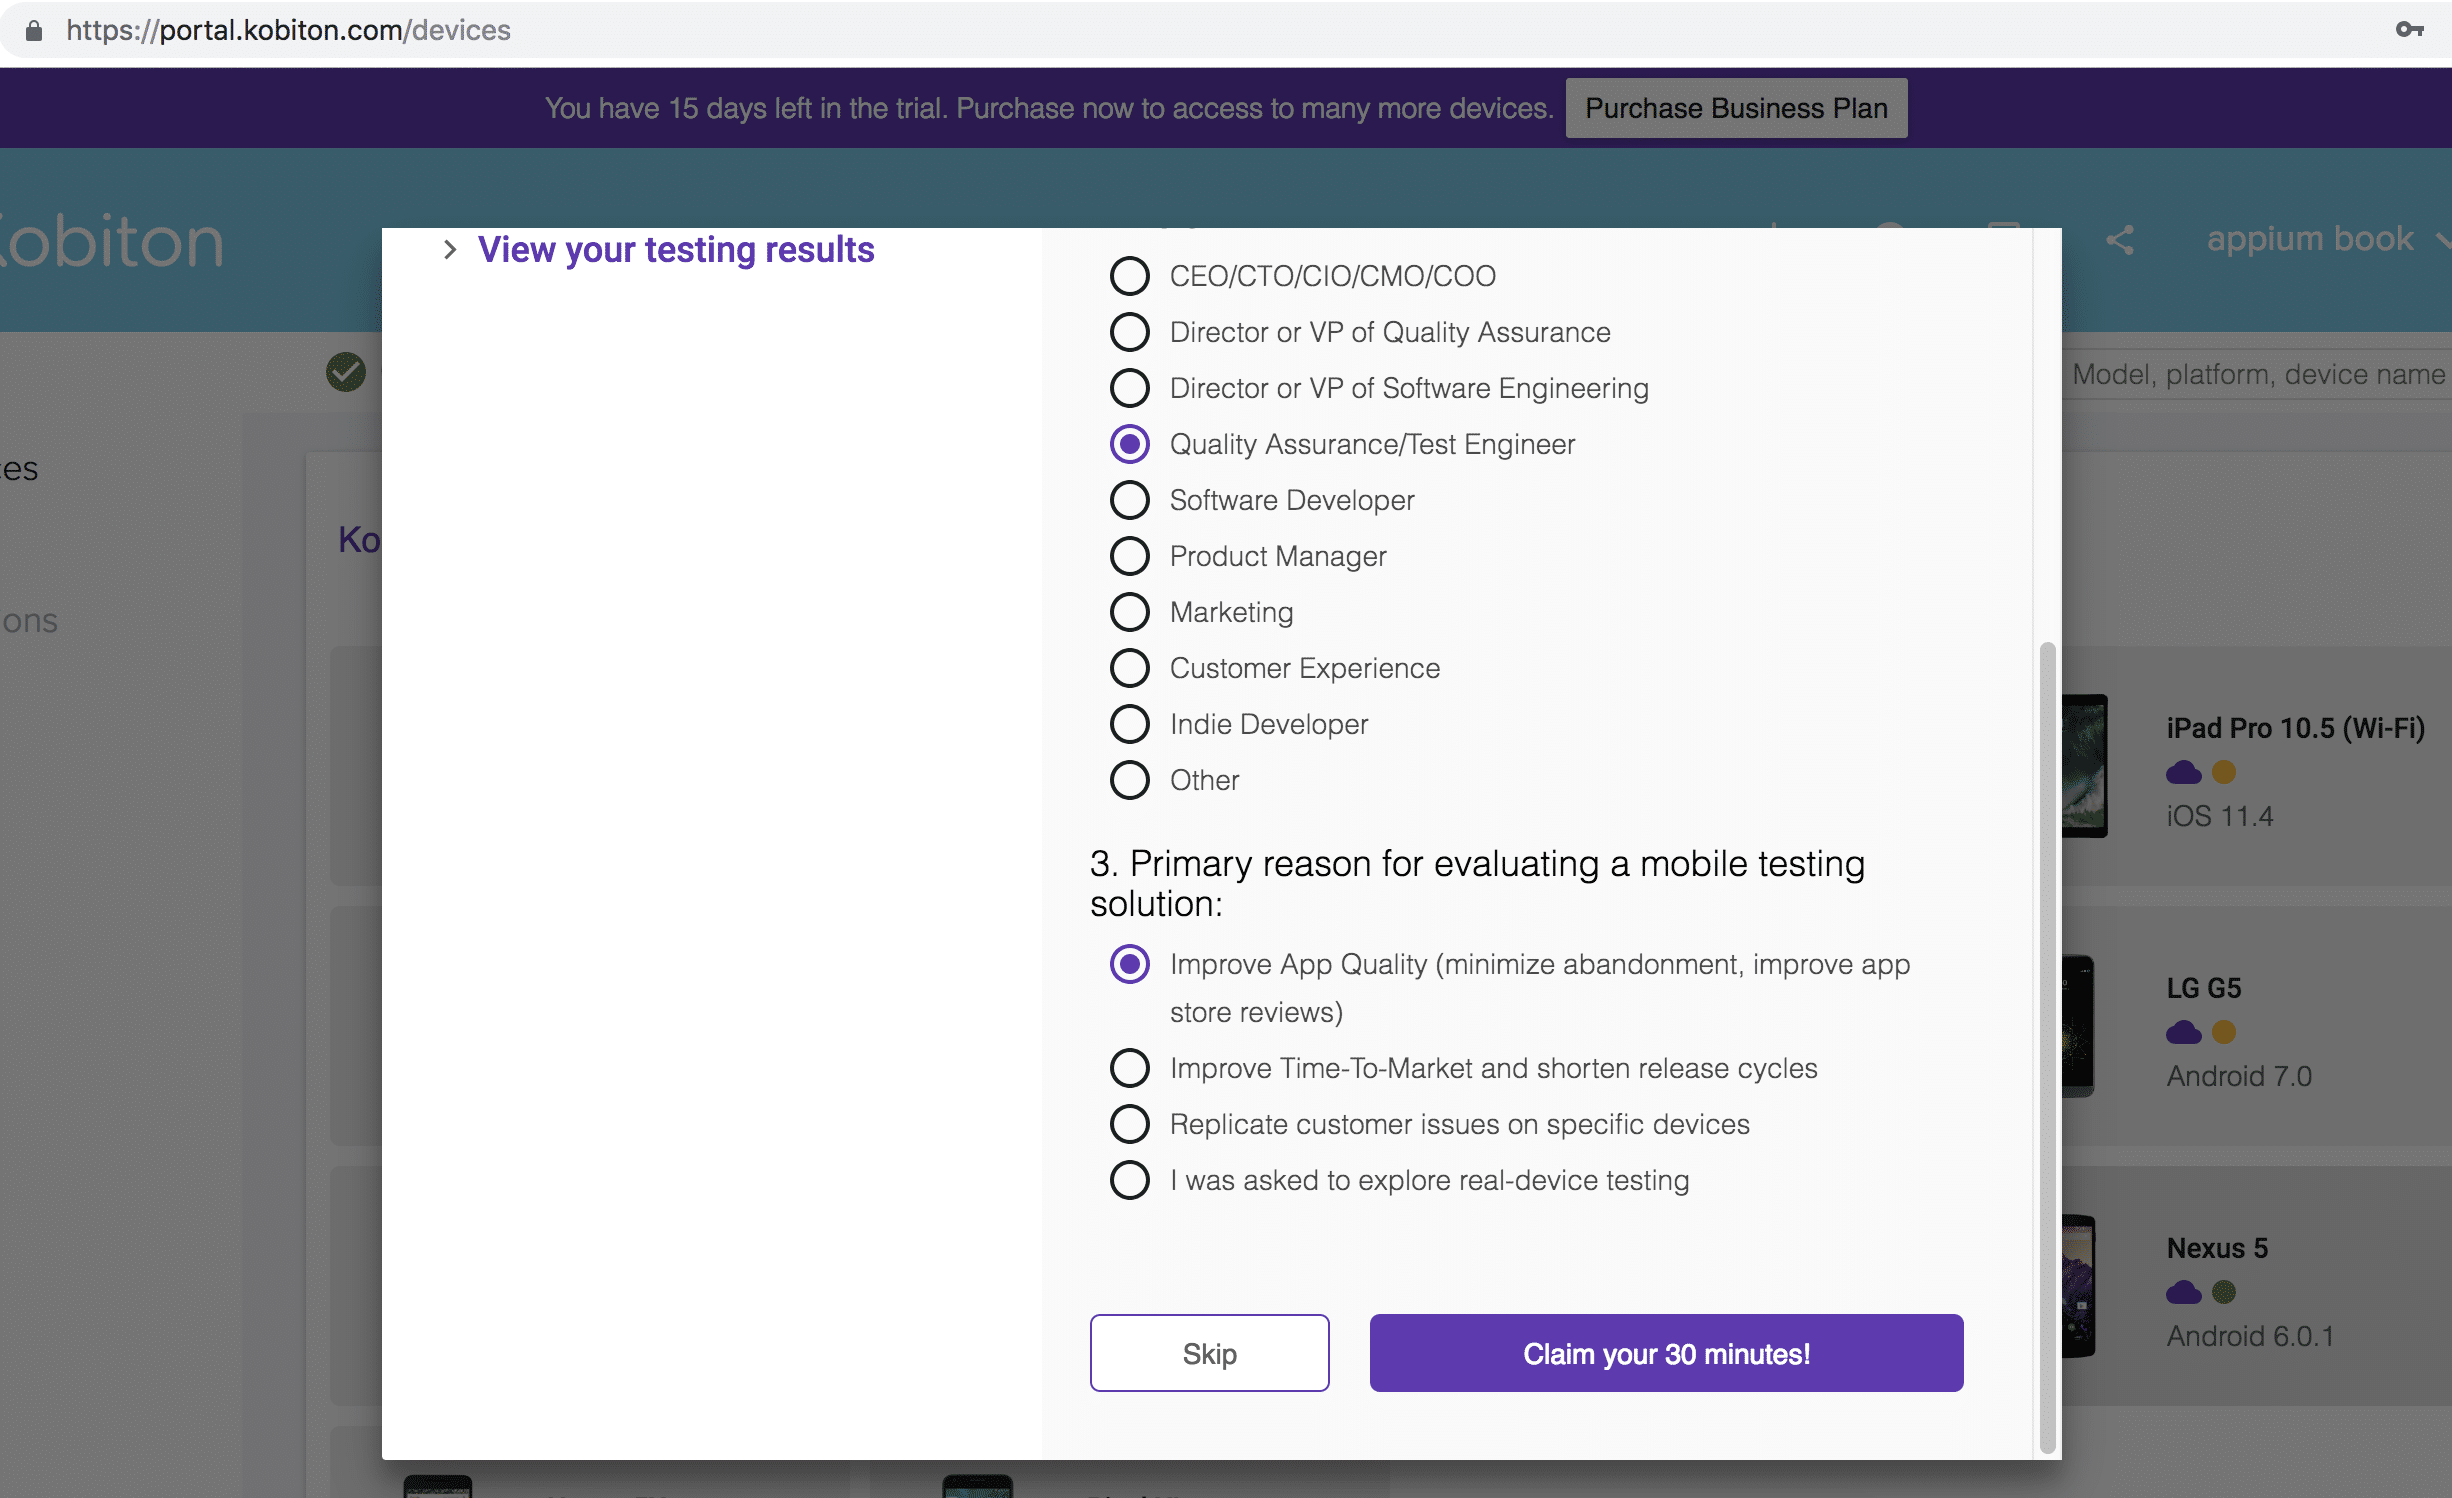
As part of the free trial, you get 120 minutes. By completing the survey you can get an additional 30 minutes of testing.
Figure-4: Select the preferences.
Once you click on Claim your 30 minutes! Button you will be redirected to the dashboard where you can see the devices.
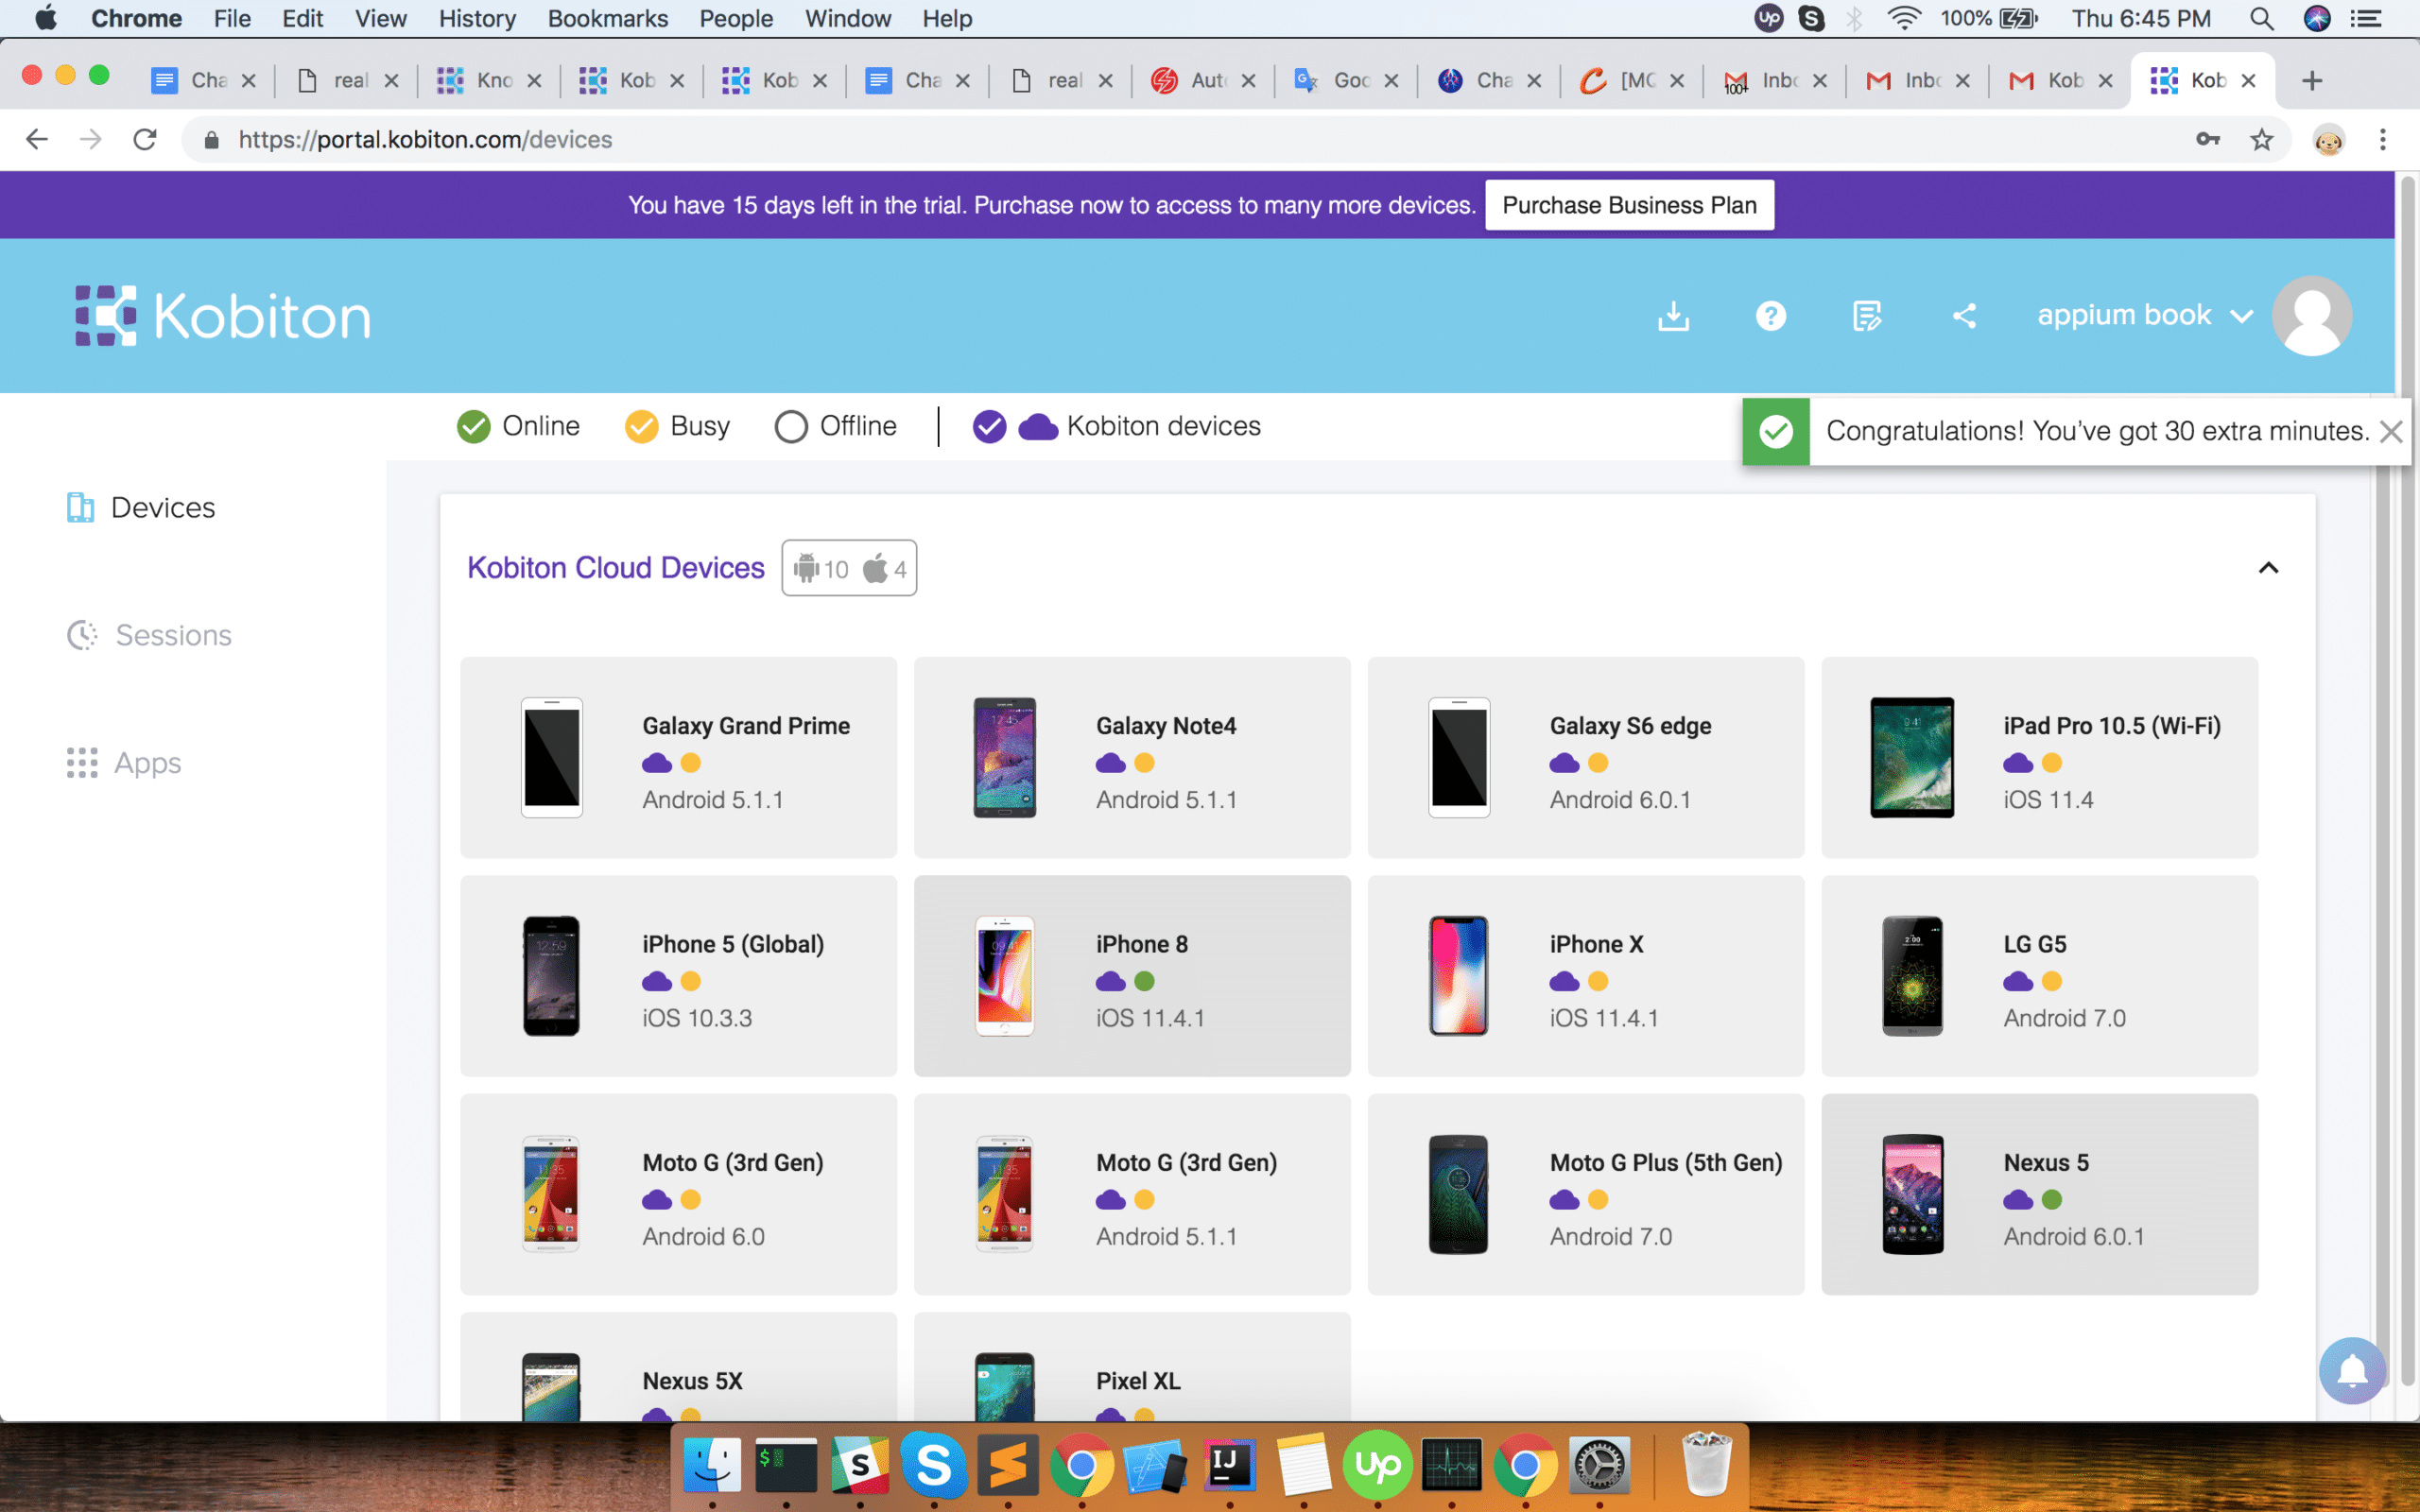
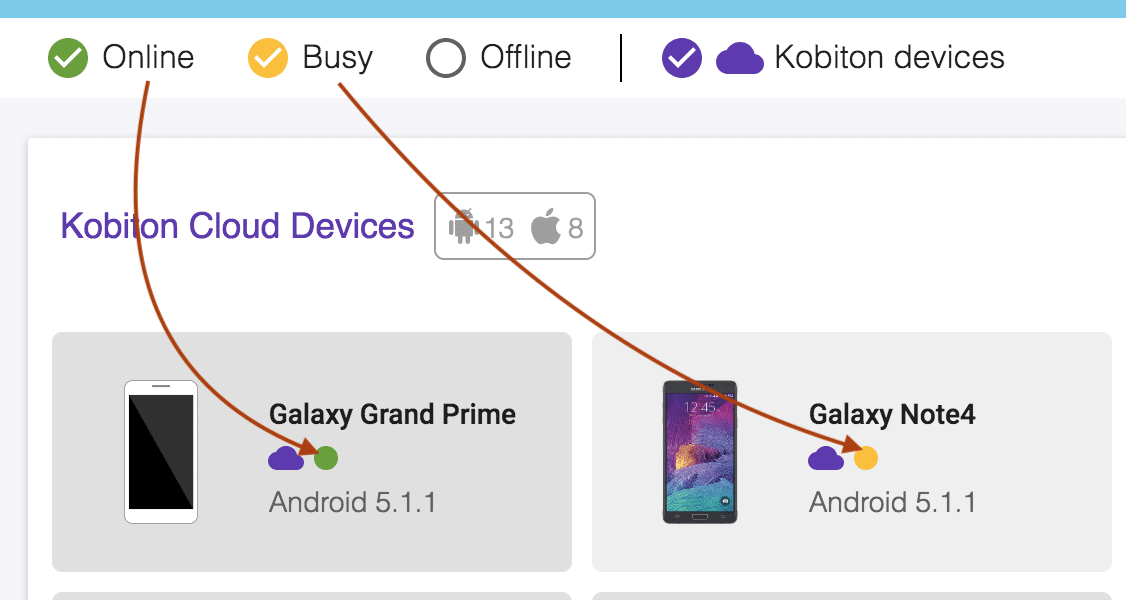
Figure-5: Kobiton Dashboard.NOTE: Please make sure the device upon which you want to start execution is Online (Available for execution) otherwise you can get the exception saying: org.openqa.selenium.SessionNotCreatedException: No device matching the desired capabilities
Figure-6: Device Availability.
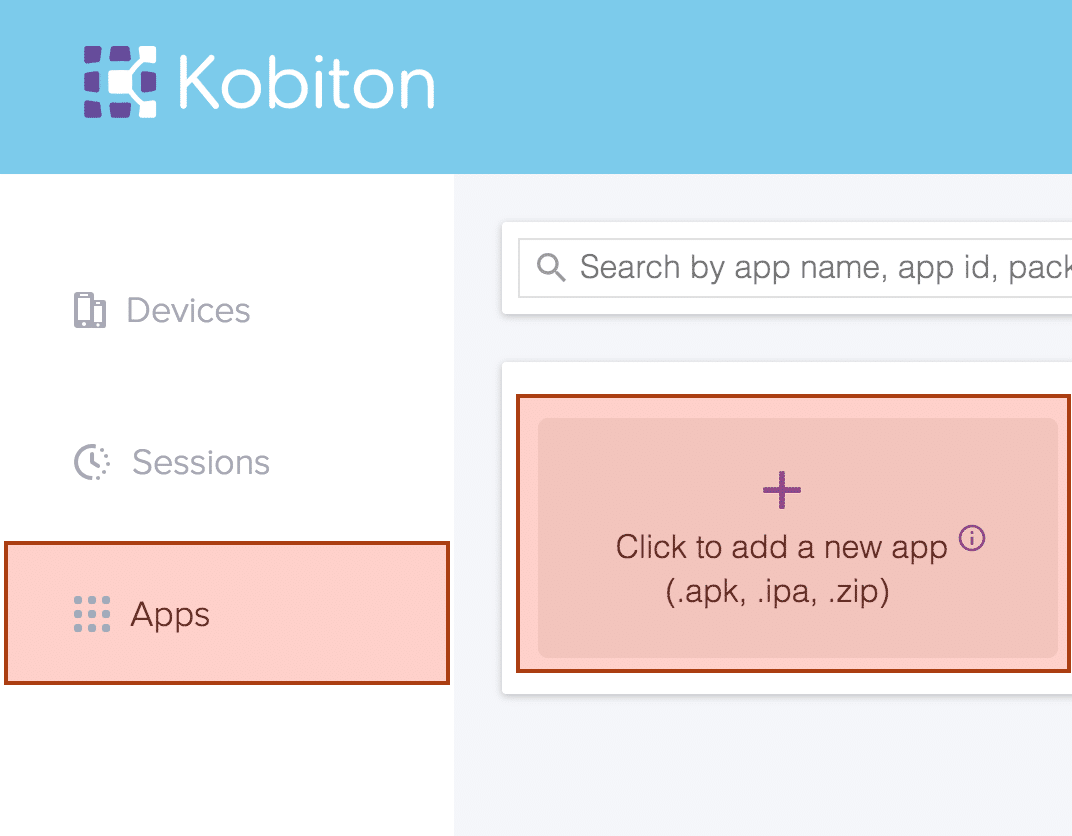
Now on the dashboard page you can choose any device for test execution. But before you choose the device for execution you need to upload the mobile application which you want to automate by going into the Apps section.
Figure-7: Add a new app
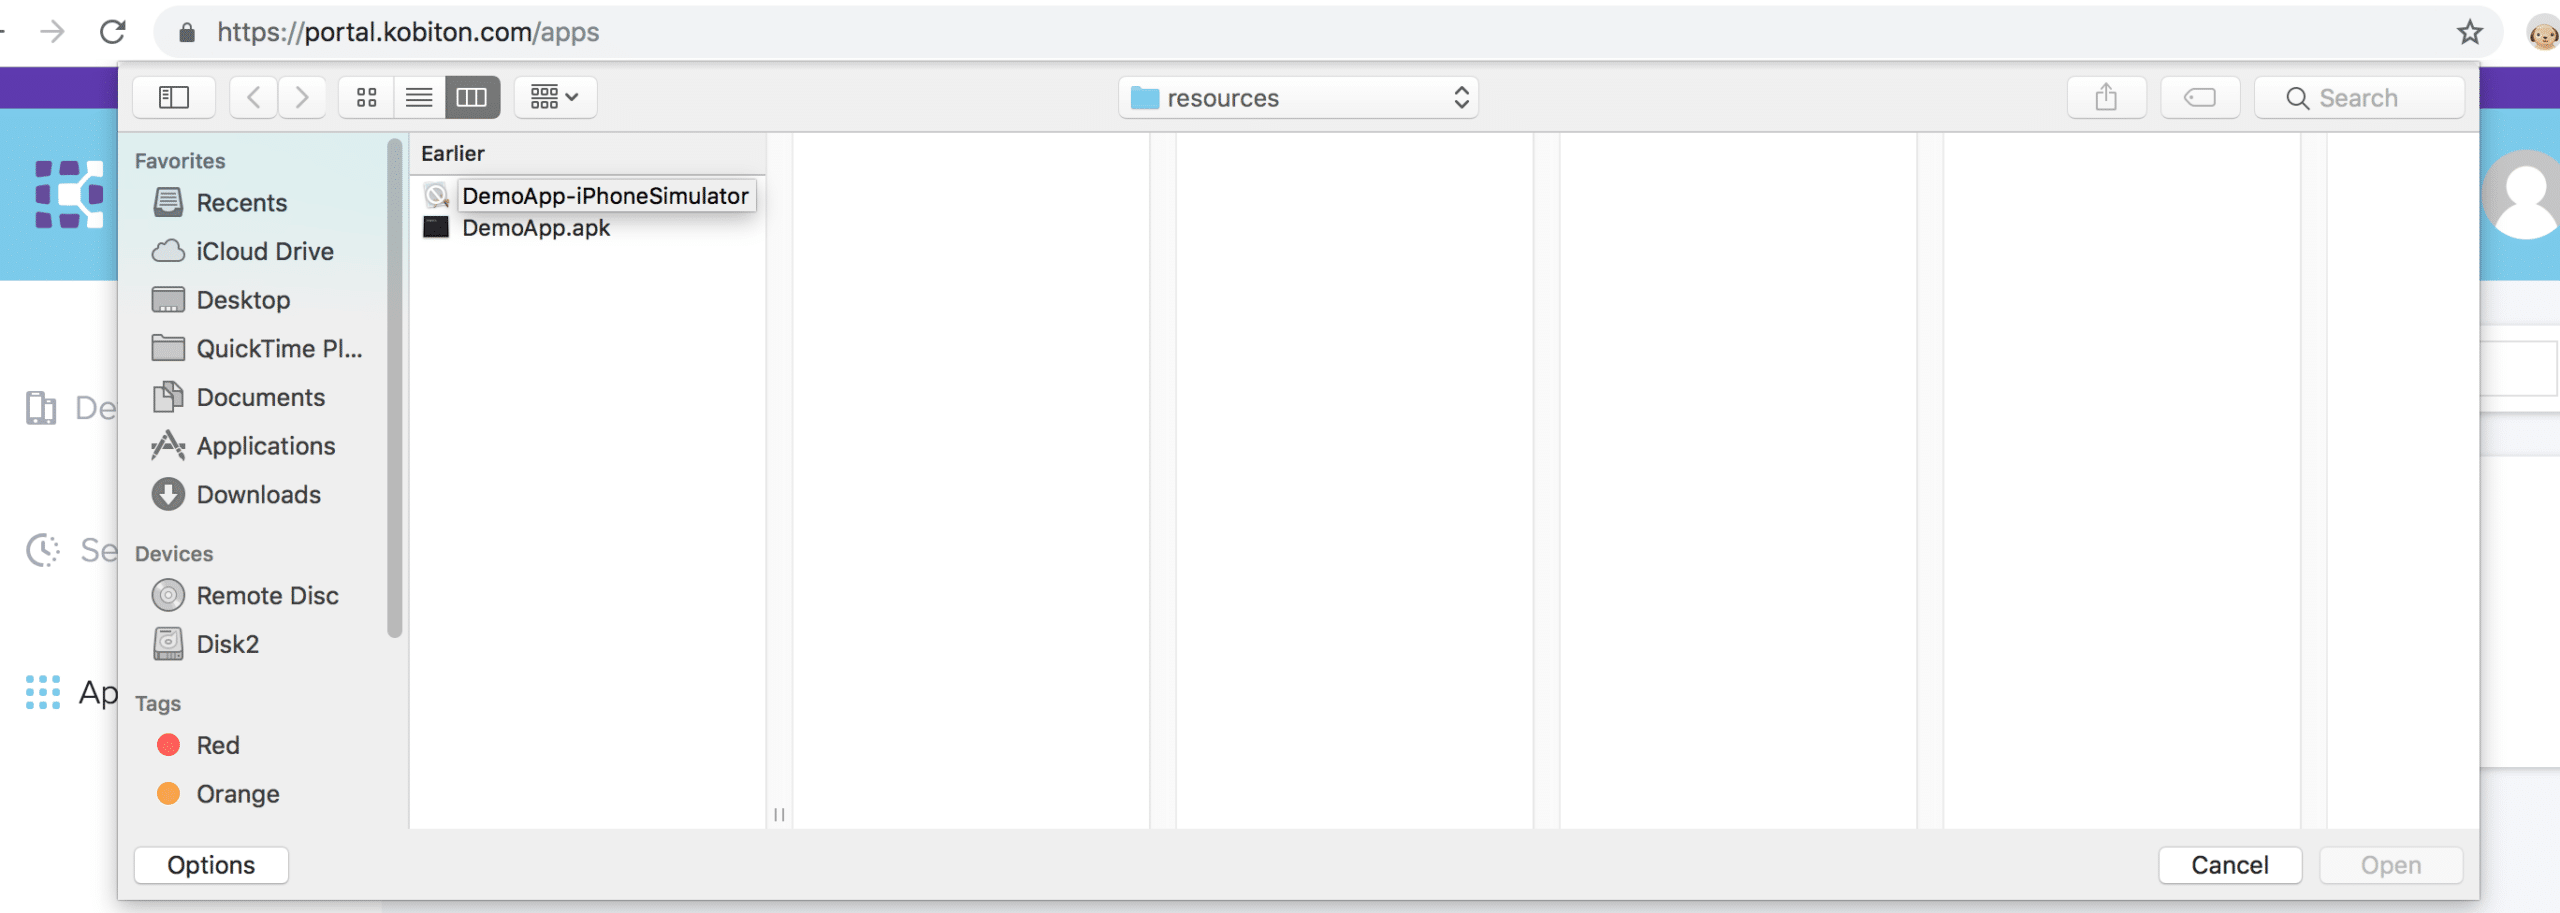
Figure-8: Select the application from finder window.
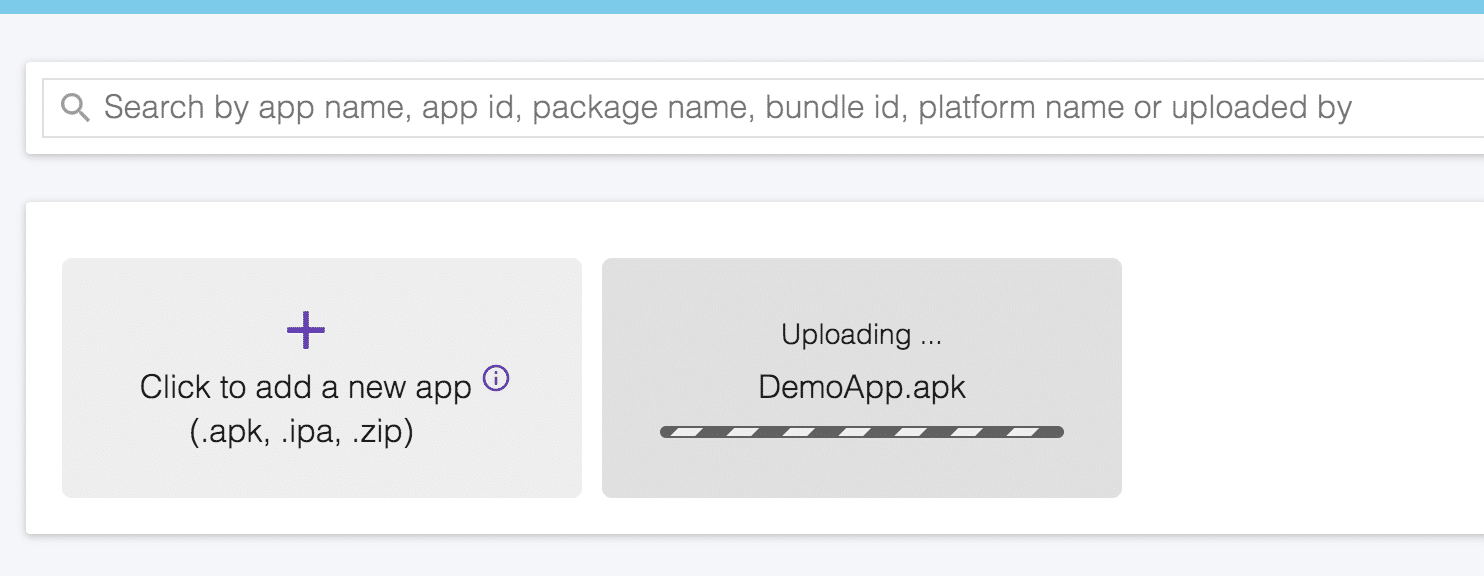
Figure-9: Uploading the new apk file.
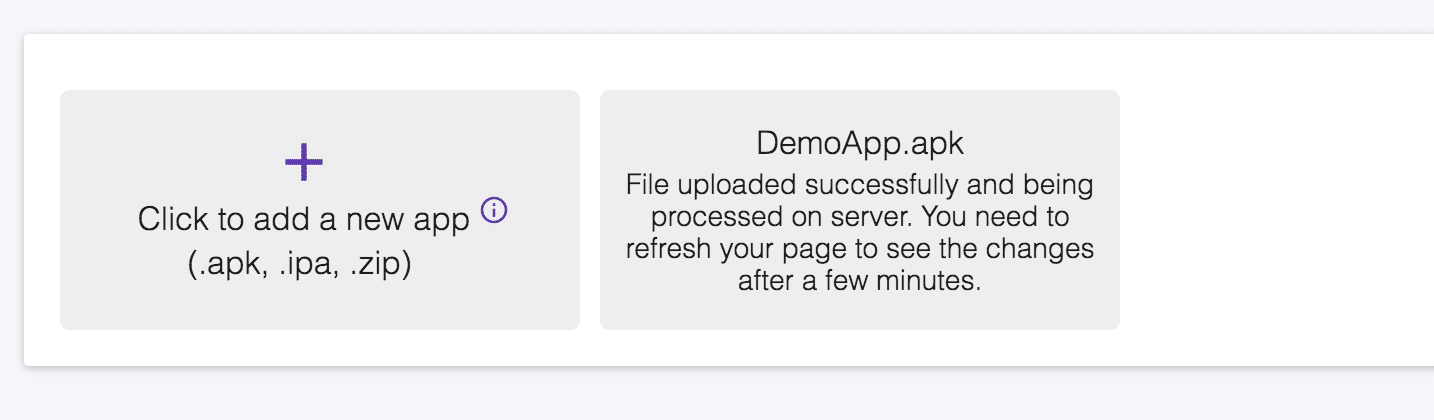
Figure-10: apk file uploaded.
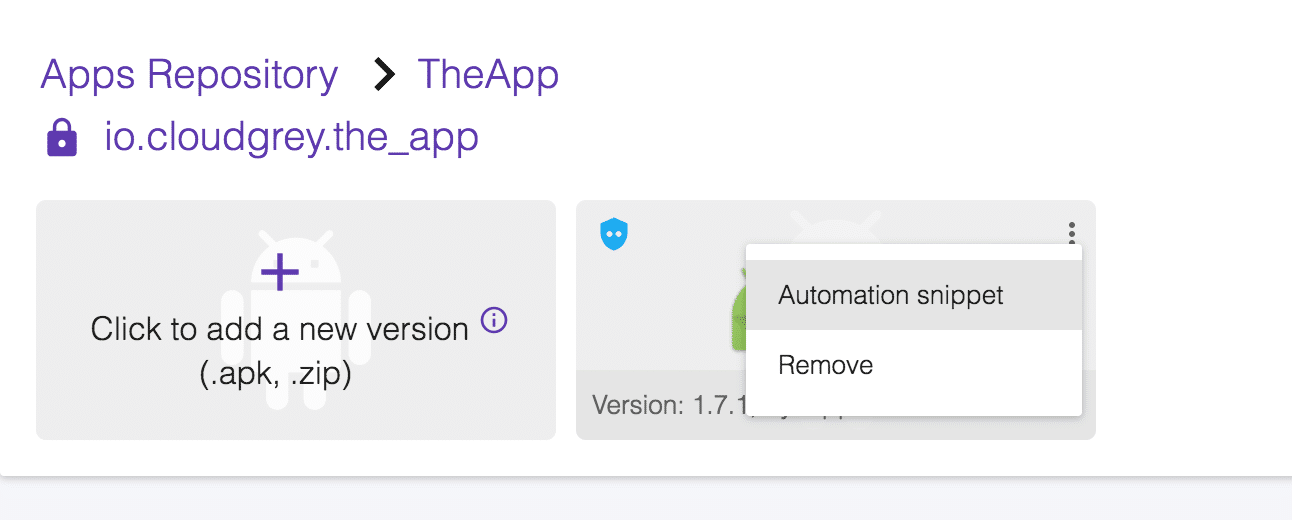
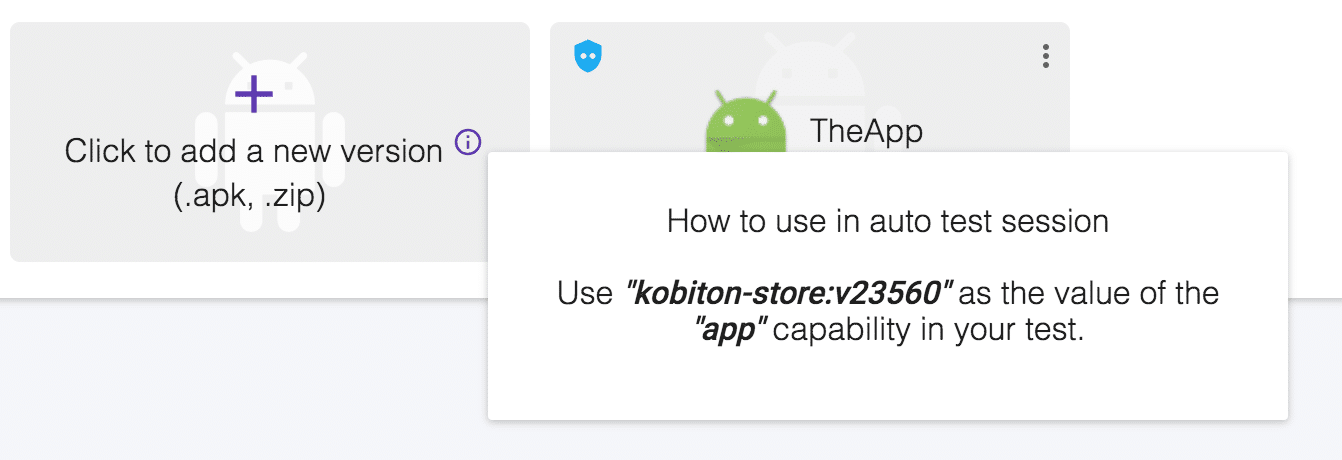
Once the application is uploaded successfully you can get the app id for the uploaded application because you need to pass this id as value of app key in Desired Capabilities.
capabilities.setCapability(“app”, “kobiton-store:22304”); Or you can also select the application in the automation settings dialog, so that you don’t need to manually write the app value in desired capabilities.
Figure-11: Get Automation snippet.
Figure-12: app capability value.
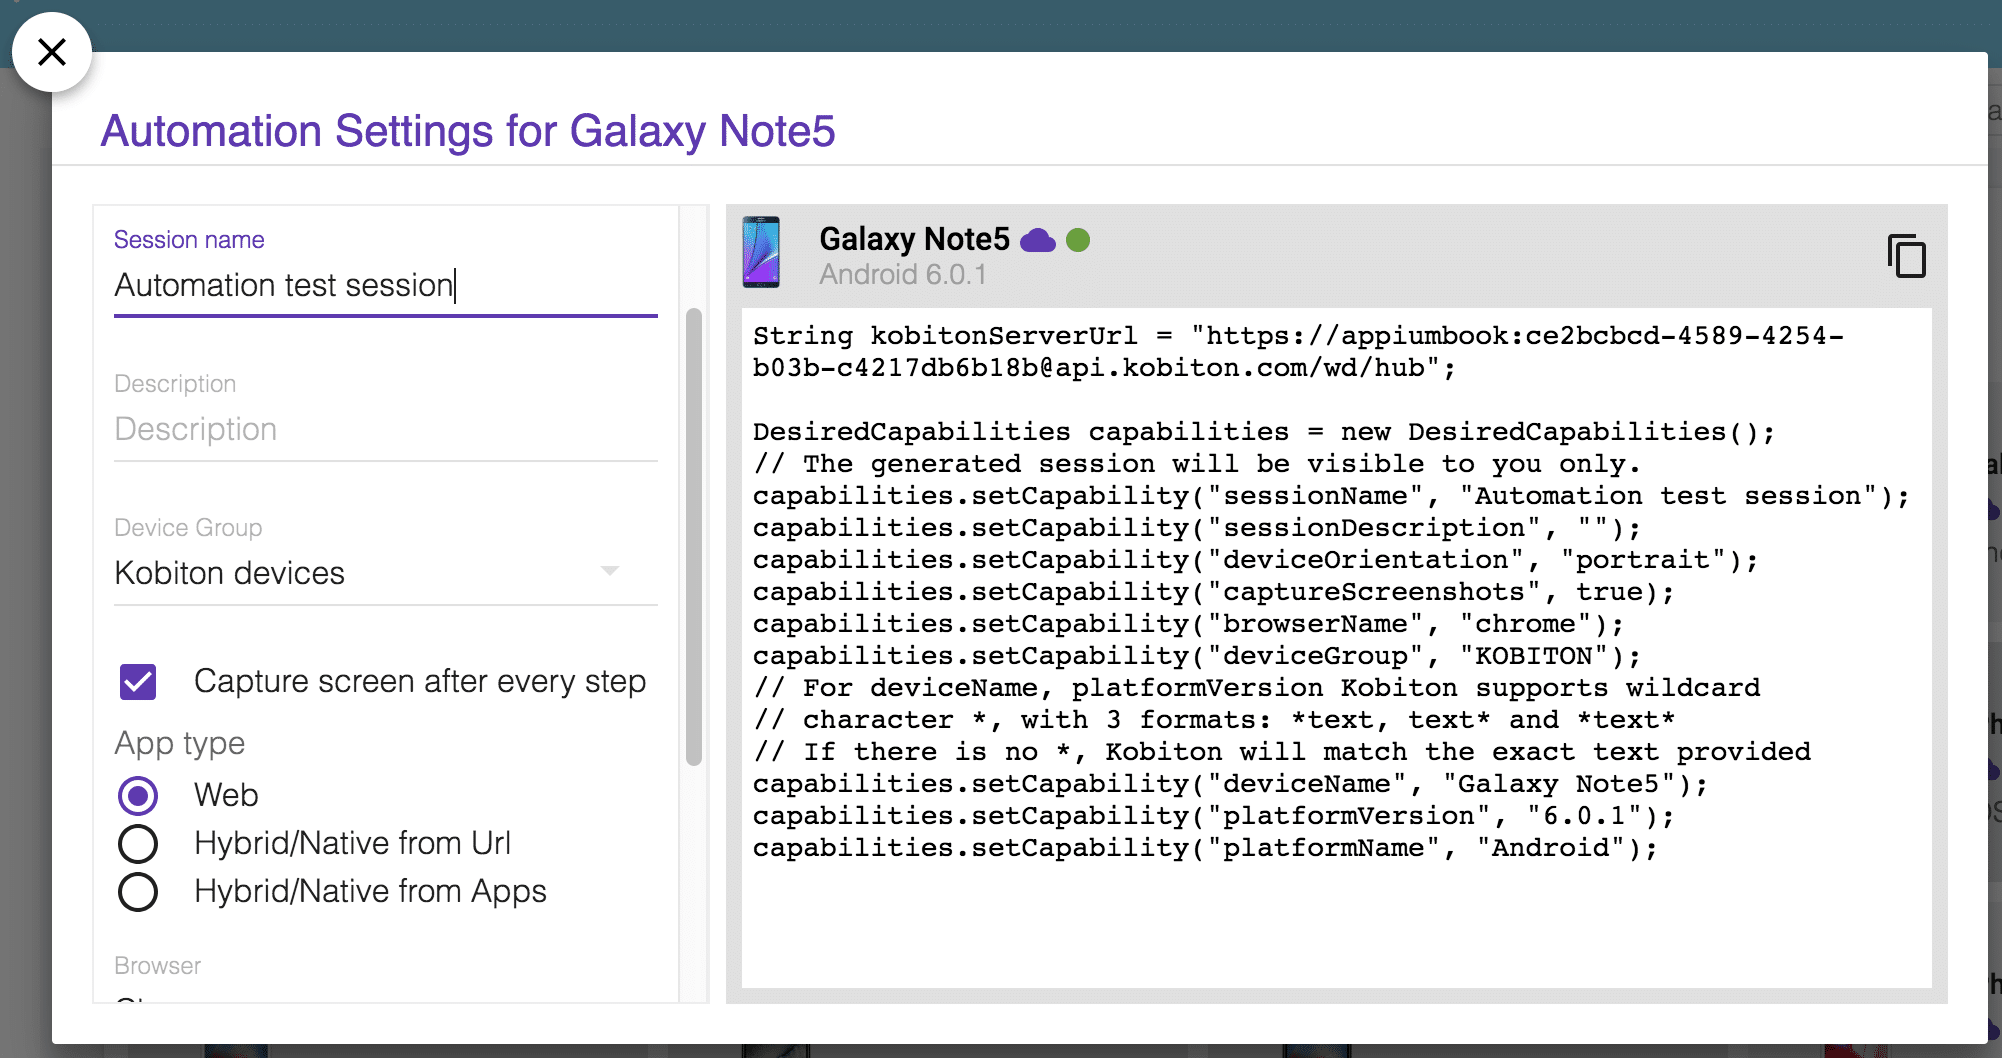
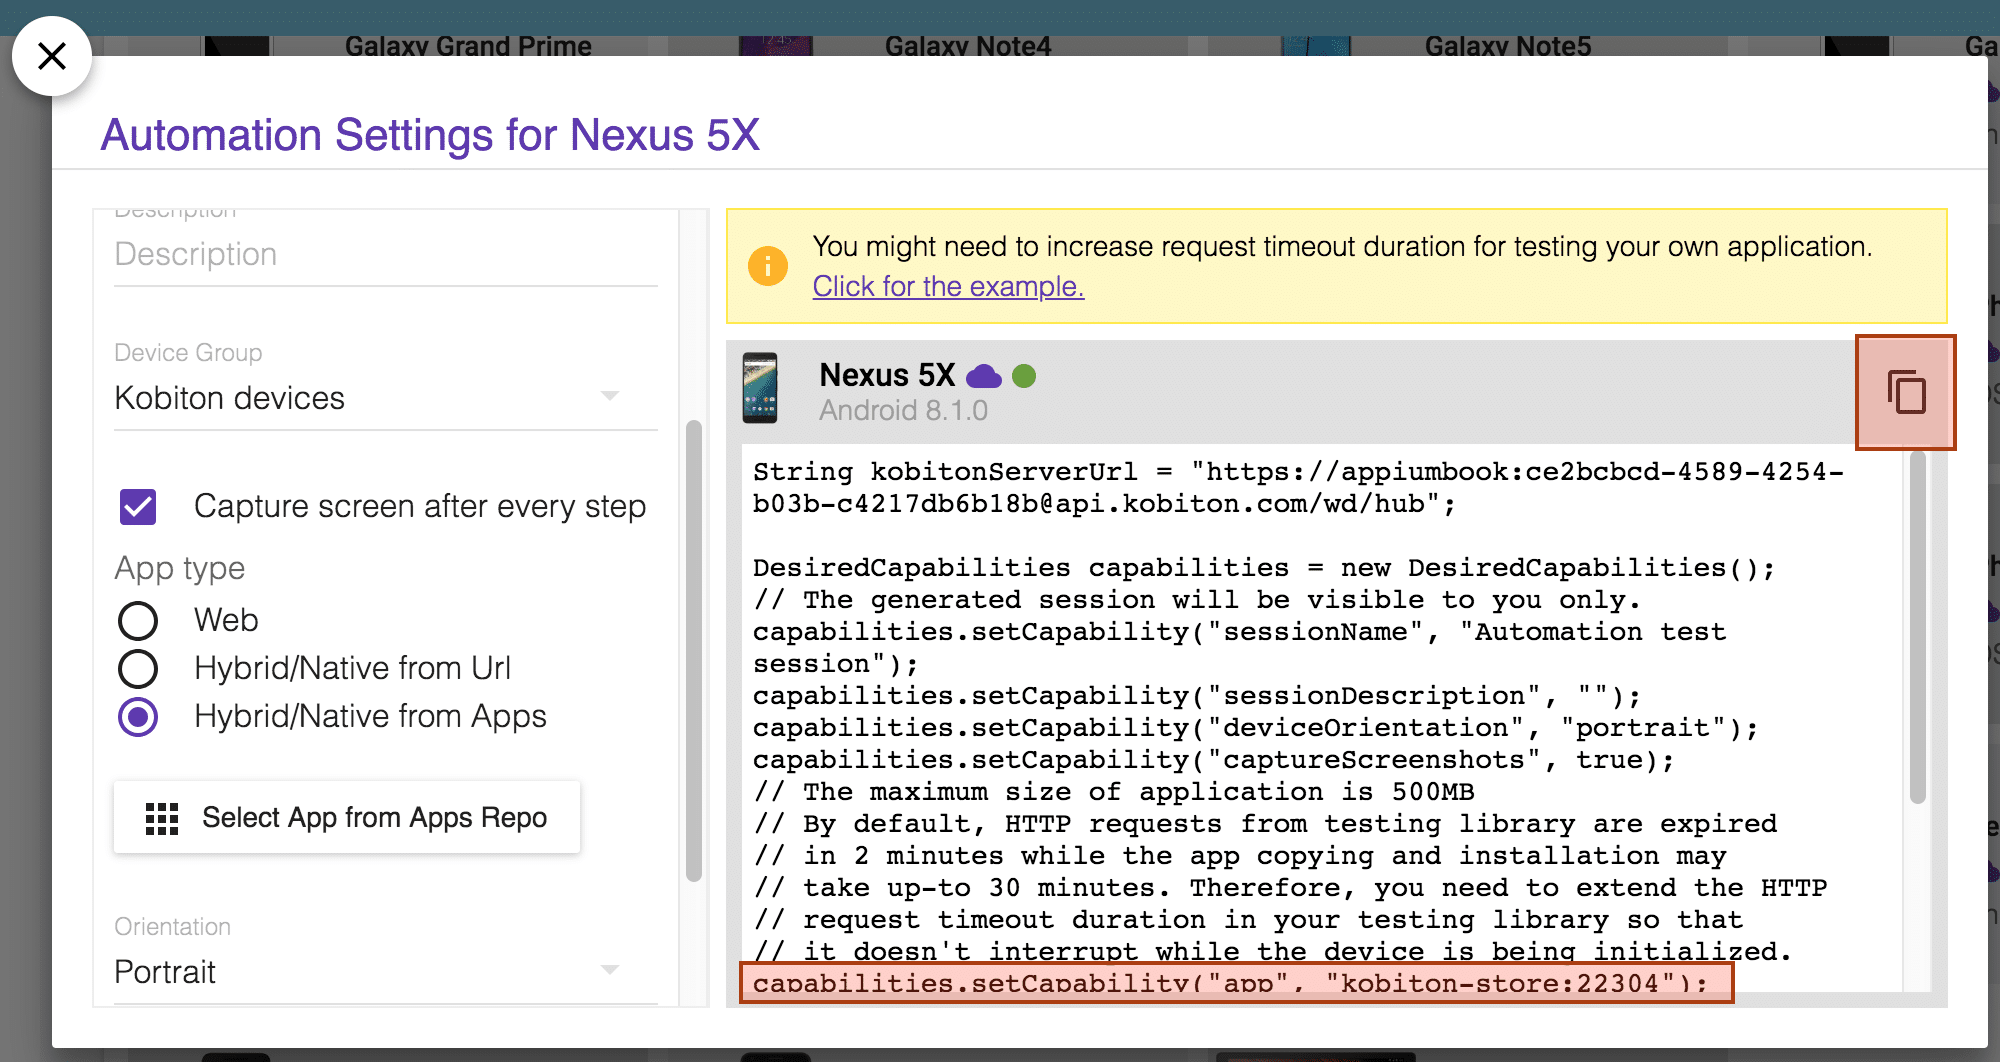
After noting down the app value you can move to the Devices section and in the automation settings you will get the set of the Desired Capabilities (for every programming language) which you need to use in order to execute the test case on Kobiton device.
Figure-13: Show automation settings for Device.
Figure-14: Automation Settings for Device.
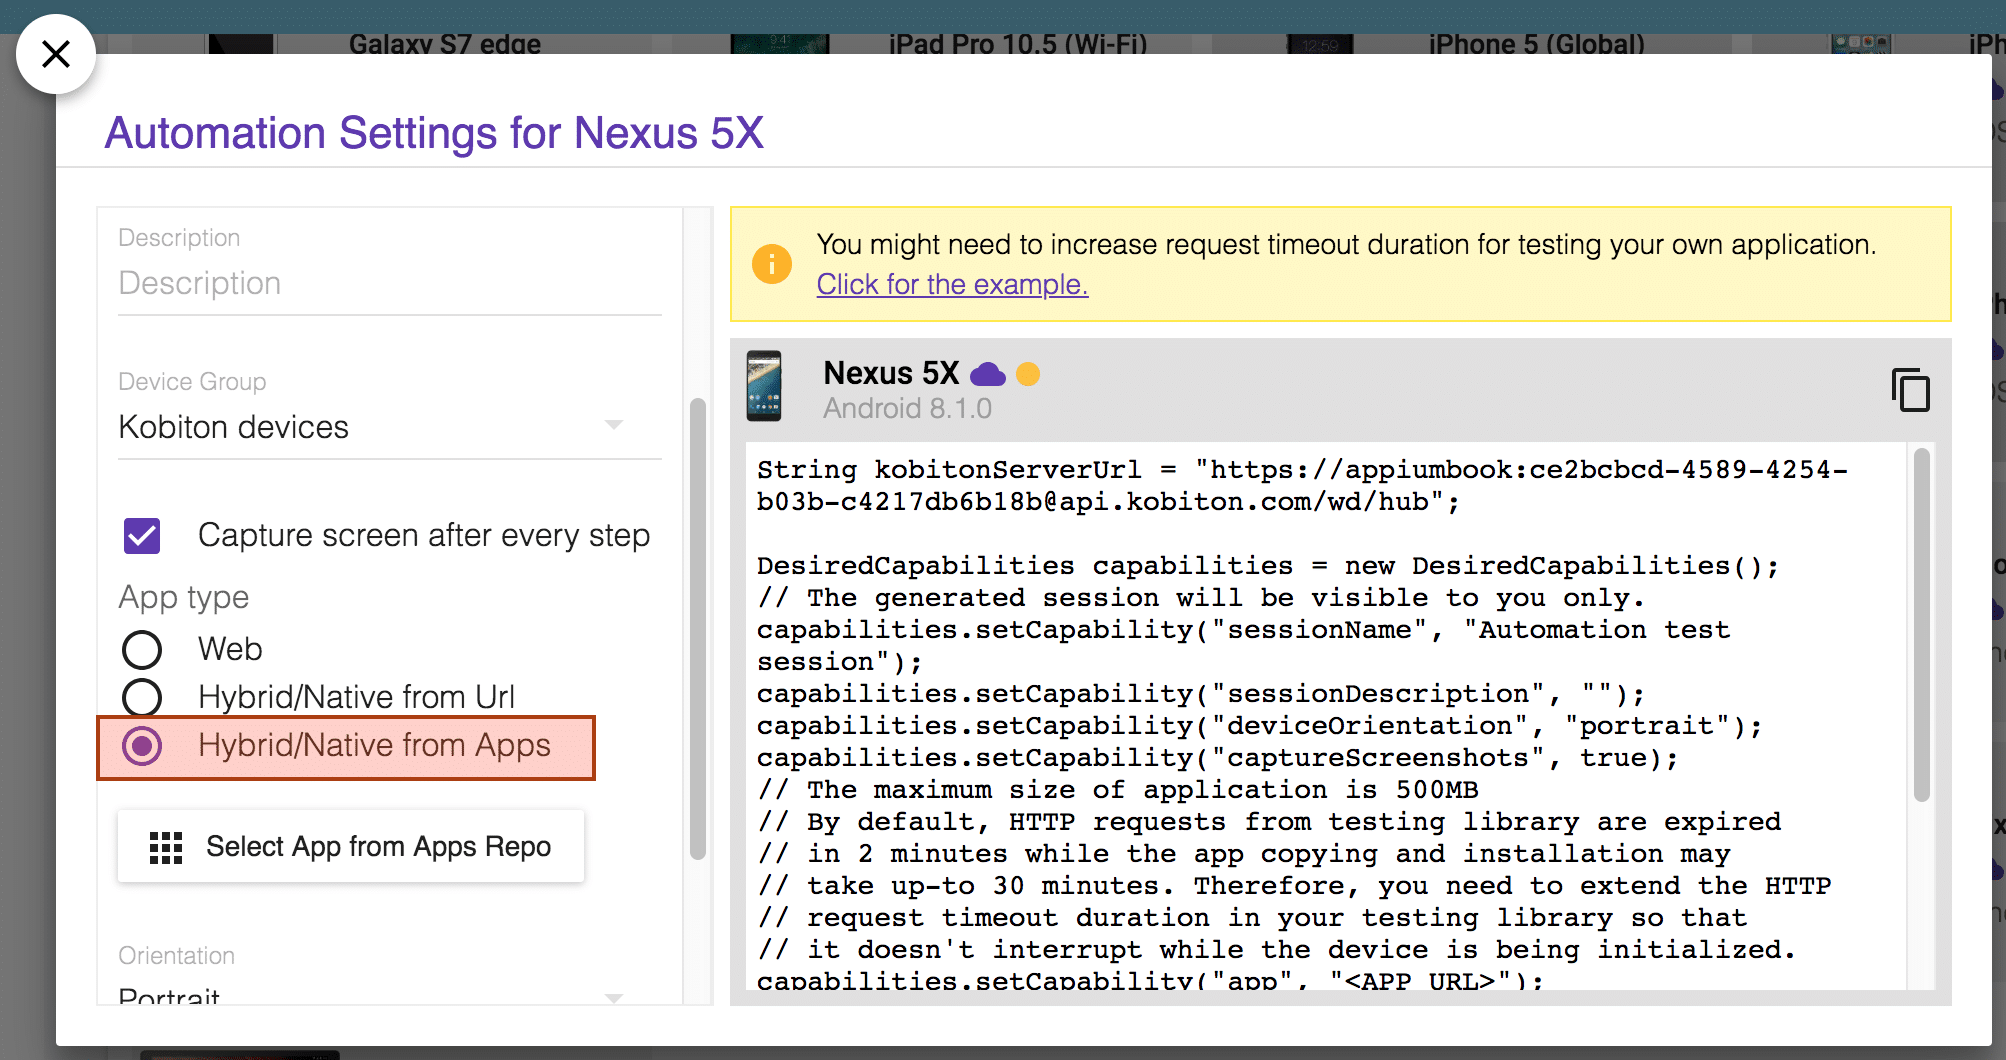
As we want to execute test cases for a mobile application, you need to select the ”Hybrid/Native from Apps” option.
Figure-15: Choose HybridNative from Apps.
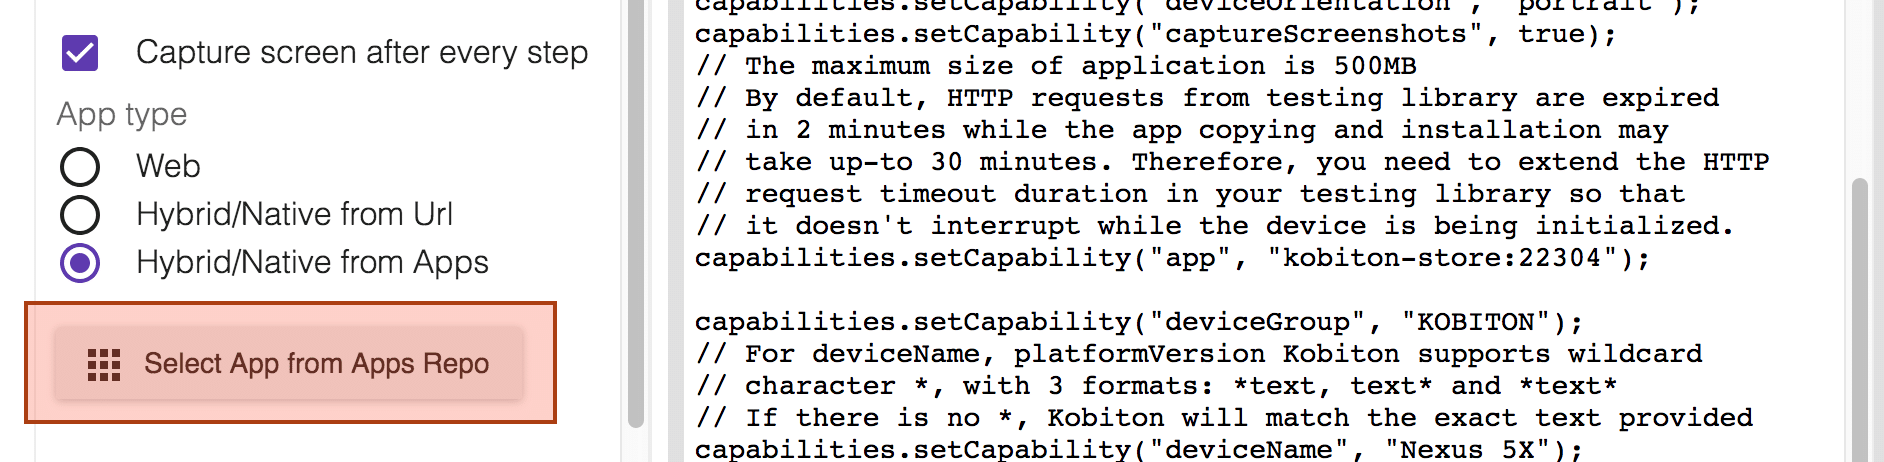
Now as we have already uploaded the application to Kobiton server, so you just have to click on “Select App from Apps Repo” button and select the uploaded app.
Figure-16: Click on Select App from Apps Repo button.
As we want to execute test cases for a mobile application, you need to select the ”Hybrid/Native from Apps” option.
Figure-17: Select uploaded app. And at last, copy the set of Desired Capabilities.
Figure-18: Copy Desired Capabilities.
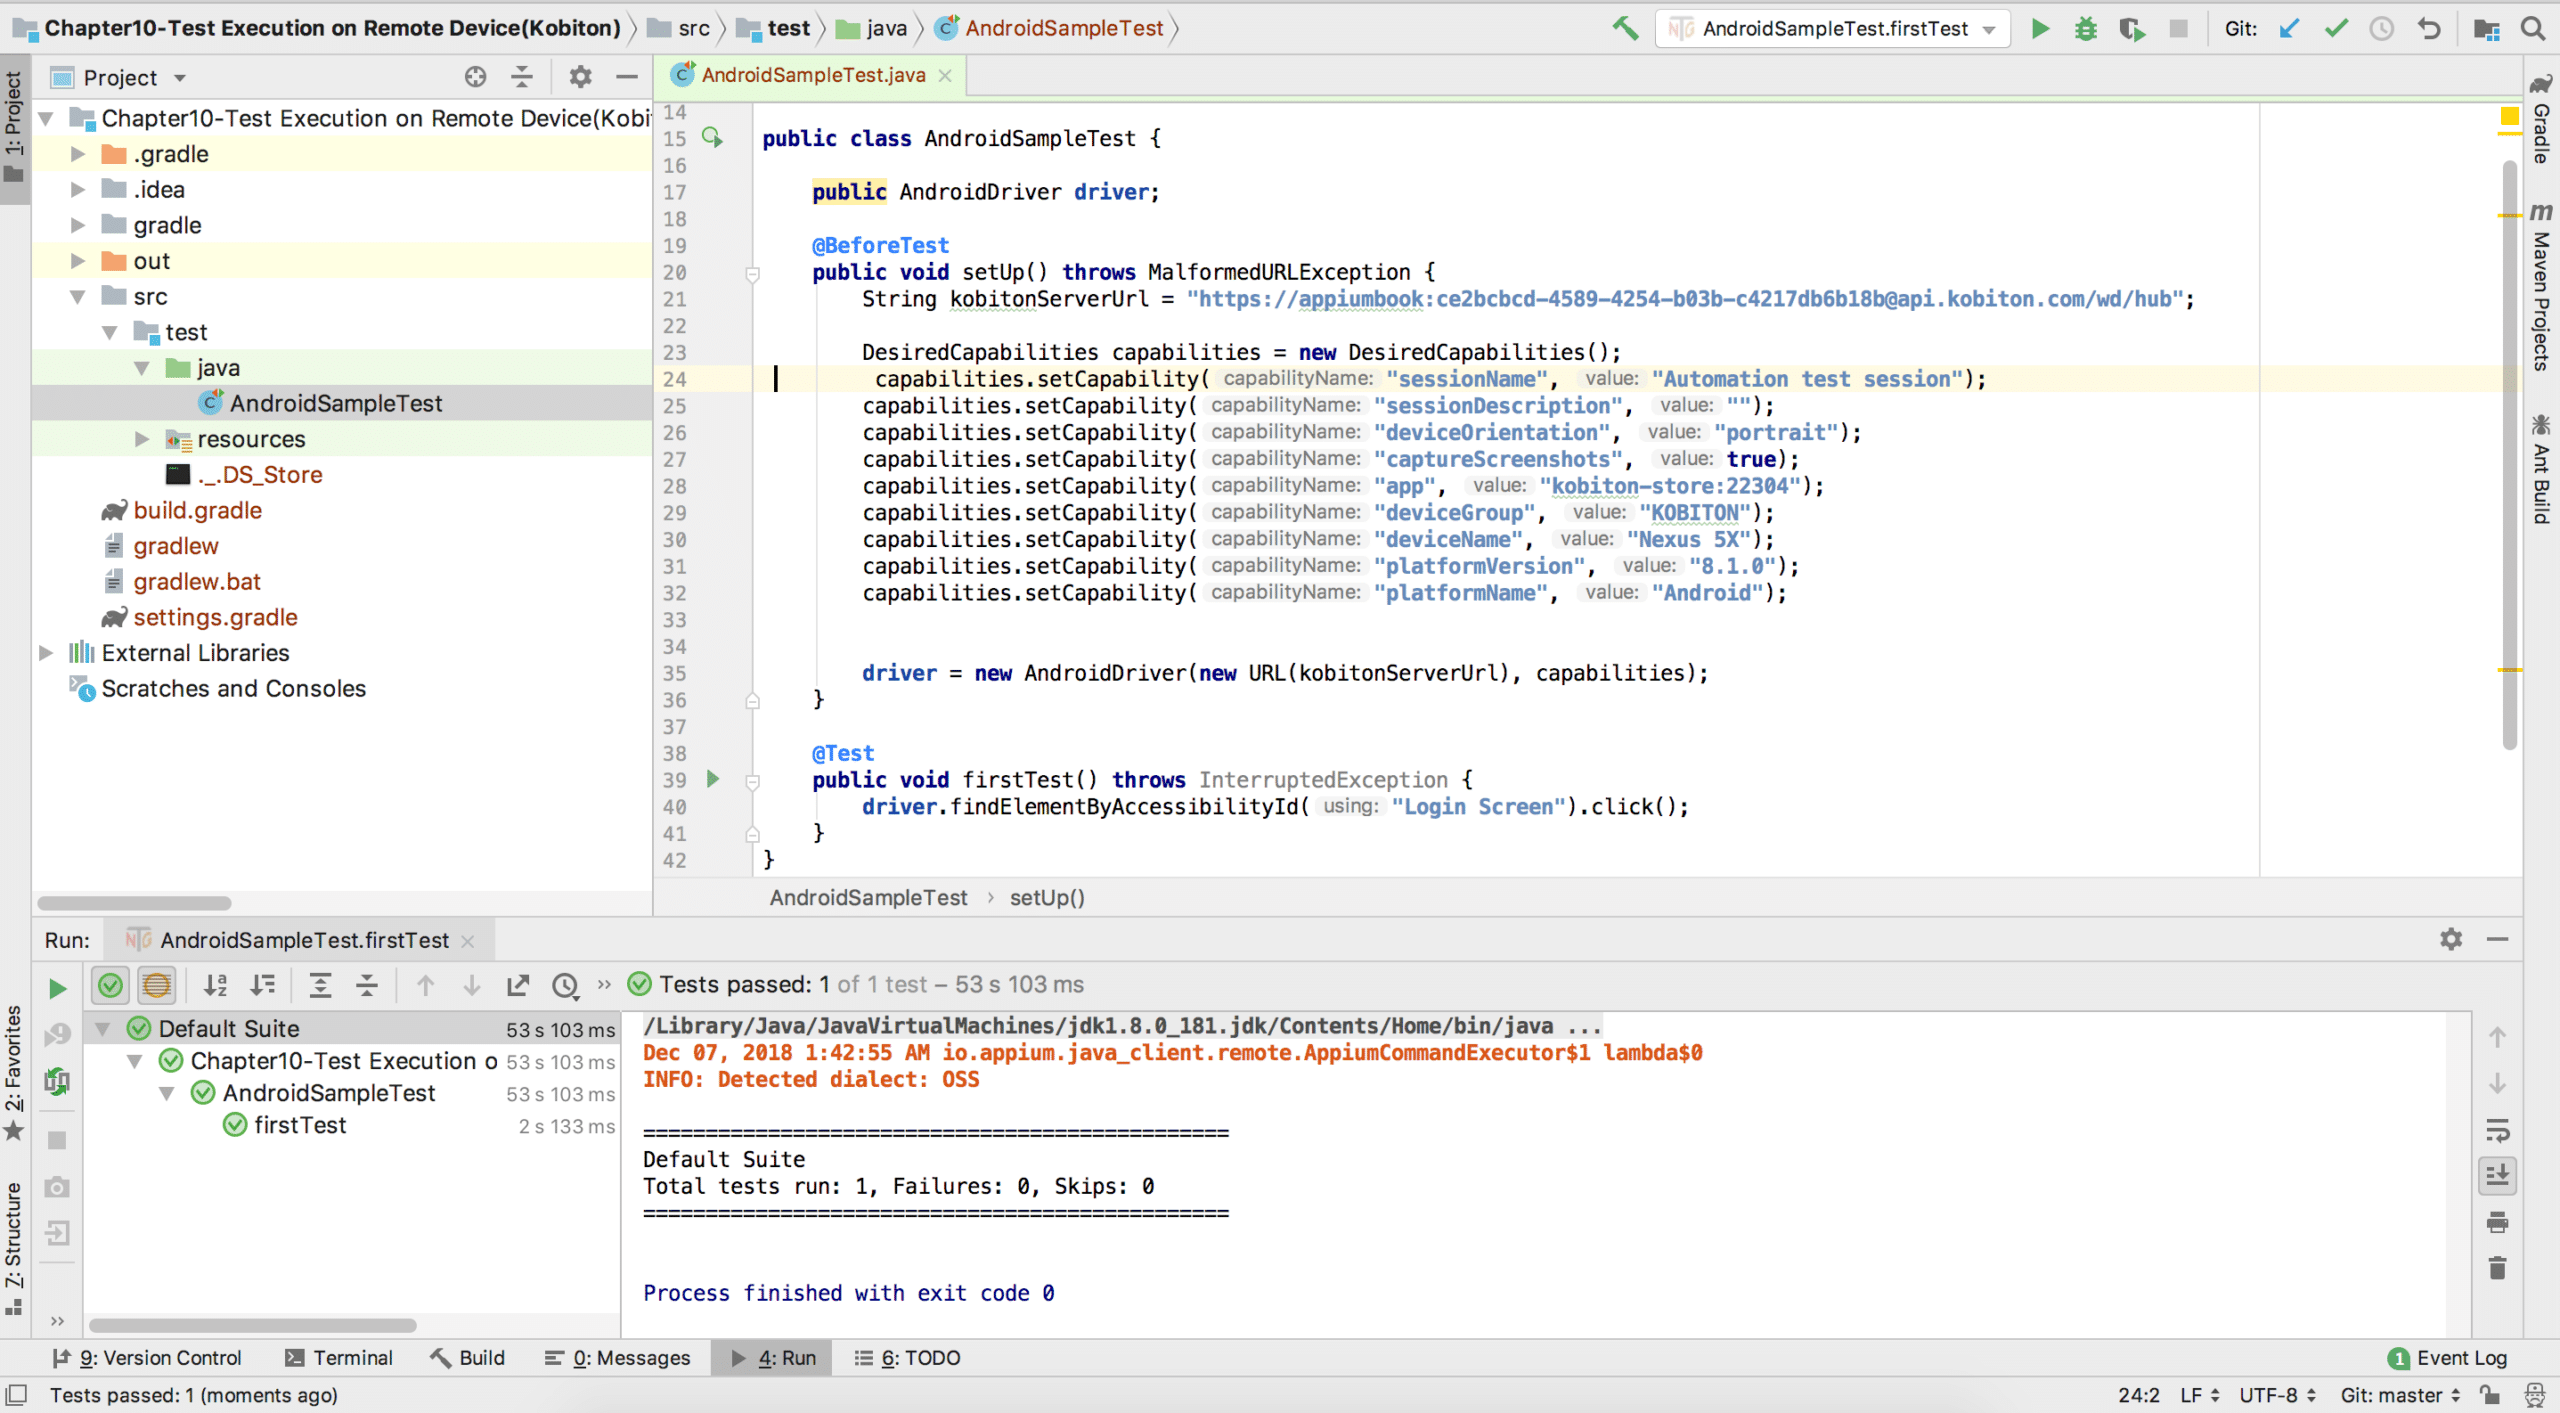
Now we need to paste the desired capabilities to our test script and run it. And here, we are using the same android script.
Figure-19: Paste Desired Capabilities in Test Script.
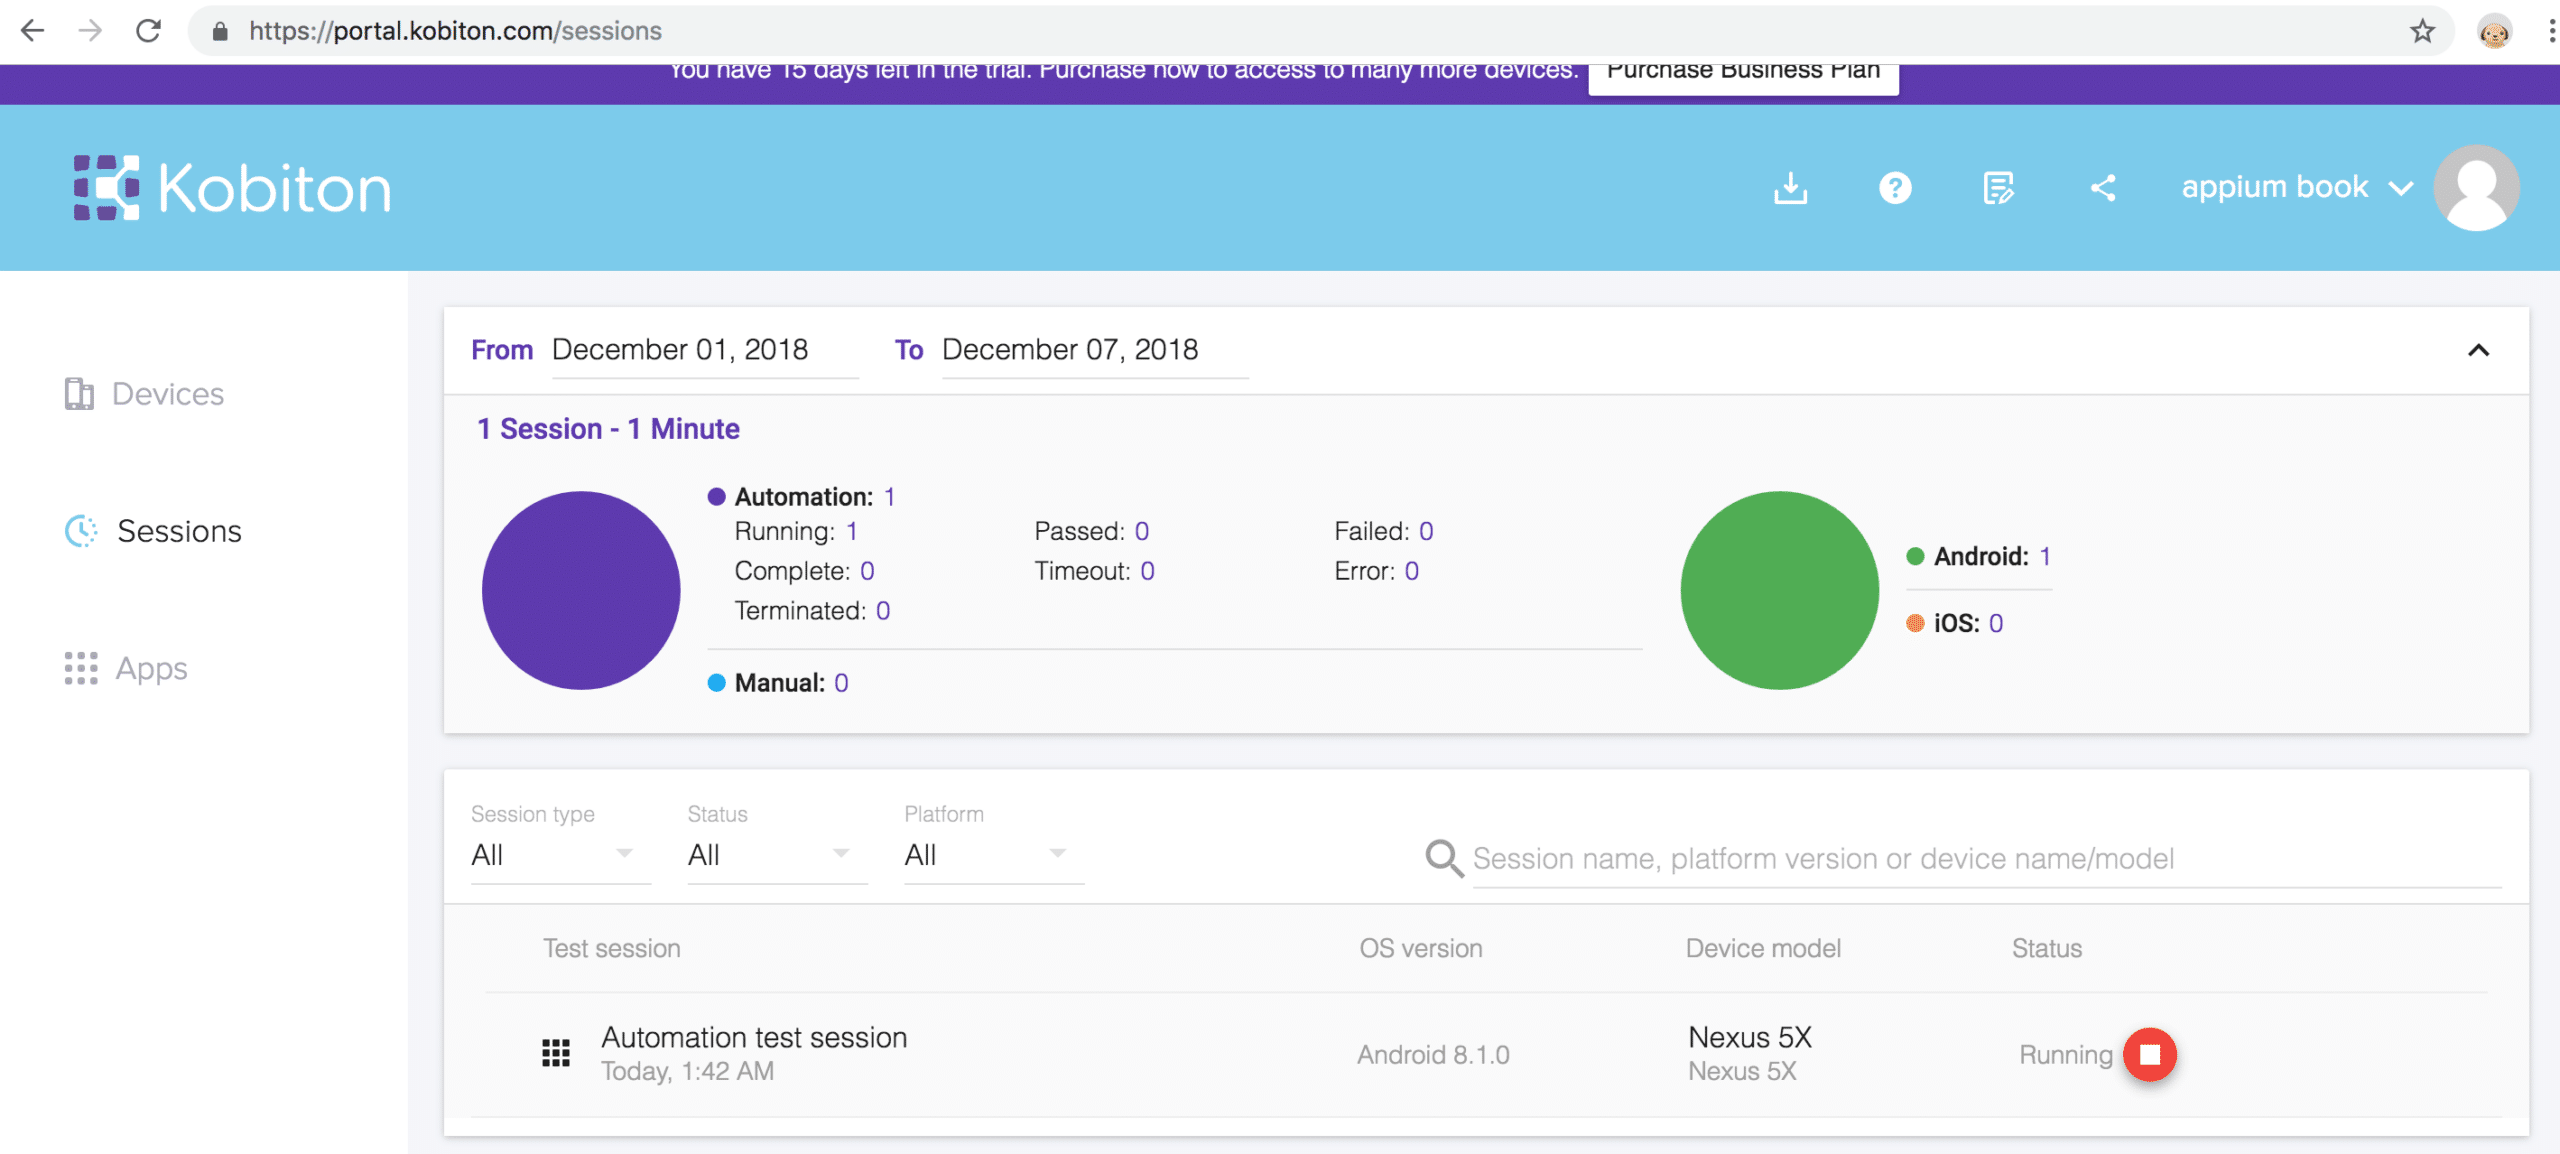
Now when you run the script, you can see the session is created for the selected Kobiton device.
Figure-20: Kobiton Session is created.
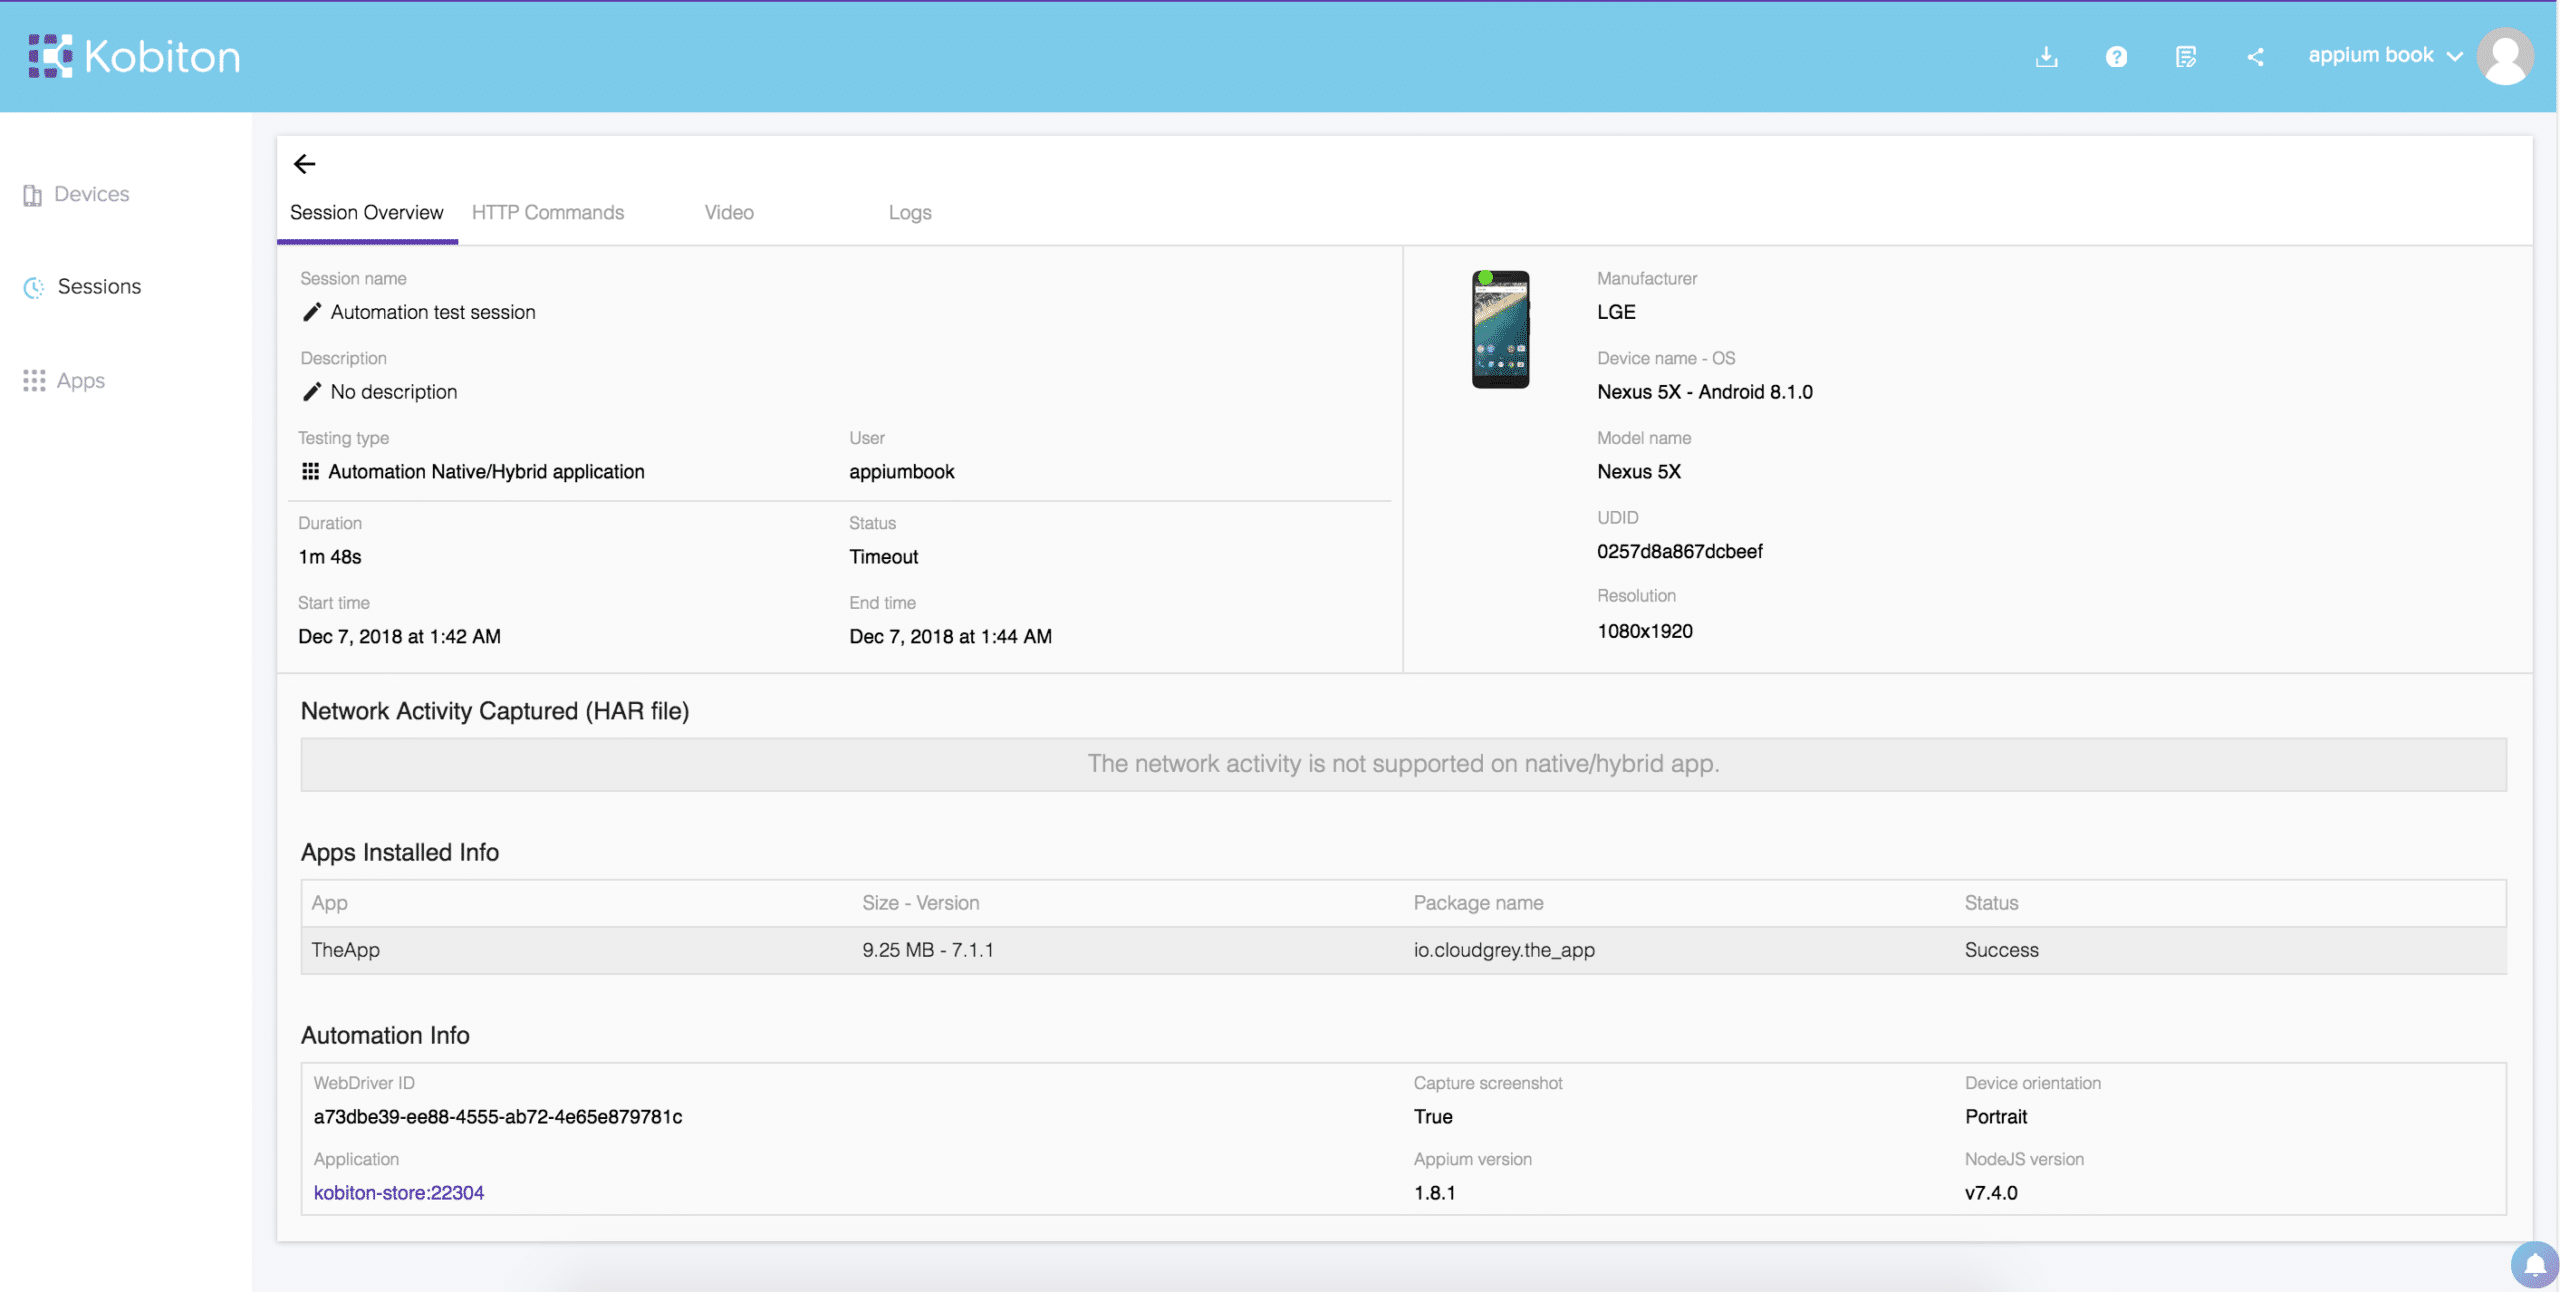
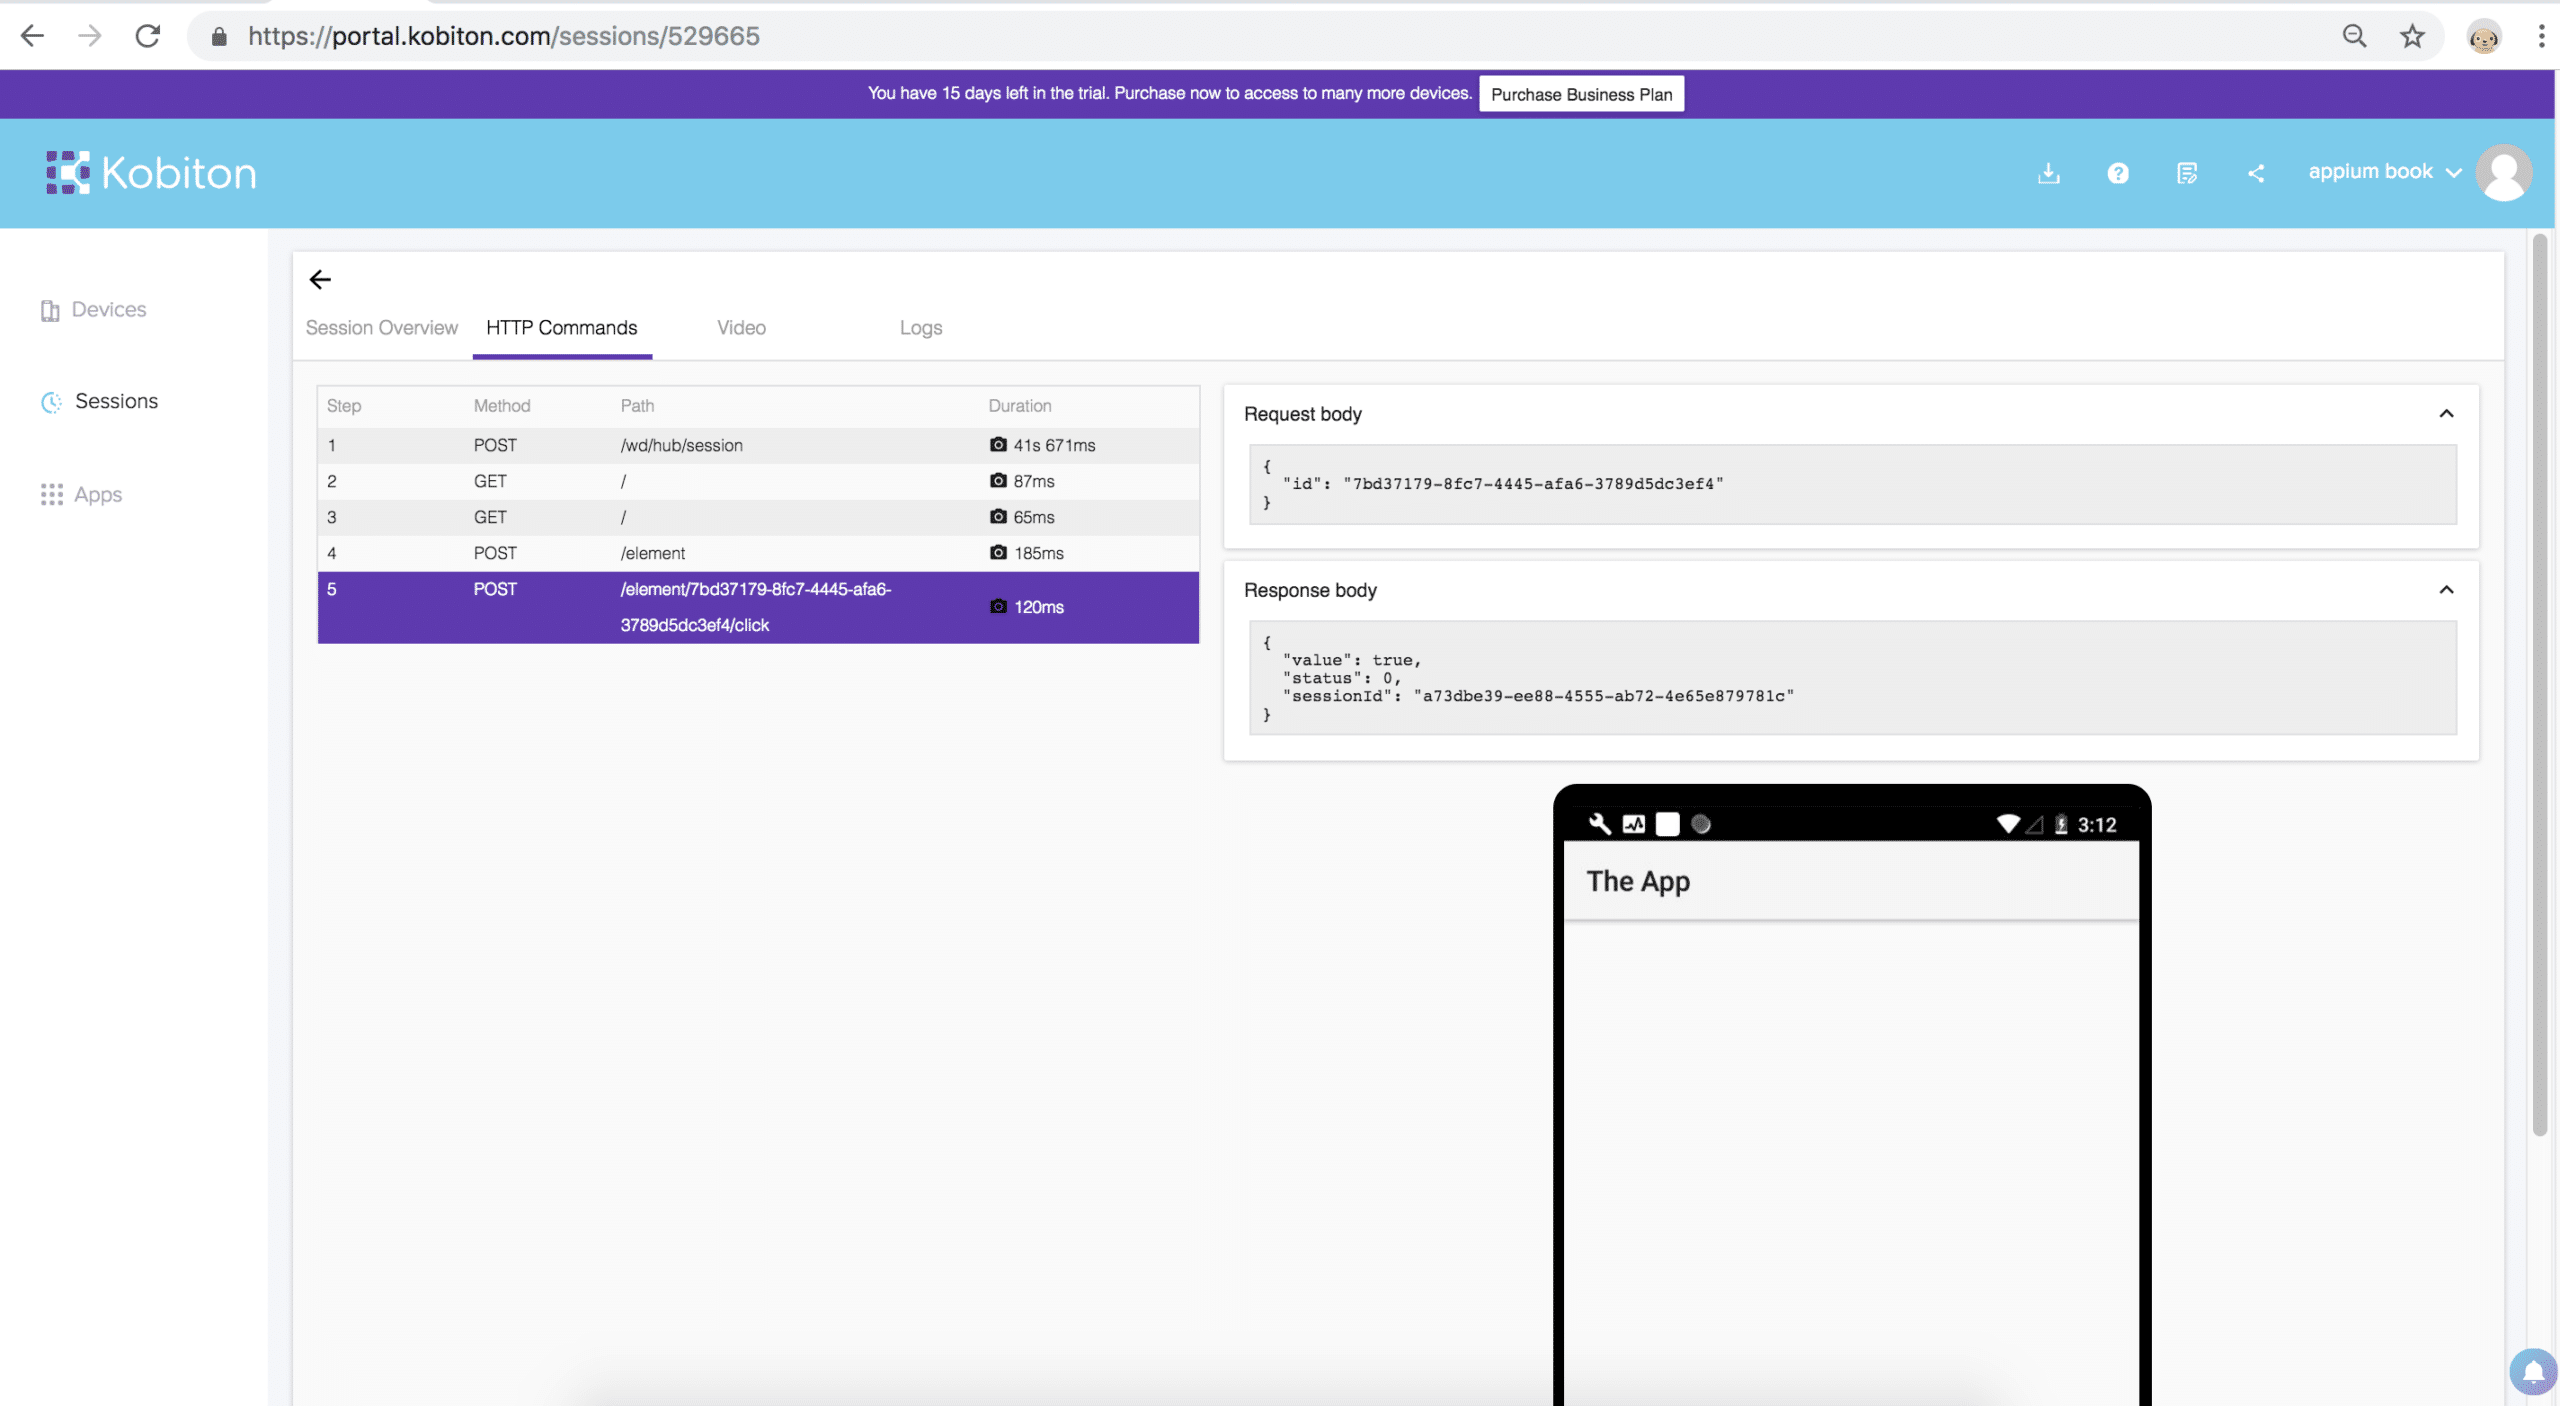
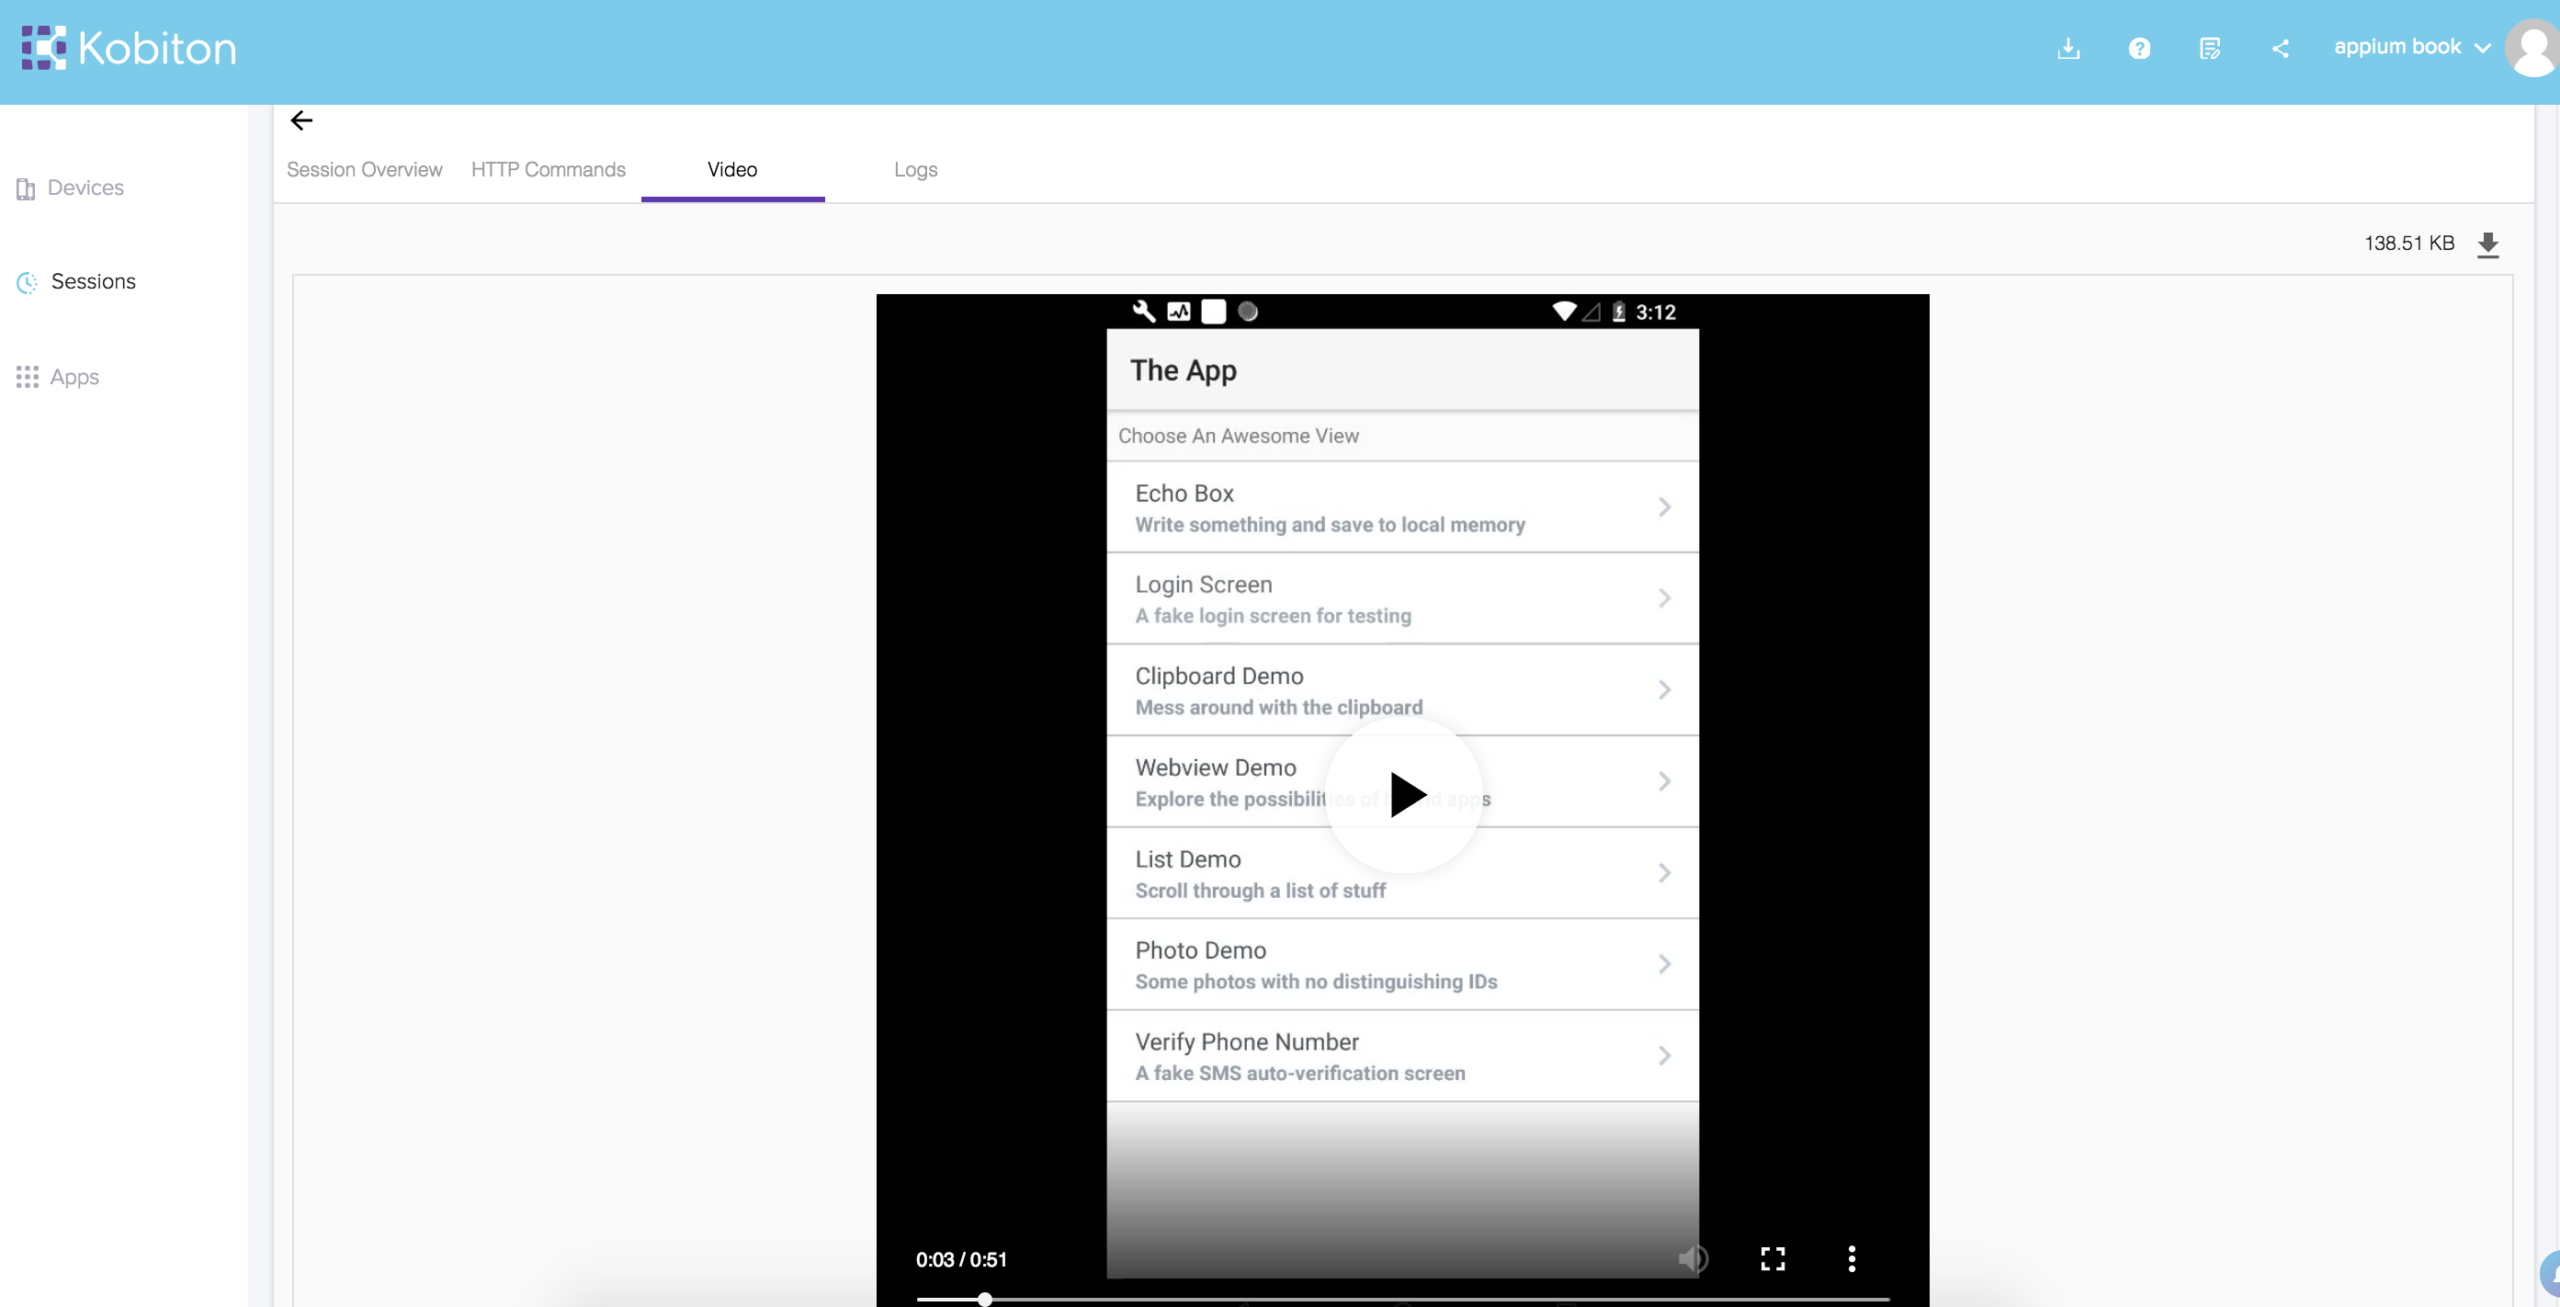
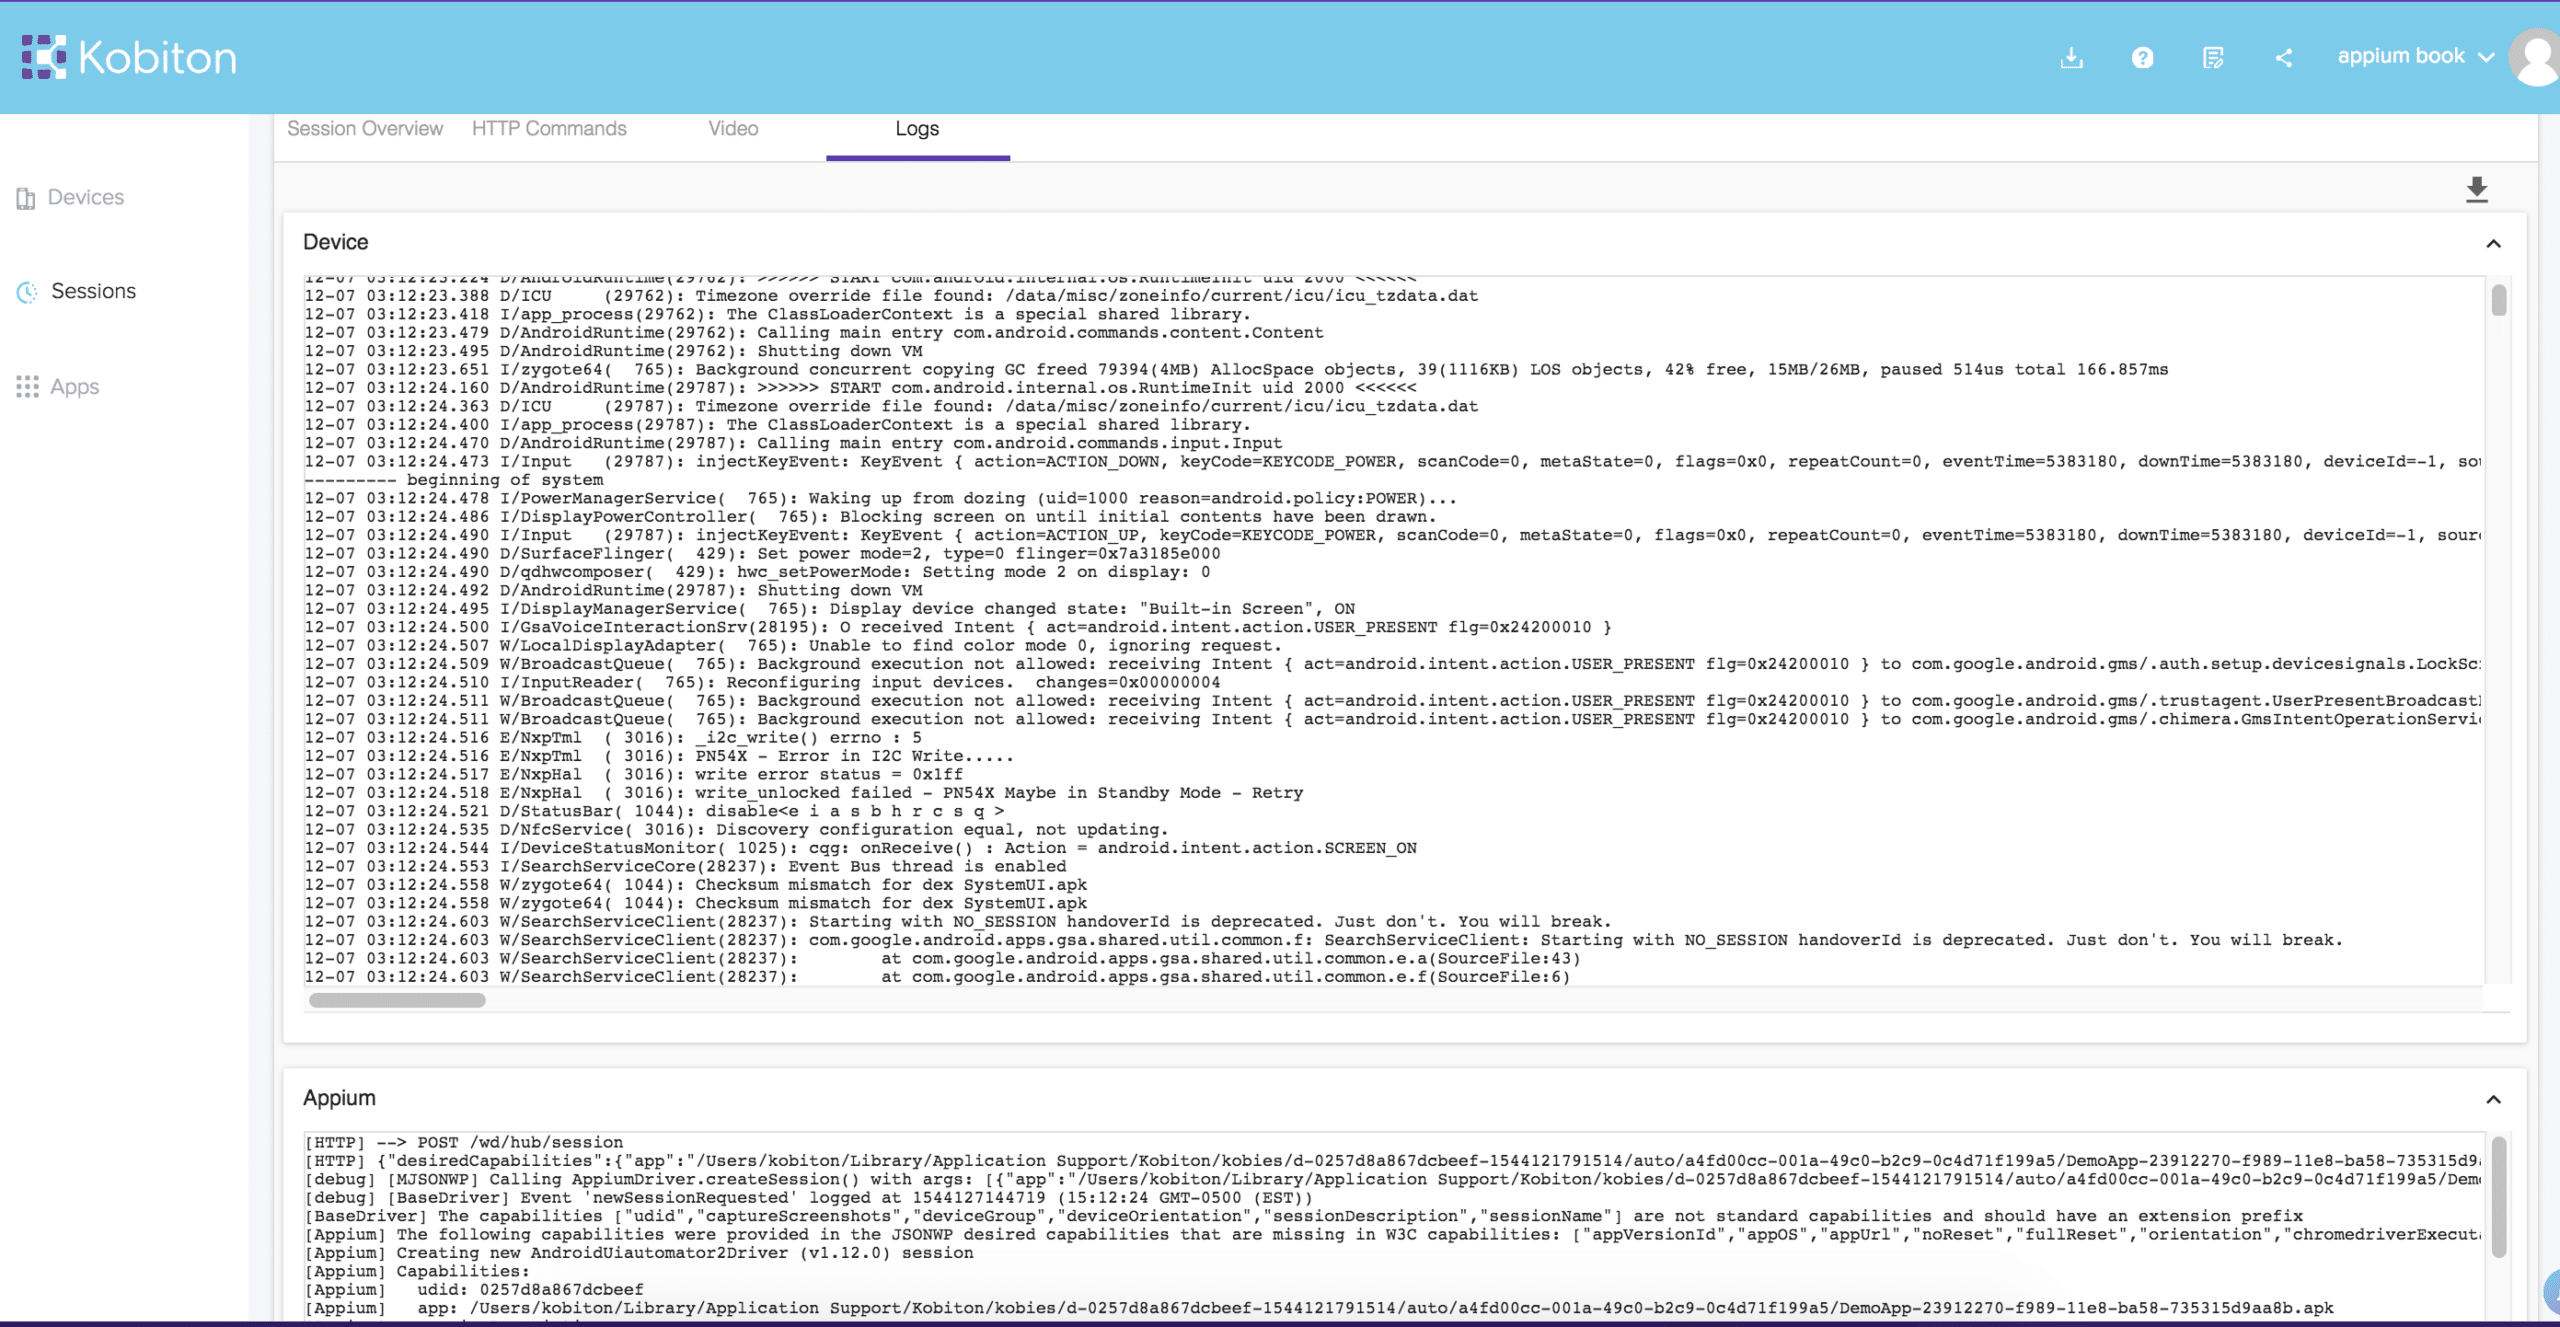
Once execution is finished, you are able to analyze the logs, screenshots, video and even HTTP commands.
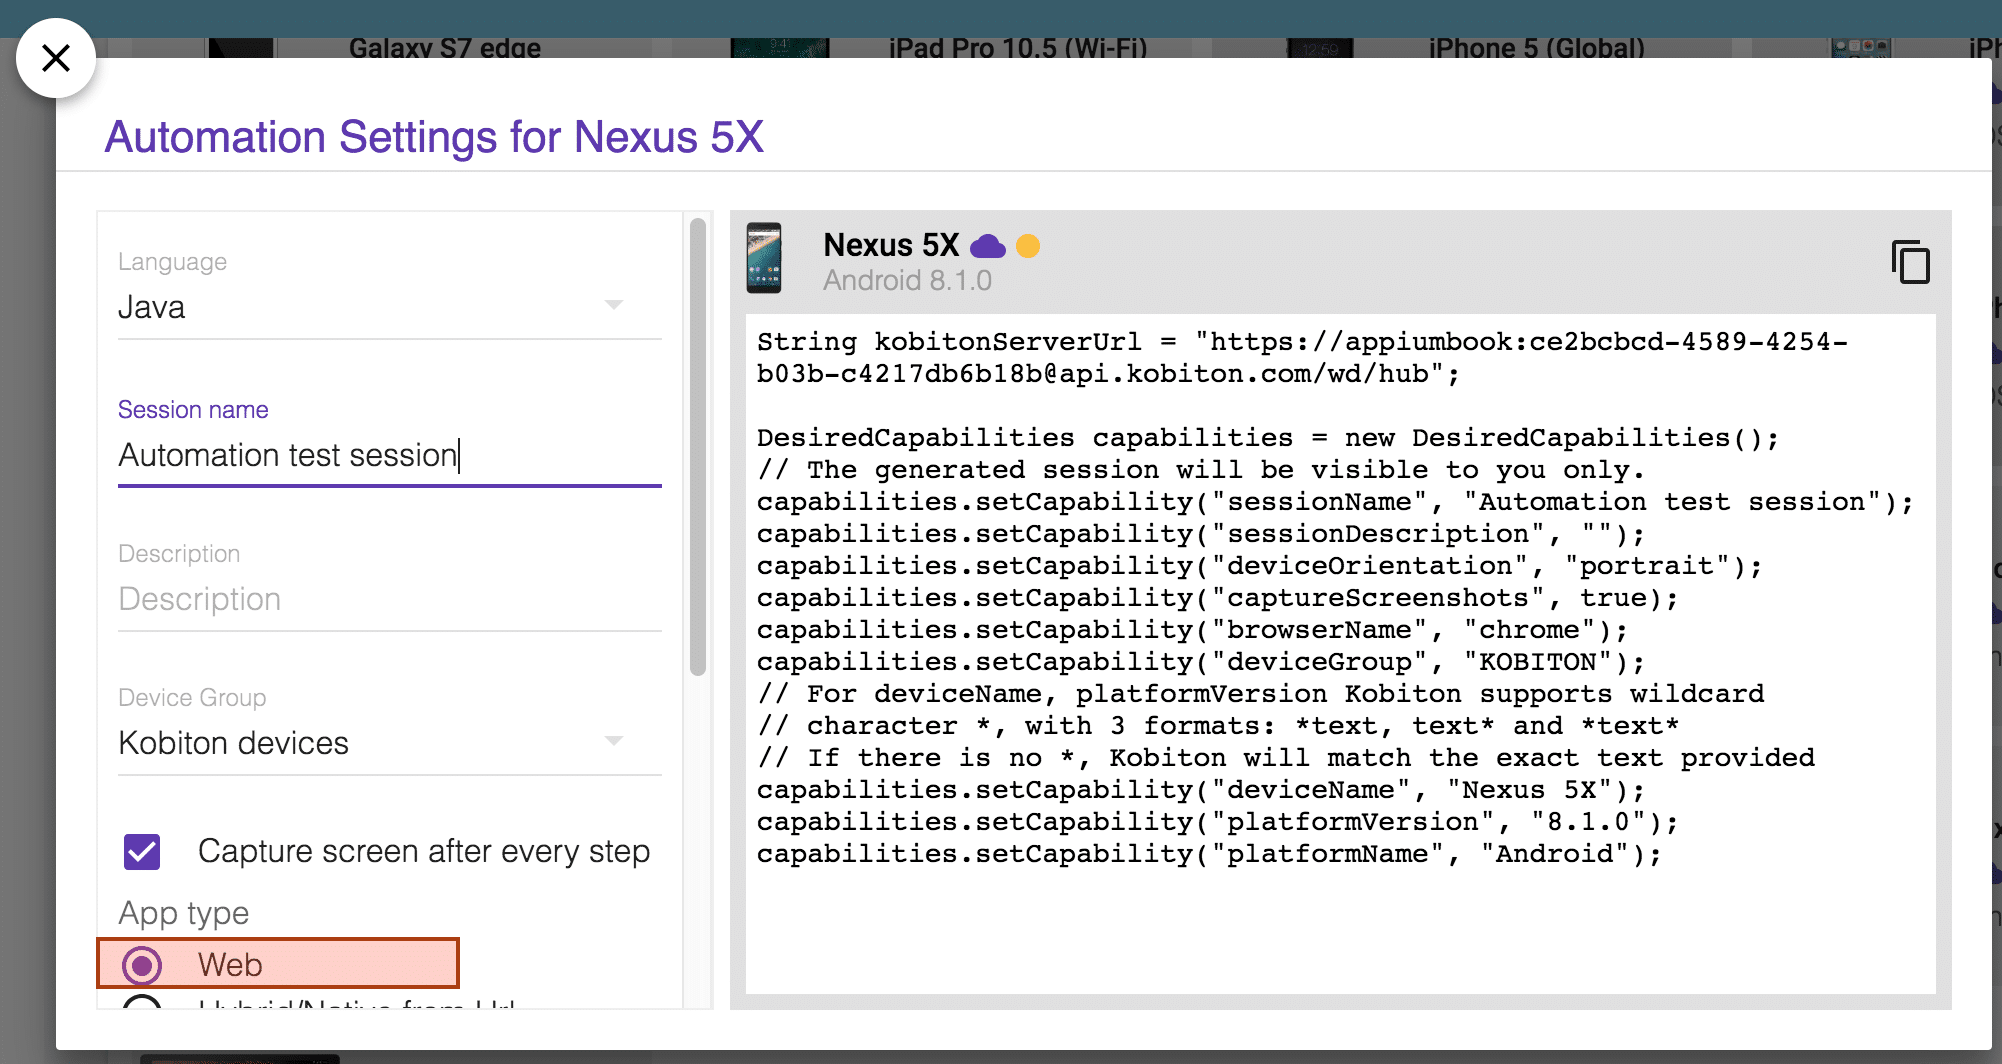
There is one more thing! What if you want to execute test cases for a mobile browser(chrome/safari) instead of a mobile application? The answer is pretty simple – you just need to select the ”Web” option in the Automation settings for the device and simply copy the desired capabilities. And because we’re testing a web application in this case, there is no need to upload an app.
Figure-25: Automation Settings for Mobile Browser execution.
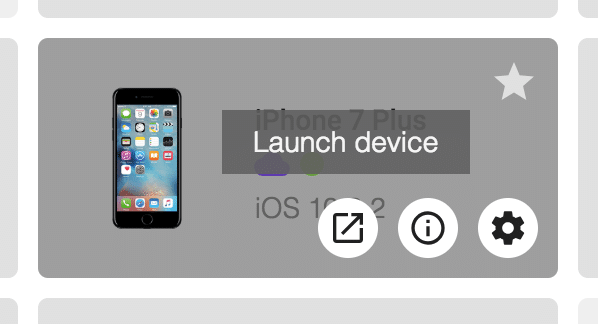
Moreover, if you want to manually test your mobile application on a Kobiton device you can easily do that, you just need to select the device click on the Launch button.
Figure-26: Launch device.
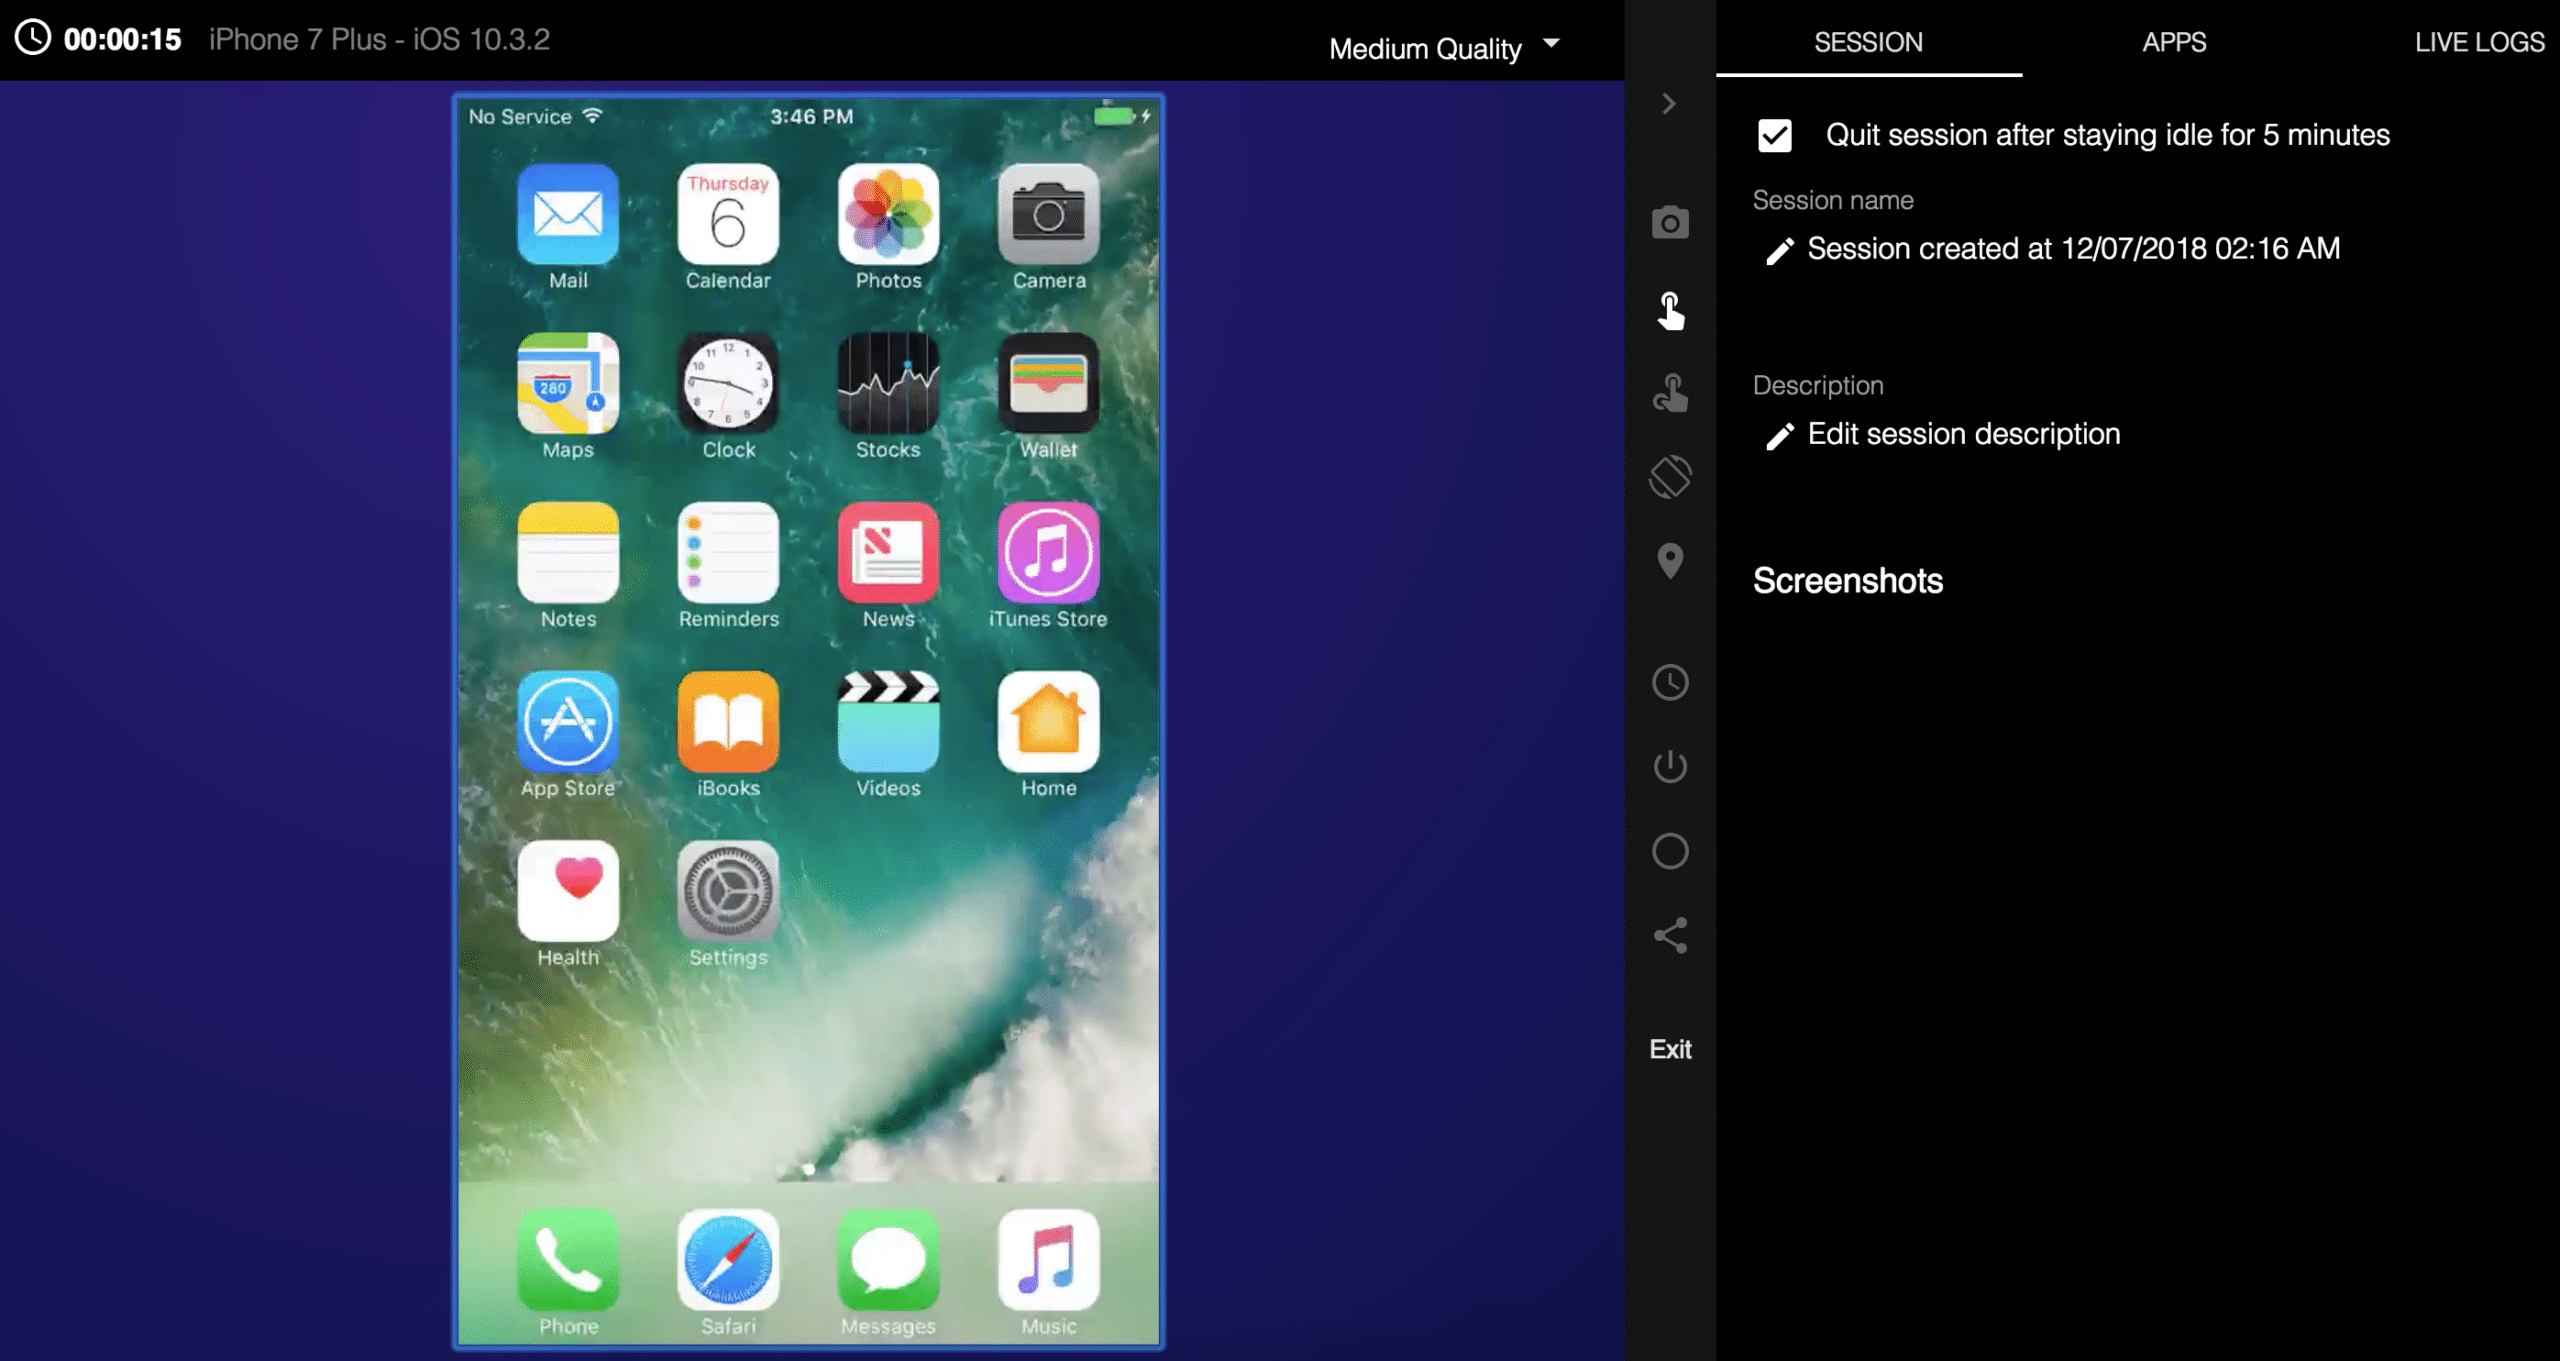
In this manual mode you can control the real device the same as if you had the device in-hand.
Figure-27: Manual testing on device.
Kobiton offers many features, including the ability to combine your own on-premises devices with the cloud devices. A detailed review of all the Kobiton capabilities are beyond the scope of this article, but if you visit our docs, you can find additional information and services offered by Kobiton.
For more information about Automation testing with Kobiton, visit here. And for Manual testing with Kobiton, you can find documentation here. Real-device testing should be a key part of your quality process. Fortunately, this is made easy by cloud device providers.
Interested in Learning More?
Subscribe today to stay informed and get regular updates from Kobiton