Mar 21, 2024
Emulators, Simulators, and Real Devices: A Detailed Comparison

Brittney Lawrence
Read More
In the fast-evolving world of mobile application development and testing, ensuring the quality and performance of mobile apps is imperative, especially over a wide range of devices and OS versions. But given this fast pace, with new models and OS versions released yearly, it’s hard to keep up from a manual testing perspective. That is why it is crucial to adopt mobile test automation. But mobile test automation is difficult. Not just because of the wide range of market permutations of device models/OS versions, but because of the platform fragmentation – two wildly different platforms supporting native mobile and hybrid applications with each’s native automation framework: Android with Espresso; and iOS with XCUITest.
That’s two automation scripts for one test case: an exhausting effort! Selenium, the pioneer of web application testing, saw this issue of platform fragmentation and created a solution: Appium for mobile test automation that can be executed on both Android and iOS platforms. And it gets even easier – pairing with a testing framework, Appium can run your test cases across multiple devices at once. This is called parallel test execution. In this article, we will go over what exactly is Appium parallel test execution, and how to set up and design parallel testing on emulators, simulators, and across real devices as well.
Estimate time savings by running tests in parallel vs. sequentially.
Please enter valid positive numbers.
Sequential time
—
Parallel time
—
Time saved
—
Efficiency gain
—
Running multiple test cases or test scripts simultaneously across different environments, browsers, devices, or configurations is known as parallel test execution, and it allows for faster test execution.
By running tests simultaneously rather than sequentially, you can detect issues earlier, improve resource utilization, and speed up time to market for software releases. However, this requires careful planning, design of independent tests, and management of test data and environments to avoid conflicts and ensure reliable results.
With Appium parallel test execution, mobile app teams can expose unknown bugs early and apply real user conditions for more realistic testing. This benefits the methodology of Shift-Left in the Software Development Life Cycle - test early and test often.
In mobile app development and testing, there are three main options for testing environments— simulators, emulators, and real physical devices. What exactly are simulators and emulators? Remember that platform fragmentation - Android and iOS? It is relevant in this terminology as well. Emulators are to Android as simulators are to iOS.
Emulators, primarily leveraged by Android, mimic the hardware and software of a real mobile device, offering a more accurate representation of real devices than simulators. Parallel test execution and automation using tools like Appium are possible with emulators. However, emulators can be slower than simulators, and they have limited availability for the latest devices and OS versions.
Simulators, primarily leveraged by iOS, simulate the operating system that you are testing within. XCode offers iOS simulators, macOS simulators, watchOS simulators, etc. In contrast to emulators, hardware is not simulated. Testing can be expedited with simulation, because it’s faster to set up and run tests, but they cannot replicate real-world device capabilities. Initial UI and functional testing during development are excellent uses for simulators.
Emulators and simulators, though only capturing a snapshot of a real device, have proven benefits of being inexpensive options to begin testing early and often. However, emulators and simulators cannot accurately test performance, battery usage, and other hardware-dependent aspects.
Real devices surpass simulators and emulators by offering the most true-to-life testing environment, because they use the real hardware, software, and operating system that end-users will use. It’s the most comprehensive testing for apps, hardware, performance, usability, and more. However, real device testing can be cost-prohibitive, with procurement and maintenance costs for a large pool of devices across different makes, models, and OS versions.
Simulators and emulators can miss real-world issues, but real device testing may offer slower test execution compared to parallel testing in virtual environments. A combination of these three approaches is ideal because each testing environment has its strengths and weaknesses. Specific app requirements and testing objectives will determine the right mobile testing solution. Parallel test execution on simulators and emulators is ideal for basic functional testing early in the dev cycle, enabling faster execution and scalability. Depending on the use case, parallel test execution can be very beneficial. Knowing its ins and outs can help you determine whether it will be suitable for your testing requirements. However, teams testing for usability and performance will continue to rely on real device testing. As a best practice, it is recommended to test early and often on emulators/simulators. Once critical functionality is tested and working as expected, it is imperative to test on the real-deal: real devices to ensure no other functionality is lost that the end-user might experience.
This Appium parallel testing tutorial provides insight into how to leverage parallel test execution. We will use the language of Java paired with the testing framework, TestNG, a powerful combination in automation testing that allows us to run tests in parallel. There are other options for additional languages as well. For example, java can also be paired with JUnit; node.js can be paired with the testing framework Mocha; C# language can be paired with NUnit. There is likely a testing framework that can satisfy parallel testing with respective languages. The best part is it's all open-source with community guidance to help you get started!
Before you begin implementation, you’ll want to choose a parallel execution strategy. To start, we will focus on running against emulators and simulators. However, for true parallelism at scale, you’ll want to run tests in parallel across multiple, real devices hosted on a cloud platform, such as Kobiton. One of the main advantages of using Kobiton is access to a wide range of real devices, detailed execution logs and reports, and integration with popular test frameworks and tools. For the time being, we’ll leverage emulators and simulators in IntelliJ IDEA.
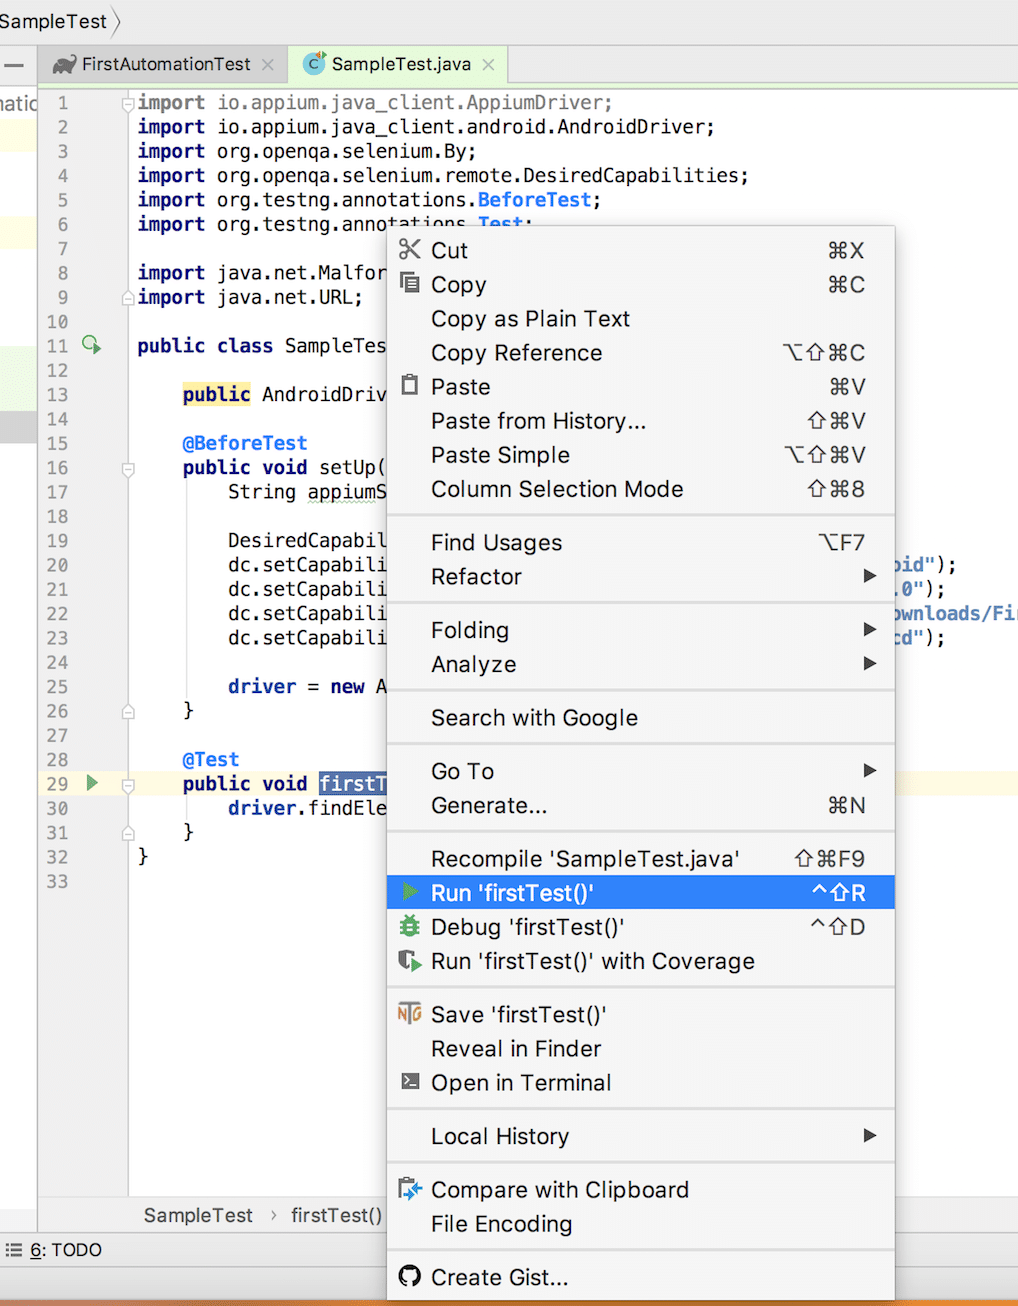
Before diving into it, there are a few prerequisites to consider before setting up running in parallel. You should have your environment set up to run Appium scripts in IntelliJ IDEA along with relevant dependencies. Here’s a quick refresher on executing test cases from a Test Class file in IntelliJ Idea. Remember, you just need to select the Test Method Name > Right-click on it > Run.
Before jumping into parallel testing, let’s review the simple code for iOS used in another example. This is the code we’ll use as an example for parallel execution:
import io.appium.java_client.ios.IOSDriver;
import io.appium.java_client.ios.IOSElement;
import org.openqa.selenium.By;
import org.openqa.selenium.remote.DesiredCapabilities;
import org.testng.Assert;
import org.testng.annotations.BeforeTest;
import org.testng.annotations.Test;
import java.net.MalformedURLException;
import java.net.URL;
public class IOSTestCases {
public IOSDriver driver;
@BeforeTest
public void setUp() throws MalformedURLException {
String appiumServerURL = "https://127.0.0.1:4723/wd/hub";
DesiredCapabilities dc = new DesiredCapabilities();
dc.setCapability("platformName", "iOS");
dc.setCapability("platformVersion", "11.4");
dc.setCapability("app", "/Users/pratik/Downloads/FirstAutomationTest/src/test/resources/DemoApp-iPhoneSimulator.app");
dc.setCapability("deviceName", "iPhone X");
driver = new IOSDriver(new URL(appiumServerURL), dc);
}
@Test
public void sampleTestCase() throws InterruptedException {
int a = 5;
int b = 10;
driver.findElement(By.id("IntegerA")).sendKeys(a + "");
driver.findElement(By.id("IntegerB")).sendKeys(b + "");
driver.findElement(By.id("ComputeSumButton")).click();
String answer = driver.findElement(By.id("Answer")).getText();
Assert.assertEquals(answer, a + b + "", "Expected and Actual Result didn't match!"); ]
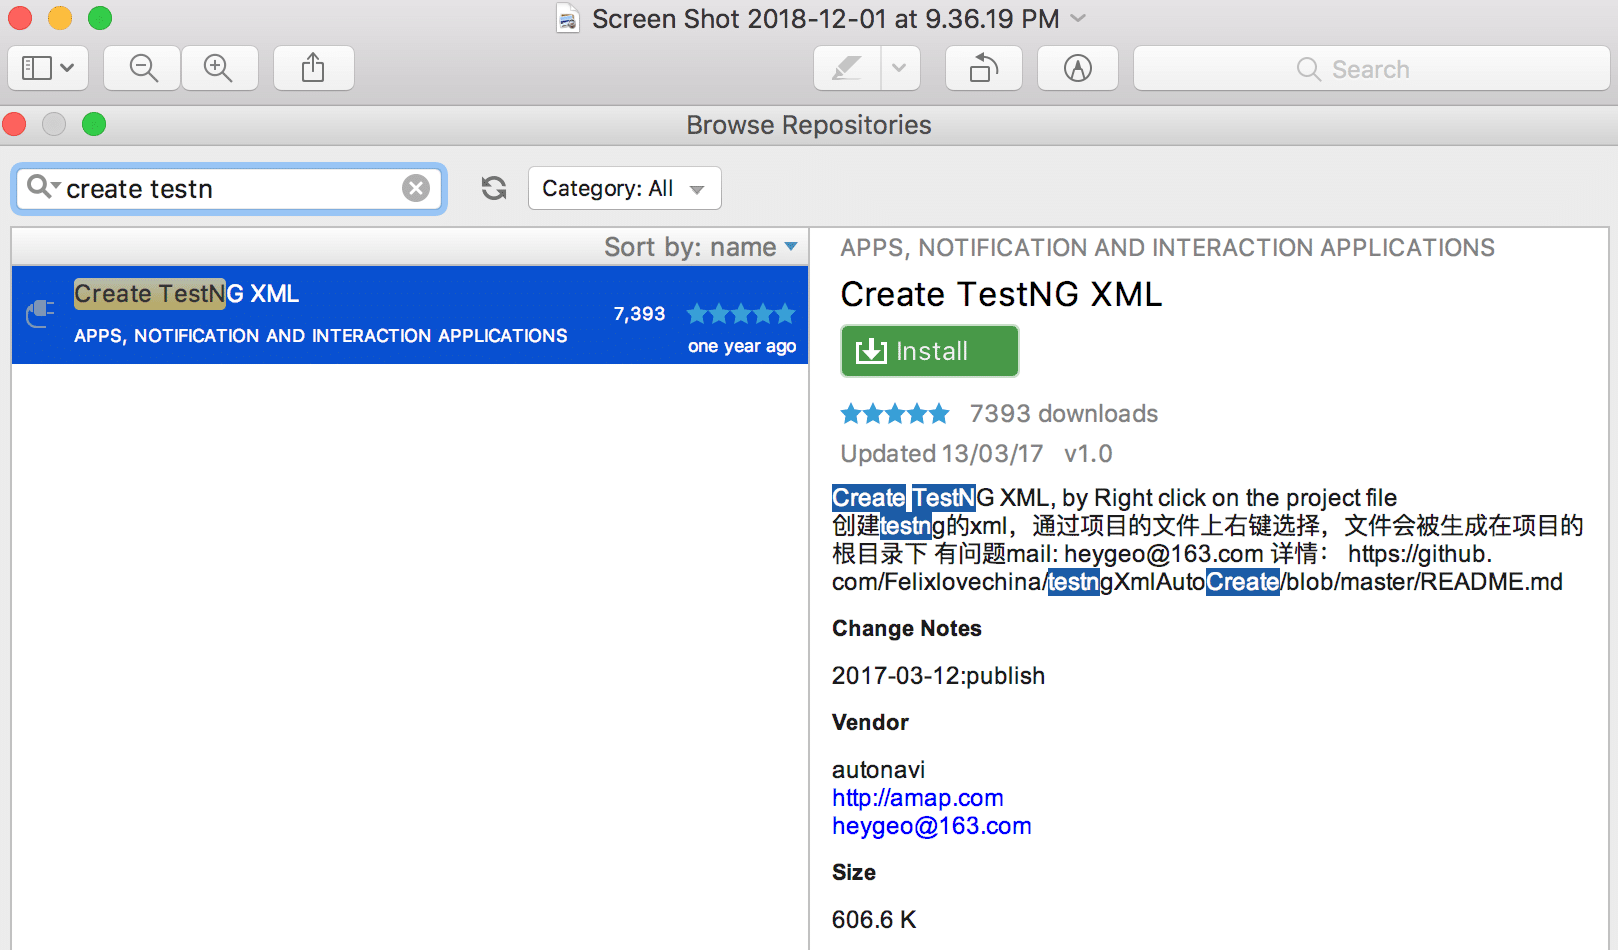
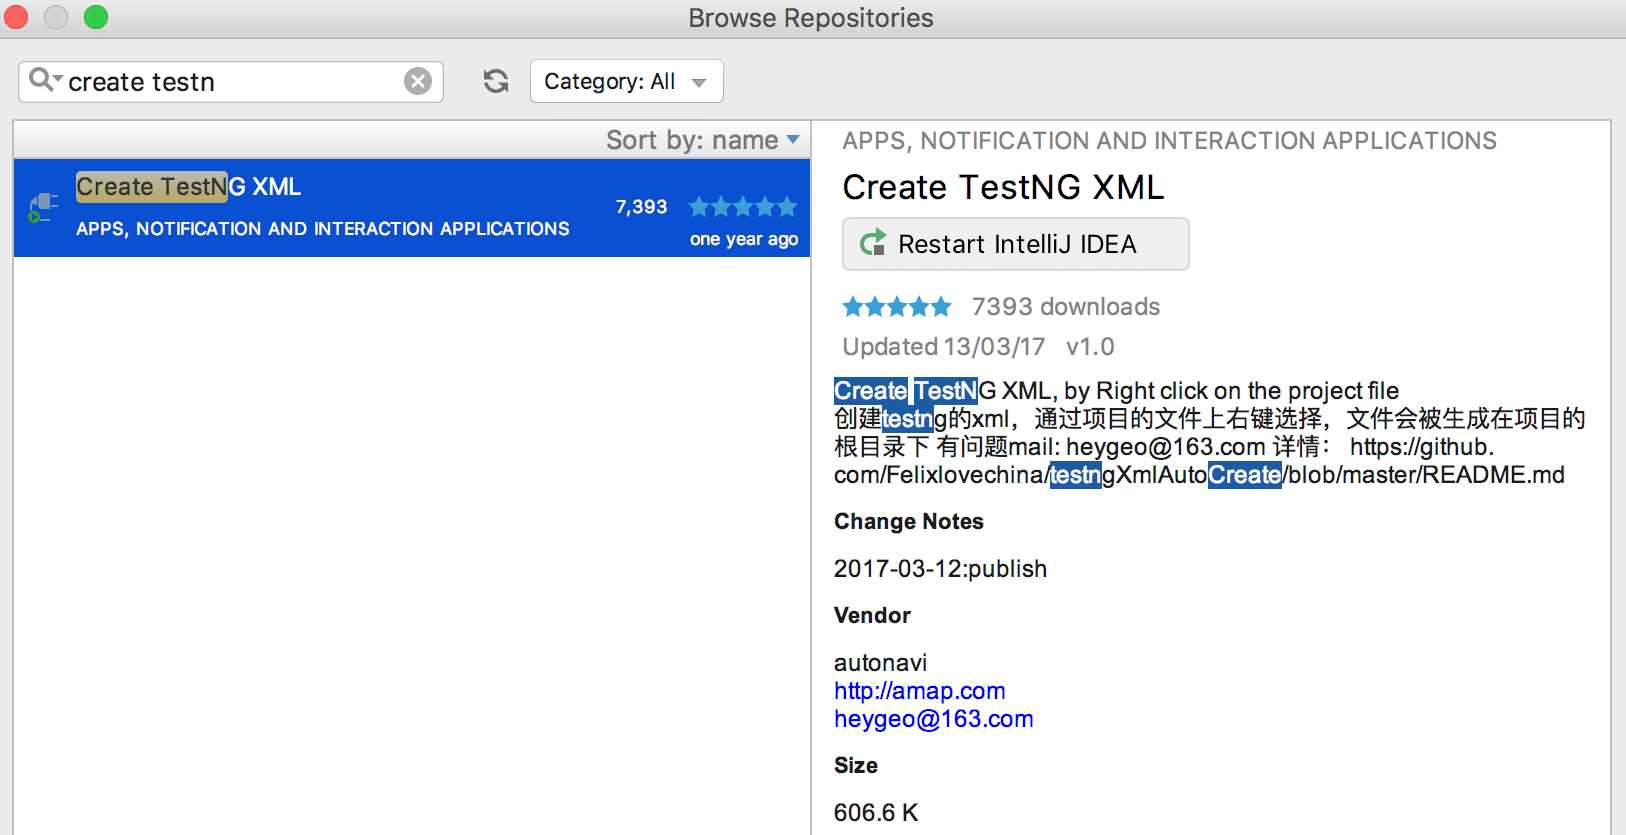
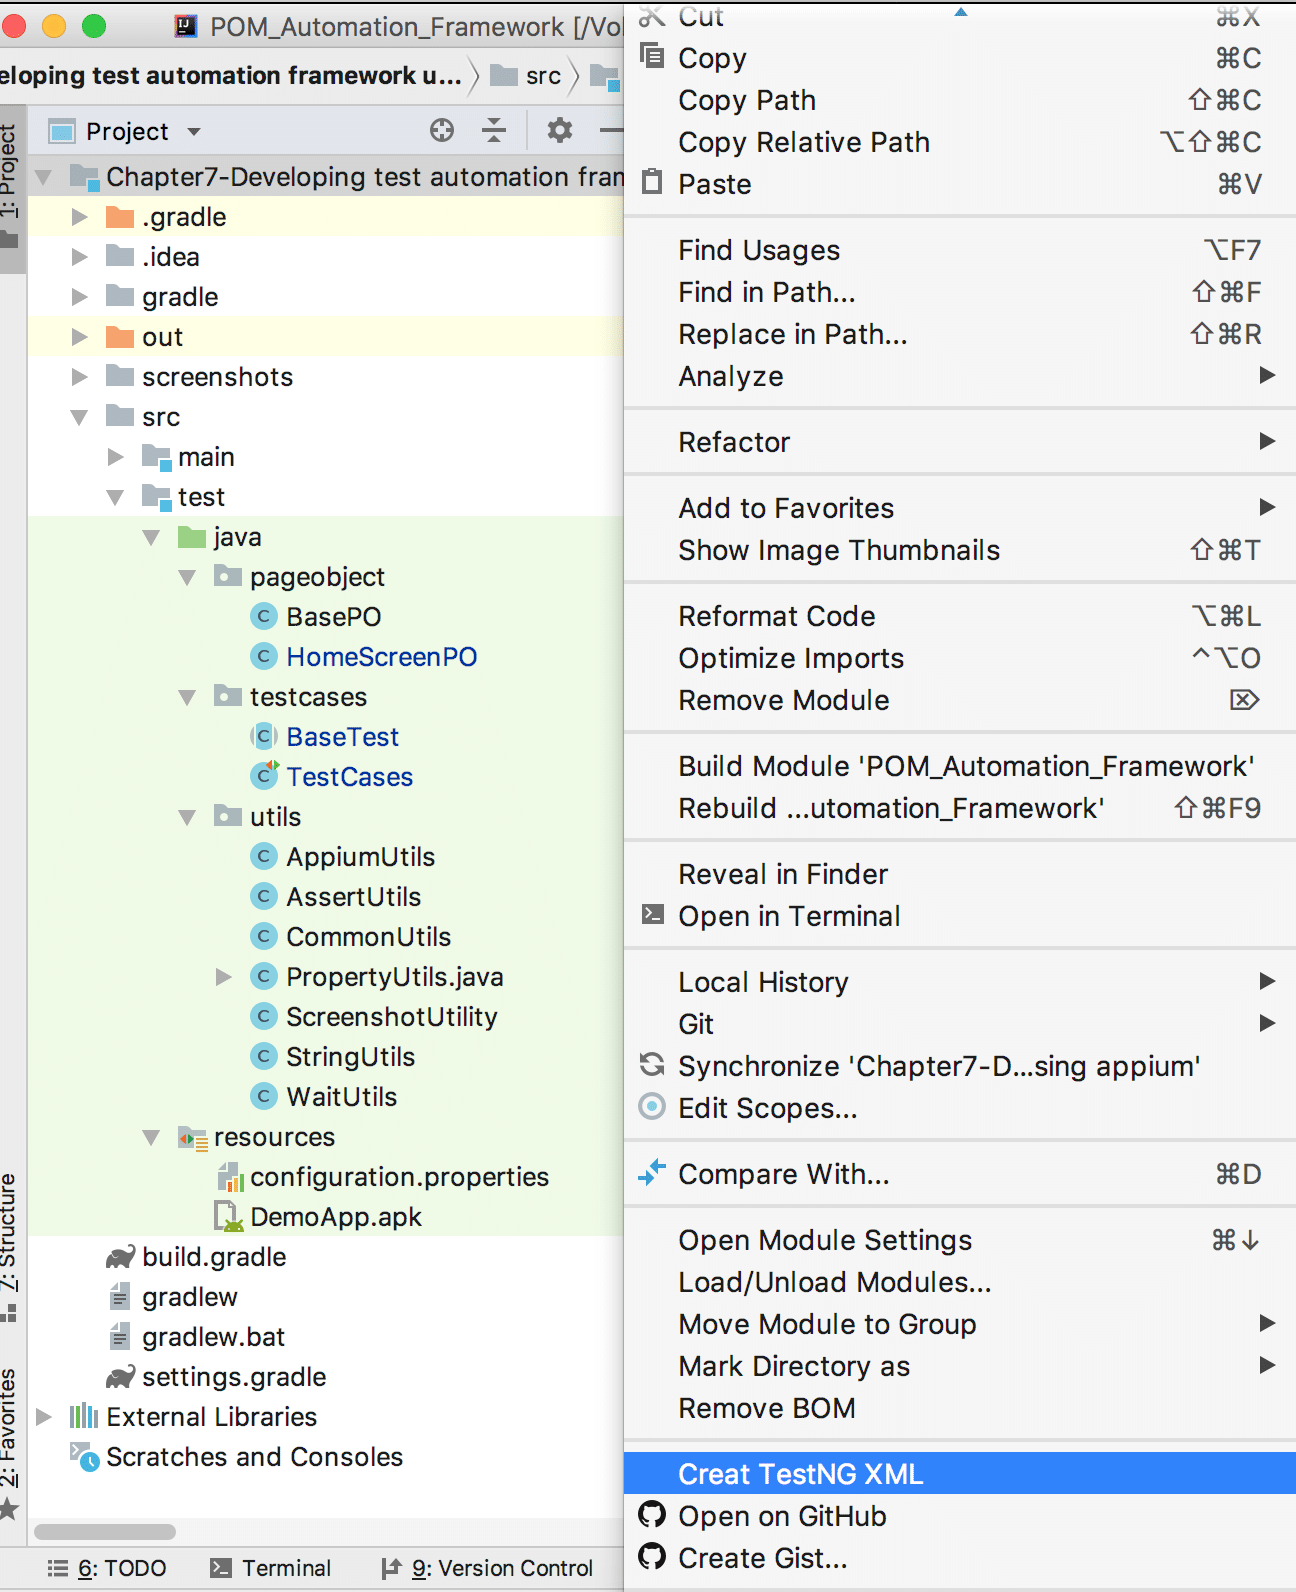
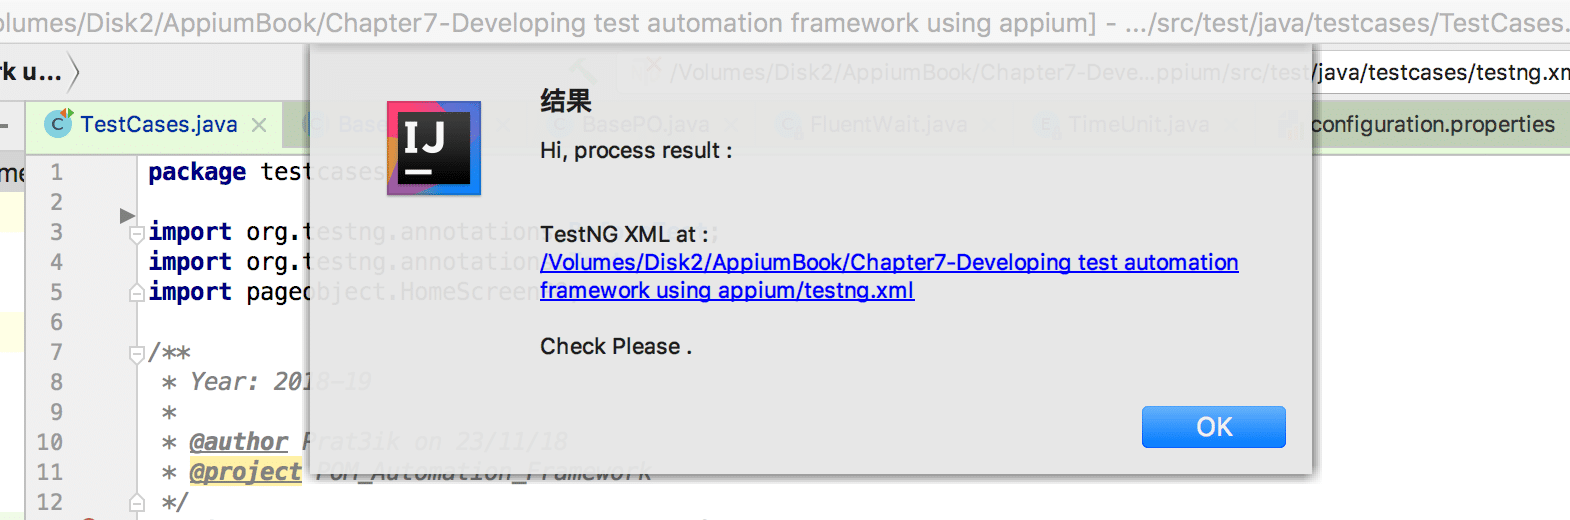
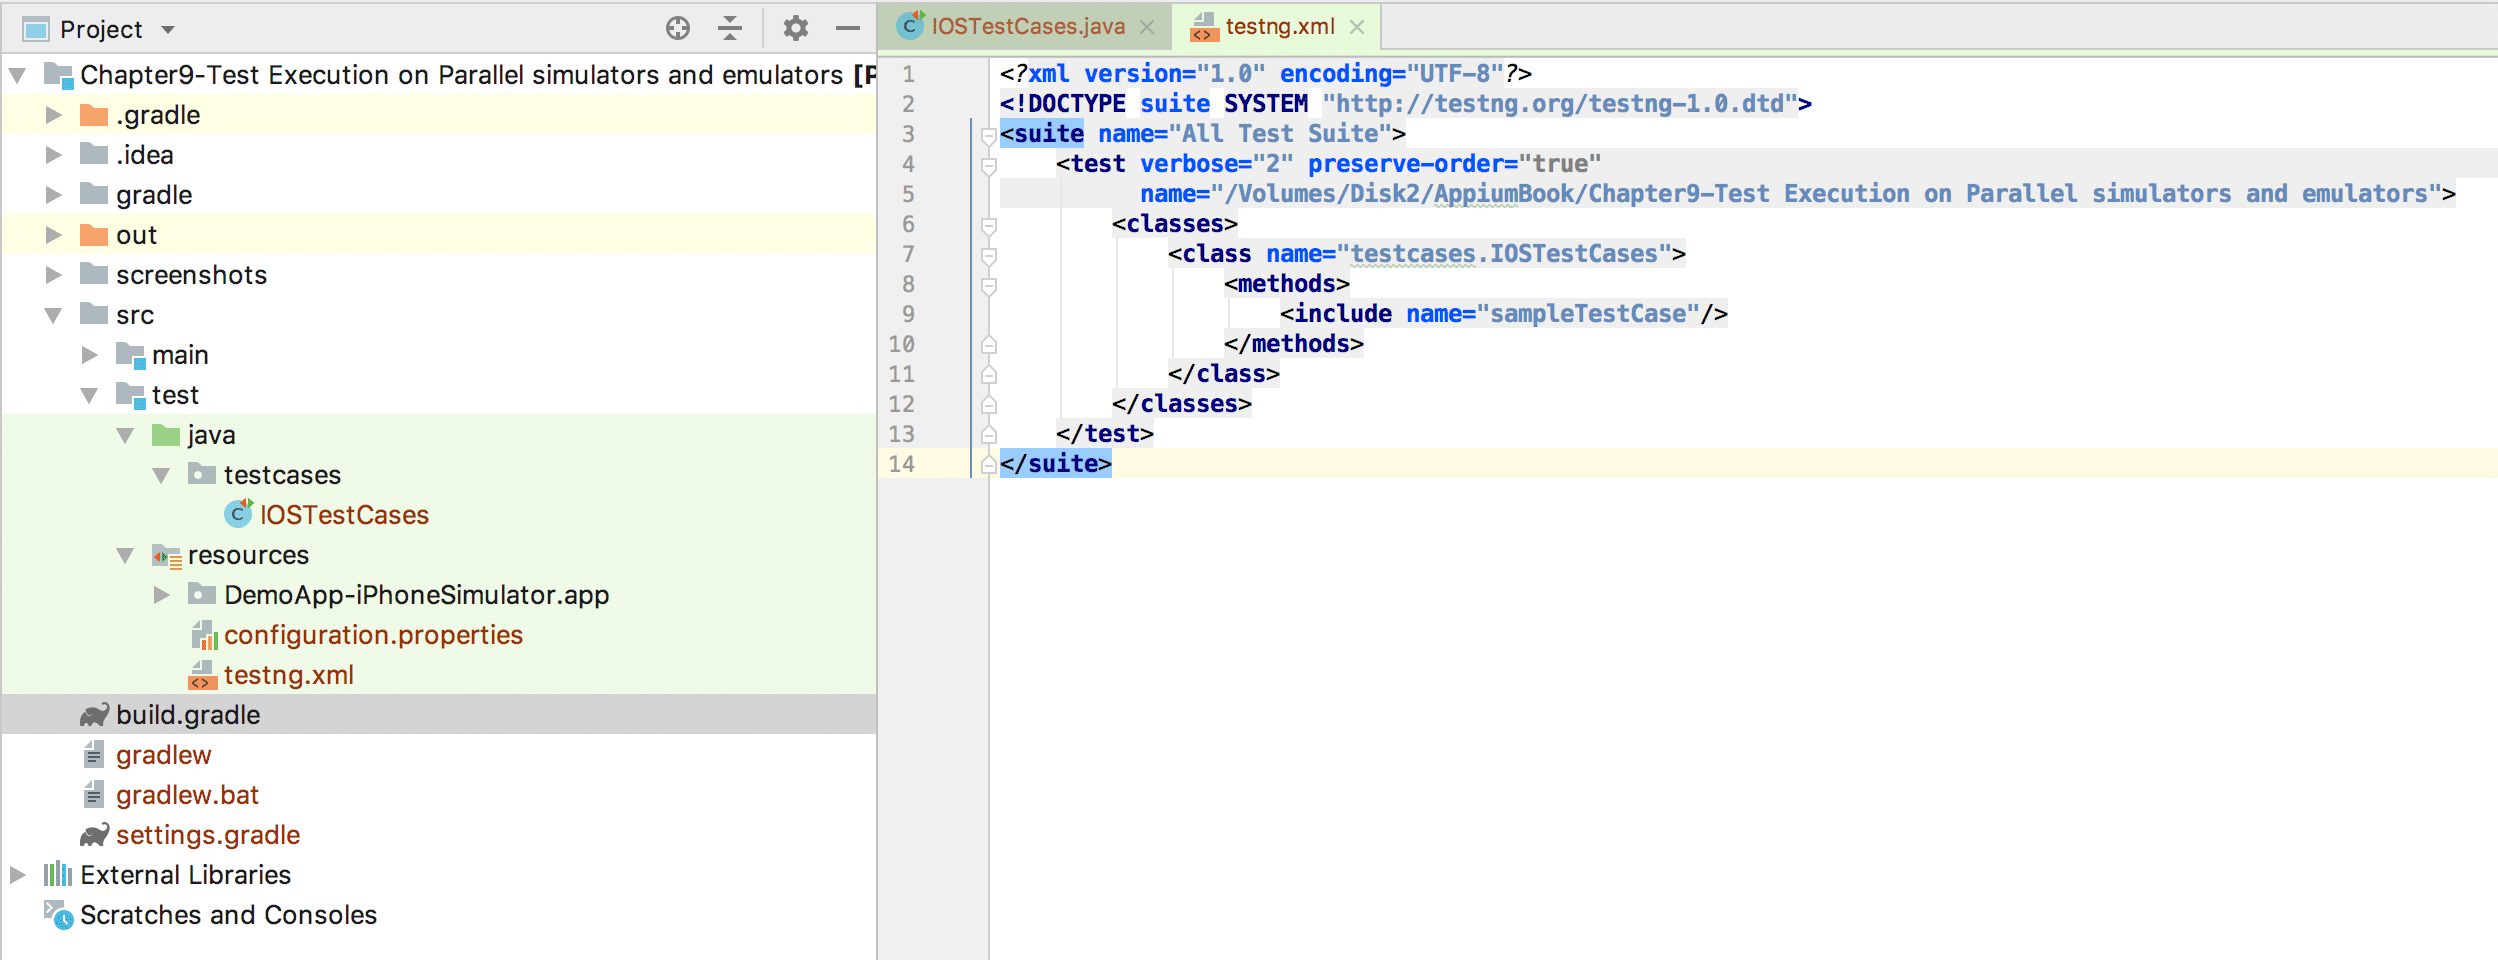
After putting this test script into an IntelliJ Java project, we can execute the test cases using the testng.xml method for execution.
To configure parallel test execution follow the following steps:
<?xml version="1.0" encoding="UTF-8"?>
<!DOCTYPE suite SYSTEM "https://testng.org/testng-1.0.dtd">
<suite name="All Test Suite">
<test verbose="2" preserve-order="true" name="/Volumes/Disk2/AppiumBook/Chapter9-Test Execution on Parallel simulators and emulators">
<classes>
<class name="testcases.IOSTestCases">
<methods>
<include name="sampleTestCase"/>
</methods>
</class>
</classes>
</test>
</suite>
<?xml version="1.0" encoding="UTF-8"?>
<!DOCTYPE suite SYSTEM "https://testng.org/testng-1.0.dtd">
<suite name="All Test Suite">
<test verbose="2" preserve-order="true" name="/Volumes/Disk2/AppiumBook/Chapter9-Test Execution on Parallel simulators and emulators">
<groups>
<run>
<include name="sample"/>
</run>
</groups>
<classes>
<class name="testcases.IOSTestCases"/>
</classes>
</test>
</suite>
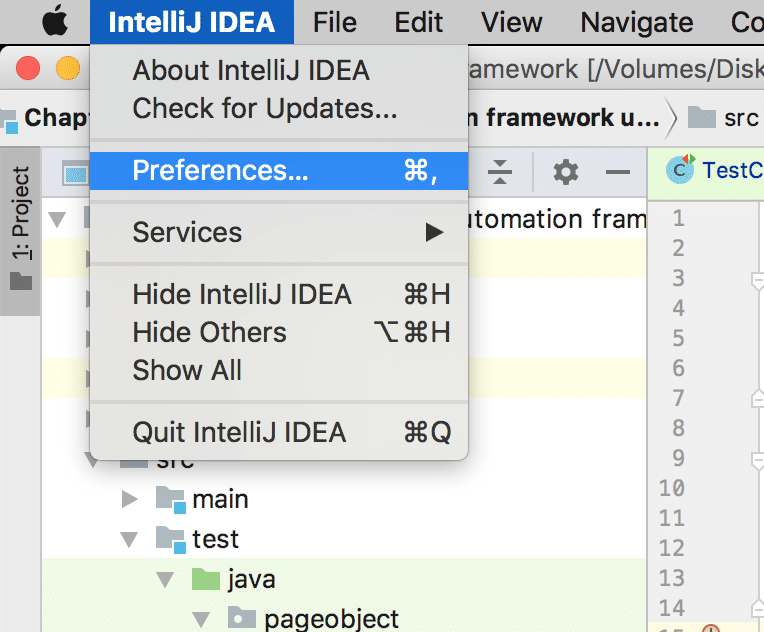
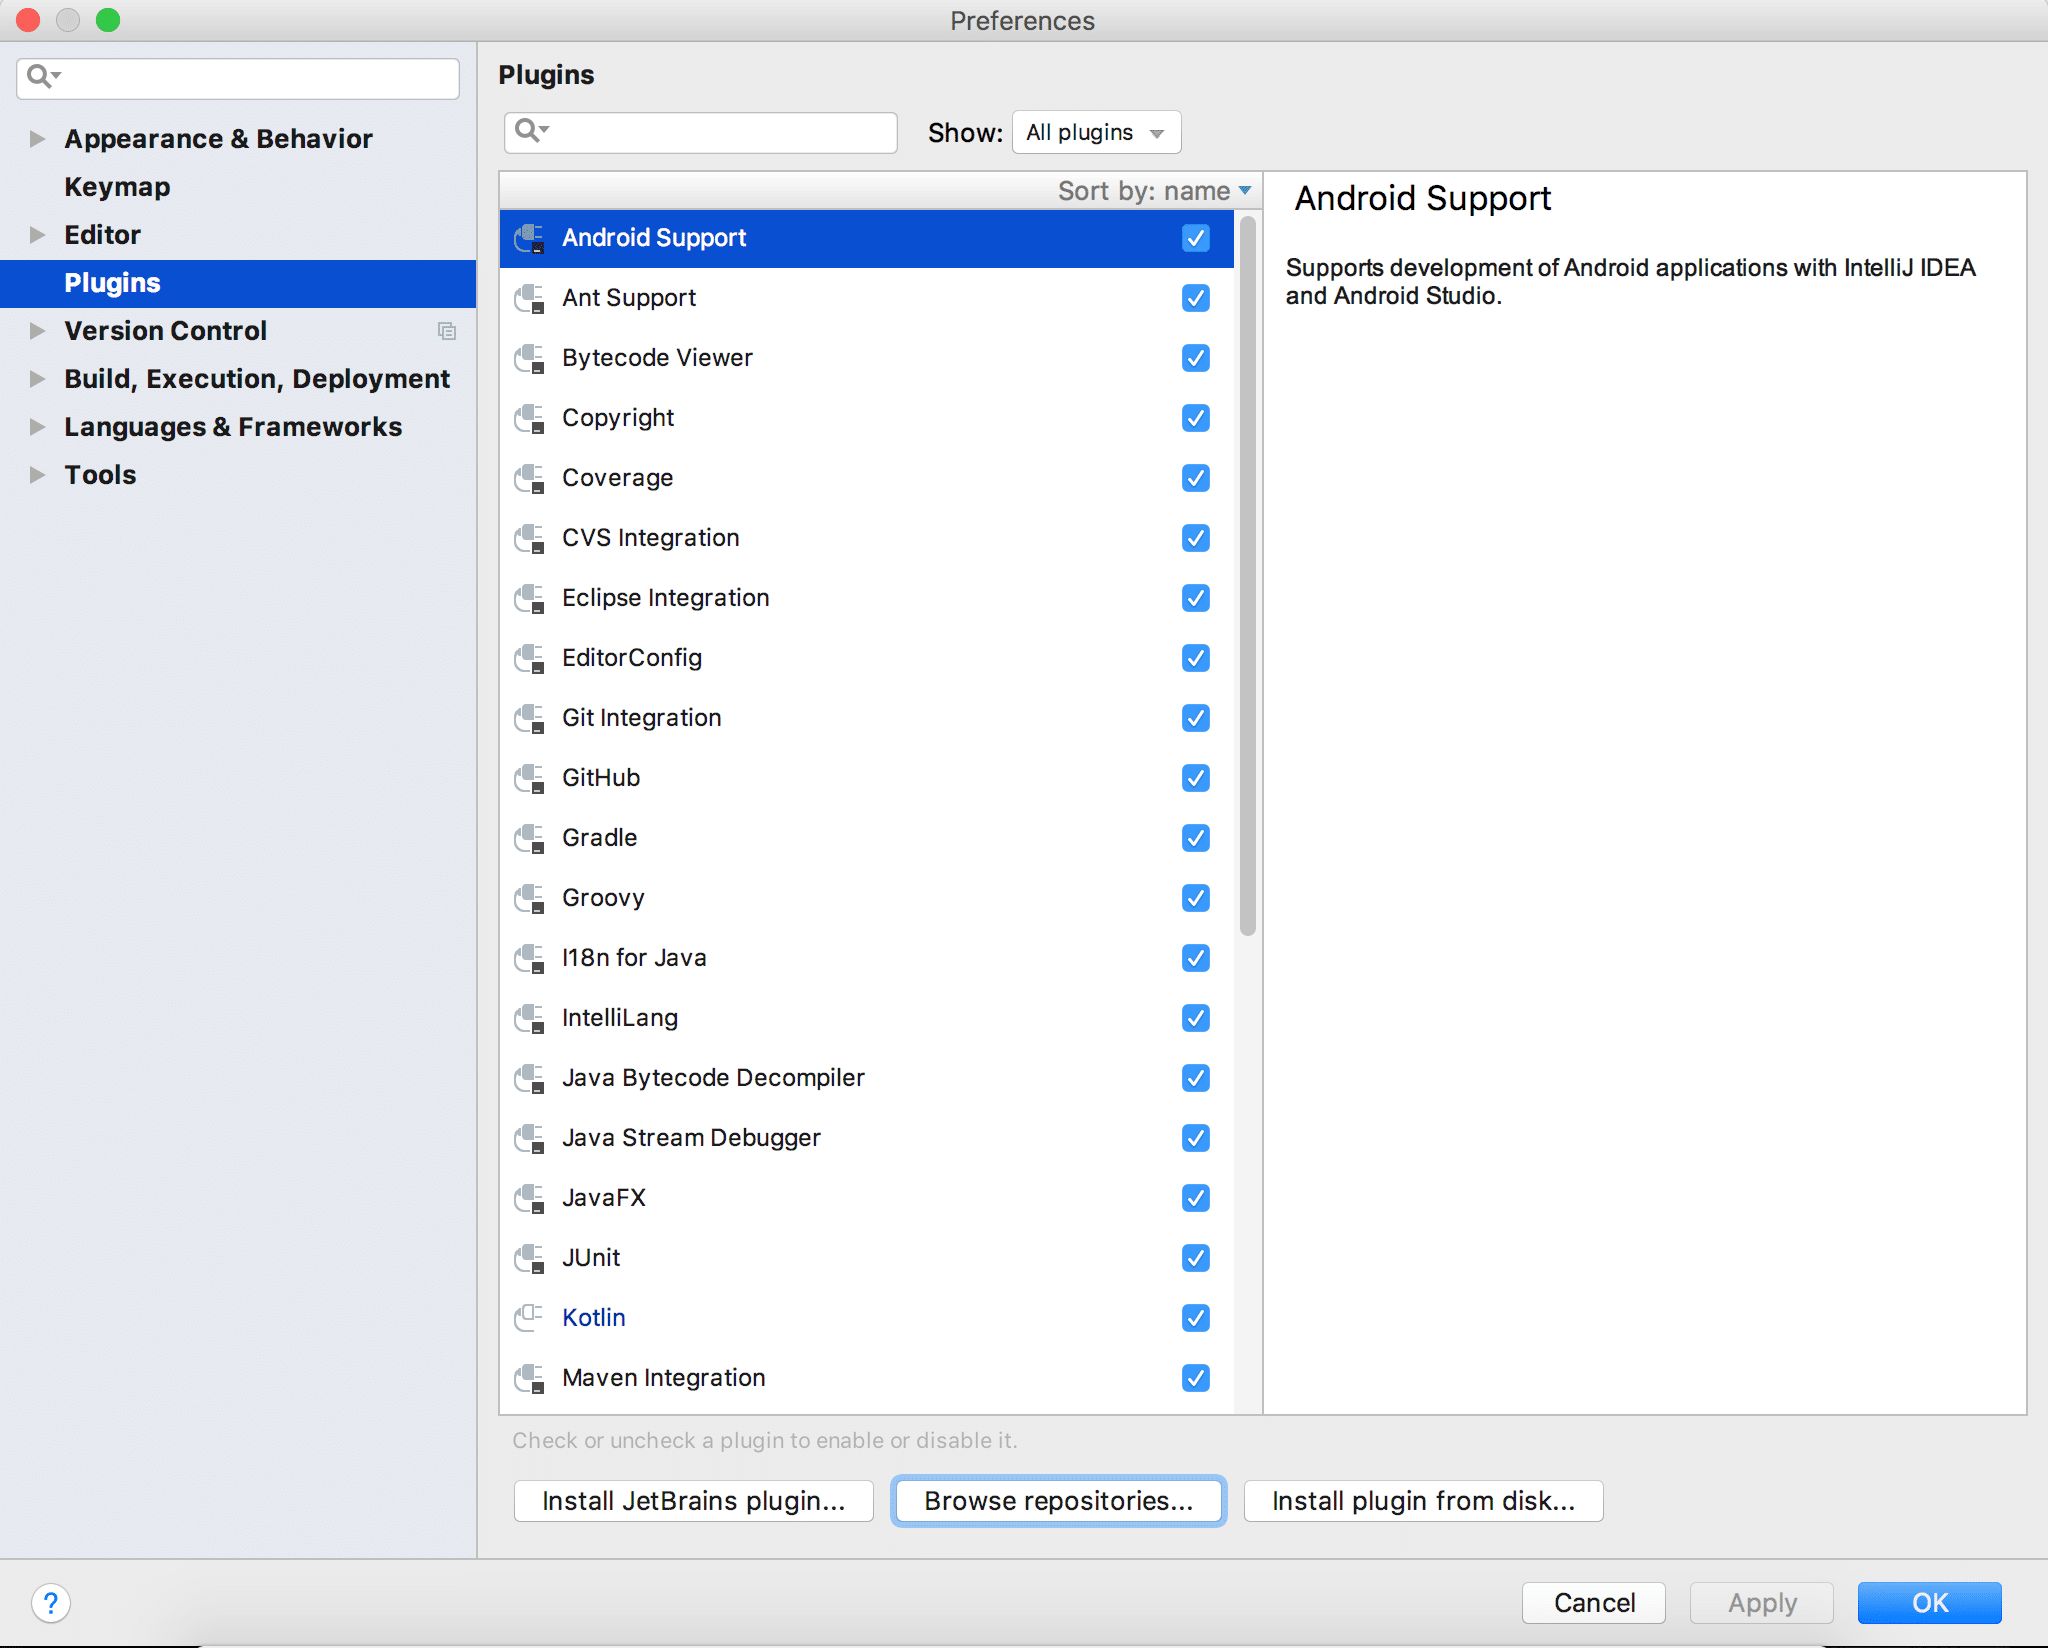
Move to the IntelliJ Idea project and open Preferences.
Our goal is to execute a single test case (sampleTestCase) written in IOSTestCase.java on 3 iOS Simulators (iPhone 7, iPhone 8, and iPhone X) in parallel.
In the parallelization phase, you can run test cases in parallel, but you’ll need to use attributes along with the tag.
To reach our goal, we need to execute test cases from IOSTestCases.java on 3 iOS simulators in parallel. Below is the testng.xml file we can use:
<?xml version="1.0" encoding="UTF-8"?>
<!DOCTYPE suite SYSTEM "https://testng.org/testng-1.0.dtd">
<suite name="All Test Suite" parallel="tests" thread-count="3">
<test name="test1">
<parameter name="wda" value="8100"/>
<parameter name="deviceName" value="iPhone 7"/>
<parameter name="port" value="4725"/>
<classes>
<class name="testcases.IOSTestCases"/>
</classes>
</test>
<test name="test2">
<parameter name="wda" value="8200"/>
<parameter name="deviceName" value="iPhone 8"/>
<parameter name="port" value="4726"/>
<classes>
<class name="testcases.IOSTestCases"/>
</classes>
</test>
<test name="test3">
<parameter name="wda" value="8300"/>
<parameter name="deviceName" value="iPhone X"/>
<parameter name="port" value="4727"/>
<classes>
<class name="testcases.IOSTestCases"/>
</classes>
</test>
</suite>
After adding this code to testng.xml, right-click on it and select the Run option. The 3 iOS Simulators will open and execute test cases in parallel. Great!
This example is just one possibility for achieving parallelization. There are many possibilities, and you can also create your own.
Remember, the best mobile app testing strategy includes a mix of simulators and emulators for early testing and real devices for final validation across a mix of devices and conditions. Although it can be more costly to set up and maintain in-house device labs, real devices provide the most realistic testing environment to accurately replicate the hardware, software, and user interactions that end-users will experience.
Use this example to test on real devices, and pass UDID as a 4th parameter:
Let’s say we have two real iOS Devices connected to a Mac host, and we want to run the test cases on them in parallel. The table below provides the device capability and port information.
| No. | Appium Server Port | Real Device Name | UDID | WDA Local Port |
| 1 | 4725 | John’s iPhone | 2b6f0cc904d137be2e1730235f5664094b831186 | 8100 |
| 2 | 4726 | iPhone | d137be2e12b6f0cc90473031186235f5664094b8 | 8200 |
| 3 | 4727 | iPhone X | 137b30235f5664094b831186e22b6f0cc904de17 | 8300 |
IOSTestCases.java and testng.xml will look like below.
IOSTestCases.java
@Parameters({"wda", "udid", "deviceName", "port"})
@BeforeTest
public void setUp(long wda, String udid, String deviceName, String port){
AppiumDriverLocalService service = new AppiumServiceBuilder().usingPort(Integer.valueOf(port)).build();
service.start();
DesiredCapabilities dc = new DesiredCapabilities();
dc.setCapability(IOSMobileCapabilityType.WDA_LOCAL_PORT, wda);
dc.setCapability(MobileCapabilityType.UDID, udid);
dc.setCapability(MobileCapabilityType.DEVICE_NAME, deviceName);
….
….
}
Testng.xml
<?xml version="1.0" encoding="UTF-8"?>
<!DOCTYPE suite SYSTEM "https://testng.org/testng-1.0.dtd">
<suite name="All Test Suite" parallel="tests" thread-count="2">
<test name="test1">
<parameter name="wda" value="8100"/>
<parameter name="udid" value="2b6f0cc904d137be2e1730235f5664094b831186"/>
<parameter name="deviceName" value="John’s iPhone"/>
<parameter name="port" value="4725"/>
<classes>
<class name="testcases.IOSTestCases"/>
</classes>
</test>
<test name="test2">
<parameter name="wda" value="8200"/>
<parameter name="udid" value="d137be2e12b6f0cc90473031186235f5664094b8"/>
<parameter name="deviceName" value="iPhone"/>
<parameter name="port" value="4726"/>
<classes>
<class name="testcases.IOSTestCases"/>
</classes>
</test>
<test name="test3">
<parameter name="wda" value="8300"/>
<parameter name="udid" value="137b30235f5664094b831186e22b6f0cc904de17"/>
<parameter name="deviceName" value="iPhone X"/>
<parameter name="port" value="4727"/>
<classes>
<class name="testcases.IOSTestCases"/>
</classes>
</test>
</suite>
Everything else remains consistent.
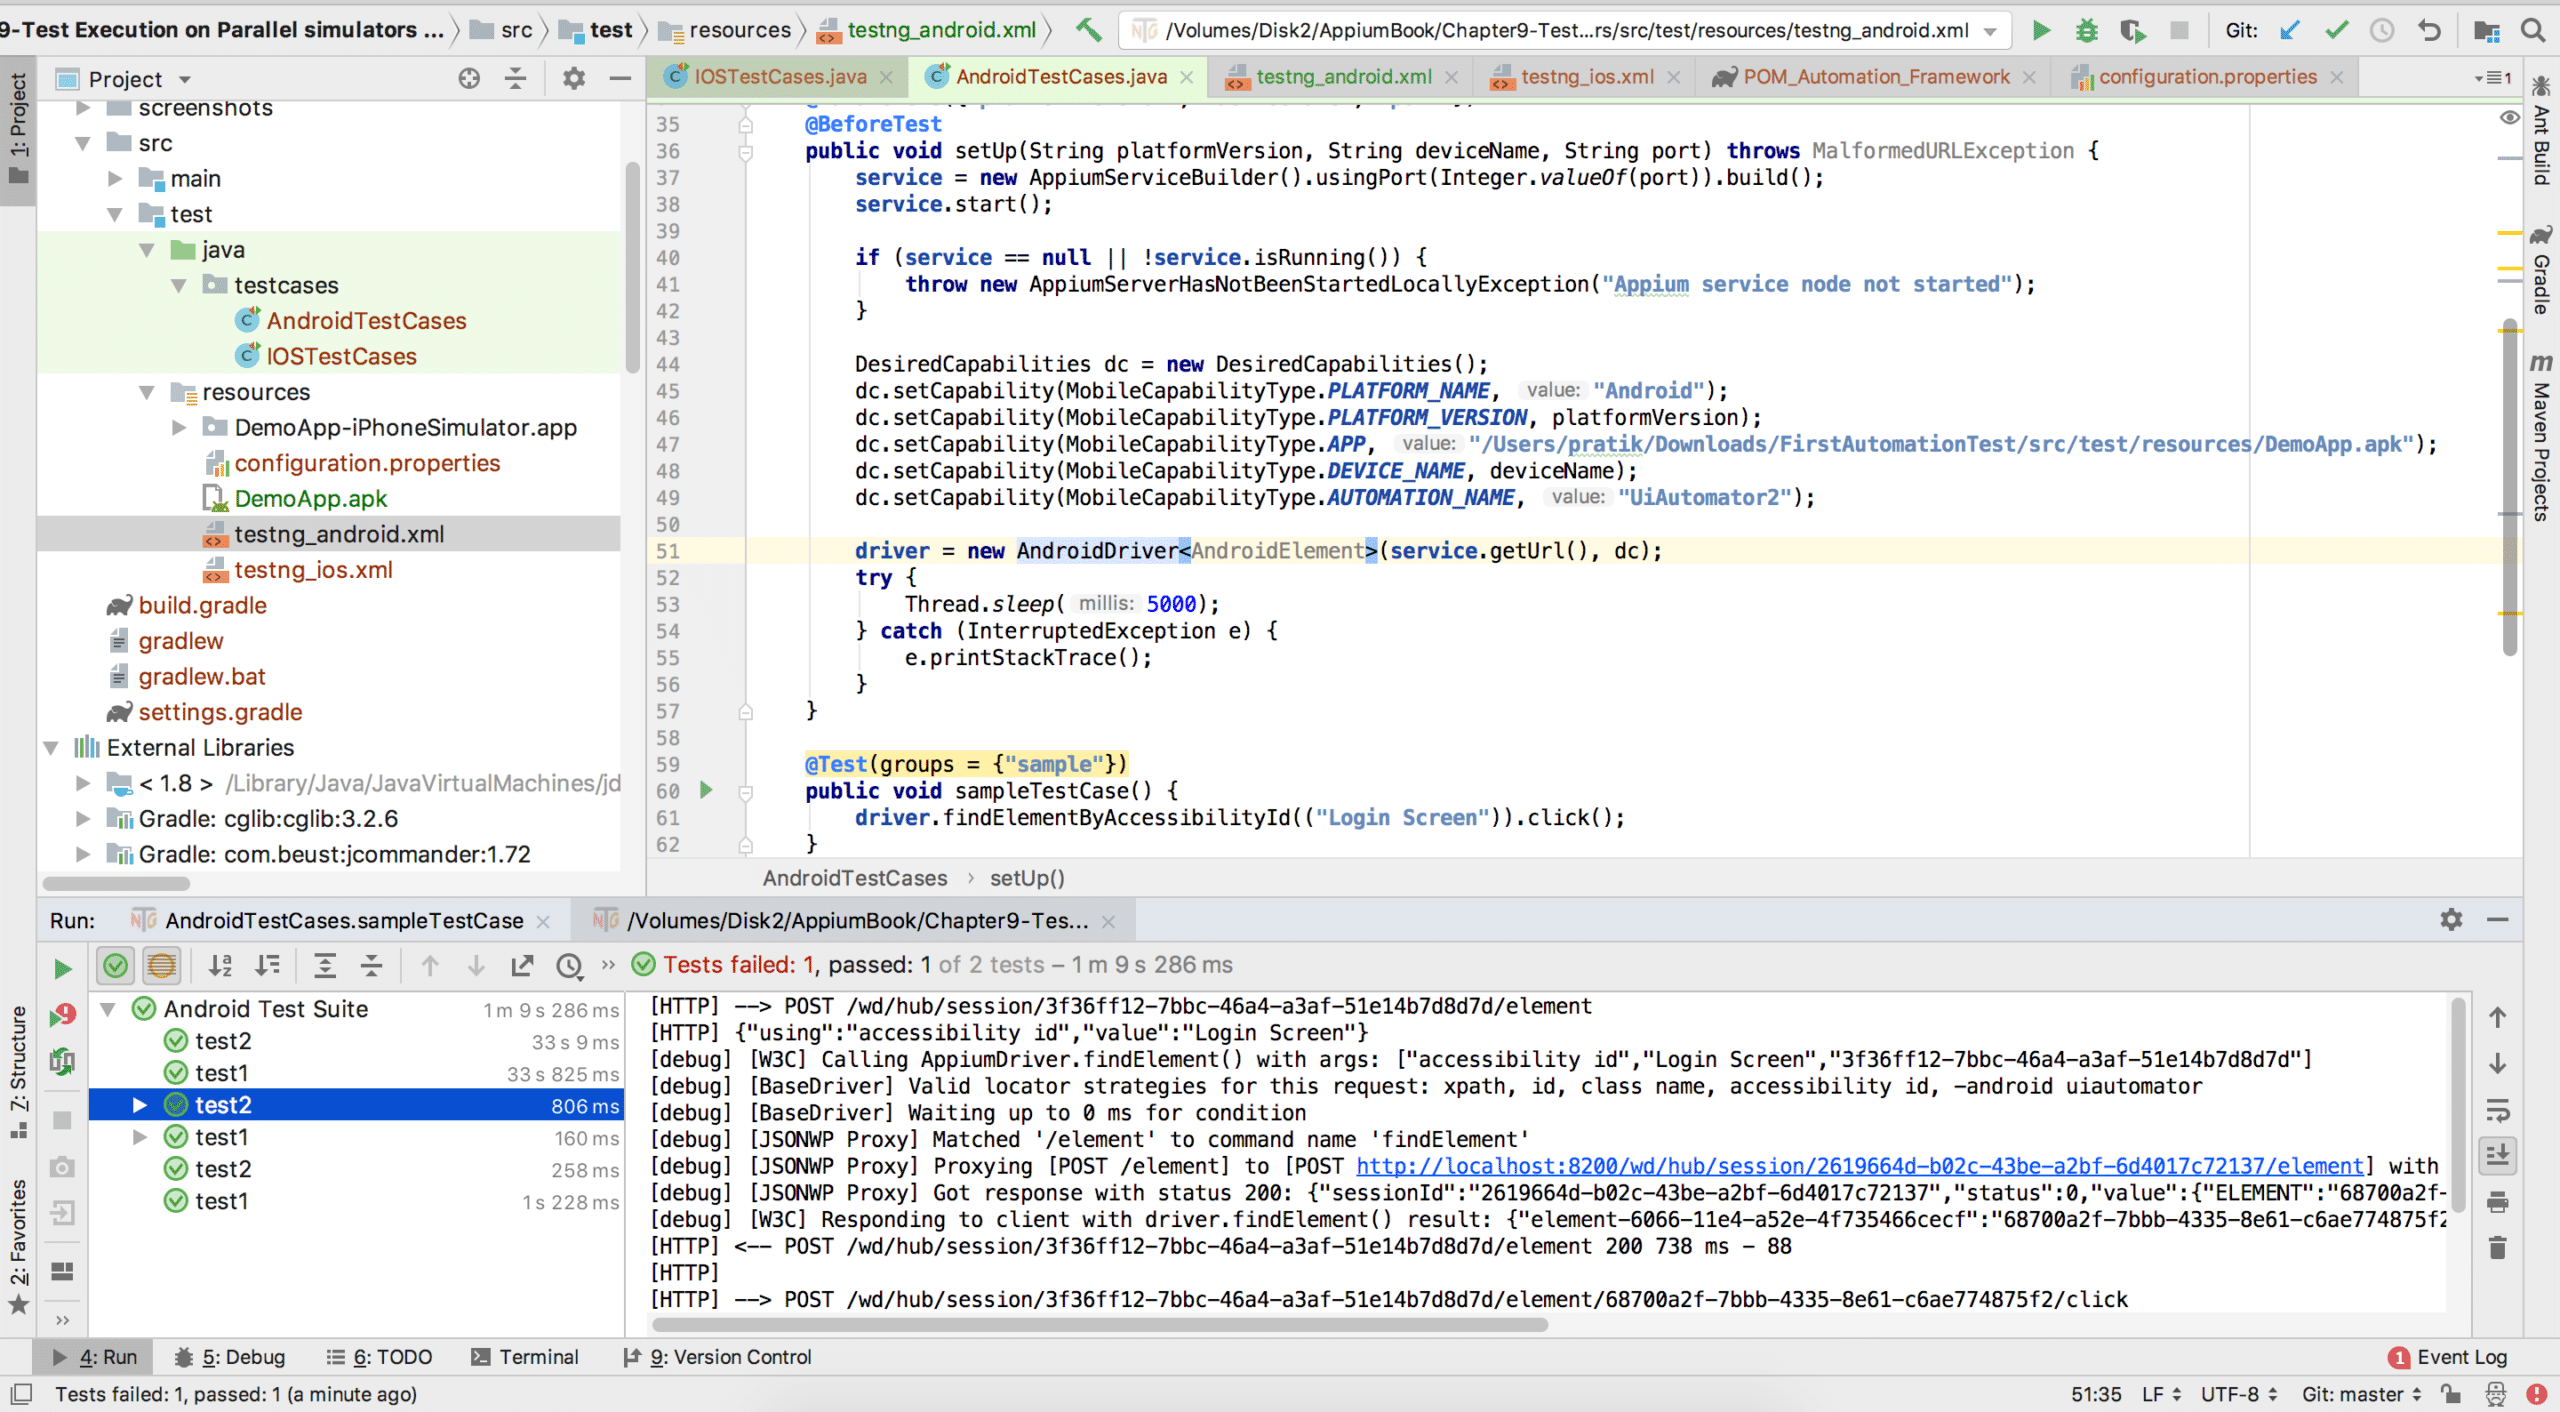
You’ll need to change the device name in testng.xml. The connected real device names can be obtained using Android device bridge, specifically $ adb devices.
Testng.xml
<?xml version="1.0" encoding="UTF-8"?>
<!DOCTYPE suite SYSTEM "https://testng.org/testng-1.0.dtd">
<suite name="Android Test Suite" parallel="tests" thread-count="2">
<test name="test1">
<parameter name="platformVersion" value="7.0"/>
<parameter name="deviceName" value="B6AUTSZDYPSOZD7S"/>
<parameter name="port" value="4739"/>
<classes>
<class name="testcases.AndroidTestCases"/>
</classes>
</test>
<test name="test2">
<parameter name="platformVersion" value="8.0"/>
<parameter name="deviceName" value="c4e3f3cd"/>
<parameter name="port" value="4740"/>
<classes>
<class name="testcases.AndroidTestCases"/>
</classes>
</test>
</suite>
You can also find an example on our GitHub page.
Specify the desired capabilities (e.g., device type, OS version) for each parallel session in the test configuration. You can leverage and modify the code above so it is reflective of which devices- emulators, simulators, or real devices- you want to run your test cases across and in parallel.
So far in this tutorial, we have executed against local environments: either emulators, simulators, or real devices connected to a local machine. Cloud services, like Kobiton, offer a cloud environment in which to connect and execute test cases resulting in faster execution through parallel testing, increased test coverage across a broad range of real devices and OS versions, scalability, and secure remote access.
Kobiton's parallel testing capabilities allow for seamless integration with widely used testing frameworks, such as Appium, TestNG, and others. Not only does Kobiton offer its own Appium server, called XIUM that can run your scripts over 3x faster than a traditional Appium server, but also makes integration super easy. So, you can run your tests in parallel even FASTER! All you need to do is re-define the Appium server URL to the Kobiton server URL, and define real devices via desired capabilities for each parallel test case per usual. A reminder that Kobiton has an extensive GitHub repository with samples, including setting up parallelization, to help you get started once you are familiar with local executions.
Appium parallel test automation is an essential strategy in the current mobile app testing framework. By allowing simultaneous execution of multiple tests across different devices and platforms, it significantly reduces the time required for thorough testing and boosts development and testing efficiency. This method helps in the early detection of defects in functional testing, thereby enhancing the application's overall quality. Learning to implement parallel testing for mobile apps can be achieved at every stage of the software development life cycle, leveraging inexpensive emulators and simulators early in the cycle, as well as end-user testing on real devices to make sure all functionality is tested.
This tutorial on Appium using TestNG provided you with some basics on parallel execution. But remember, there are many ways to achieve parallelization using available, open-source frameworks, such as test.ng along with real-device cloud providers, such as Kobiton. By using your custom logic, you can execute tests for both iOS and Android across various OS versions, setting you up for success in keeping up with the fast-paced world that is mobile application development and testing.