
Mar 25, 2021
Integrating Appium Tests into Your CI/CD Process using Jenkins

Adam Creamer
Read More
Electron is an open-source framework that is developed and maintained by GitHub. It offers a unified platform for building cross-platform desktop applications that support major operating systems like Windows, Mac, and Linux. Electron achieves this by combining Chromium and Node.js into a single runtime and packaging applications to run across multiple platforms. The Electron framework allows developers to build and deploy applications rapidly using their familiar programming languages such as JavaScript, HTML, and CSS.
If you’re interested in learning about cross-platform testing framework, contact Kobiton today!
Vue.js is a progressive JavaScript framework designed for building user interfaces. The main goal of Vue.js is to provide a simple, robust, and highly extensible framework focused on delivering a great user experience. The core focus of Vue.js is the view layer of the application which is the frontend. Vue.js is highly capable of acting as a standalone framework or can be easily integrated with other libraries or existing projects.
The purpose of this article is to combine Electron with VueJS to create a cross-platform desktop application. It will enable users to leverage the strengths of the Vue.js framework within the Electron application.
You can install the Electron framework in your development environment using the node package manager as shown below.
| npm install -D electron@latest |
If you need to install Electron globally, use the following command.
| npm install electron -g |
The basic structure of an Electron application consists of three main components.
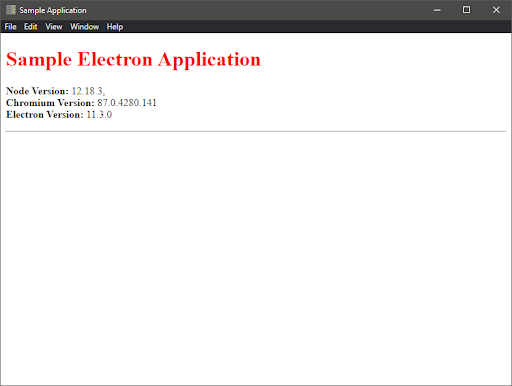
Let’s create a simple application to display the details of the development environment, as shown below.
main.js
const { app, BrowserWindow } = require('electron')
 function createWindow () {
 const win = new BrowserWindow({
 icon:'img\\icon.png',
  width: 800,
 height: 600,
  webPreferences: {
 nodeIntegration: true
 }
 })
 win.loadFile('index.html')
 }
 app.whenReady().then(createWindow)
 app.on('window-all-closed', () => {
 if (process.platform !== 'darwin') {
 app.quit()
 }
 })
 app.on('activate', () => {
 if (BrowserWindow.getAllWindows().length === 0) {
 createWindow()
 }
 })
index.html
<!DOCTYPE html>
<html>
<head>
<meta charset=”UTF-8″>
<title>Sample Application</title>
<meta http-equiv=”Content-Security-Policy” content=”script-src ‘self’ ‘unsafe-inline’;” />
</head>
<body style=”background: white;”>
<h1 style=”color: red”>Sample Electron Application</h1>
<p>
<b>Node Version: </b><script>document.write(process.versions.node)</script>,</br>
<b>Chromium Version: </b><script>document.write(process.versions.chrome)</script></br>
<b>Electron Version: </b><script>document.write(process.versions.electron)</script></br>
</p>
<hr>
</body>
package.json
{
"name": "sample-electron-application",
"version": "0.0.1",
"author": "Sample Author",
"description": "Sample Electron Application",
"main": "main.js",
"scripts": {
"start": "electron ."
},
"devDependencies": {
"electron": "^11.3.0"
}
You can run the above application using the run command as follows:
| npm run |
RESULT
To integrate VueJS with Electron, you can use the Vue CLI Plugin Electron Builder. This plugin enables VueJS based applications to work as an electron application. Developers can easily convert web applications to desktop applications by extending support for desktop applications with minimal effort. Using Electron means that the desktop application is platform-agnostic, supporting Windows, Mac, and Linux.
First, you need to install the Vue CLI Plugin, and it can be done using the following command.
| npm install -g @vue/cli |
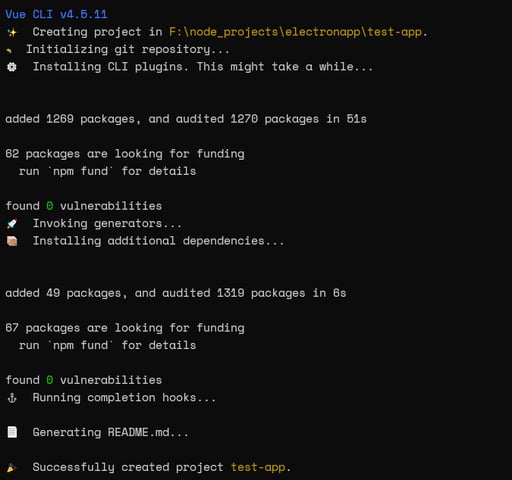
Next, you have to create the application using the Vue CLI. To do that, use the “vue create” command with the application name. It will provide you with an interface to select the framework version, install additional plugins, and automatically create the application structure. Select the required options there and initialize your project using the below command.
| vue create test-app |
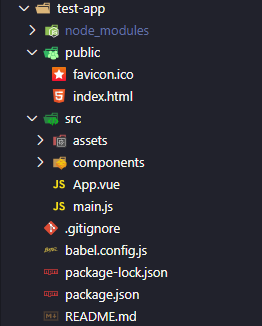
RESULT
The above process will create the following application structure. You can notice that it is similar to a regular Vue-based web application with assets, components folders, App.vue and main.js files.
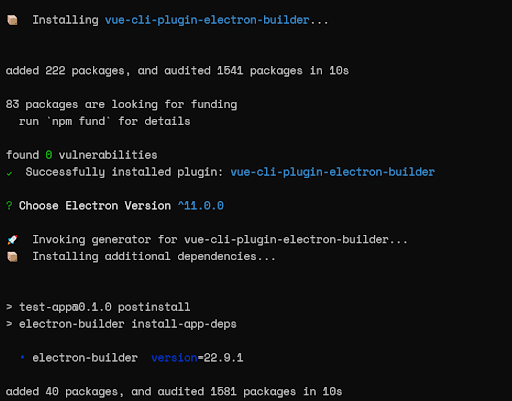
After that, navigate to the application folder (test-app) and install the Vue CLI Plugin Electron Builder using the below command. It will create a background.js file in the src directory and install the necessary components. The background.js file is the entry point for Electron to enter the Vue.js application. Furthermore, it controls all the settings for the desktop application.
| vue add electron-builder |
RESULT
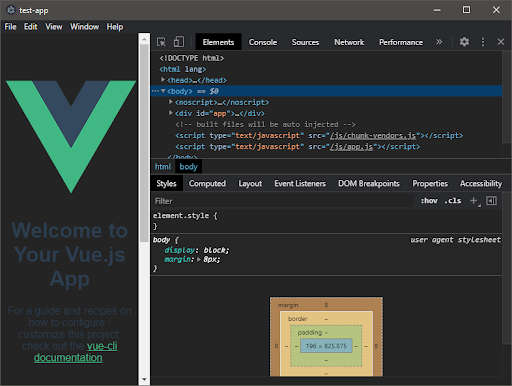
Once the project setup is completed, you have to start the development server and serve the application. The following command will compile your application and serve the test-app.
| npm run electron:serve |
Since you are using a development server, the application will be started with the Developer Tools enabled by default.
RESULT
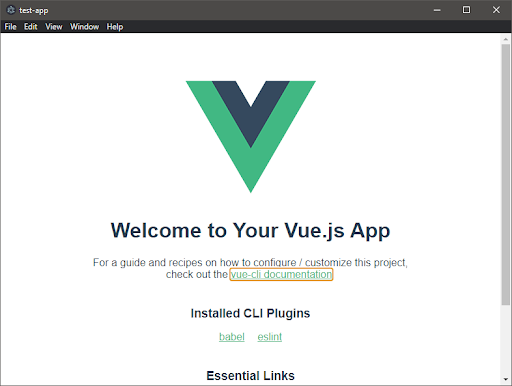
If you close the developer tools, the application will be displayed as follows;
In this section, you will be developing a sample application using VueJS. Let’s create something fun. Using the Bored API, you can create an application that suggests random things to do.
The axios HTTP client will be used to interact with the API, and you can install it via npm as shown below.
| npm install axios |
The application will consist of two main components as “GetInformation.vue” to obtain the information via the Bored API and the “GetResults.vue” to display the gathered information.
GetInformation.vue
<template>
<div>
<button class=”find” @click=”getSomething()”>Find Something</button>
<GetResult
:activity=”activity”
:type=”type”
:participants=”participants”
:price=”price”
:accessibility=”accessibility”
/>
</div>
</template><script>
import axios from ‘axios’
import GetResult from ‘./GetResult.vue’;
export default {
name: ‘GetInformation’,
components: {
GetResult
},
data () {
return {
activity: ”,
type: ”,
participants: 0,
price: 0,
accessibility: 0,
apiUrl: ‘https://www.boredapi.com/api/activity/’
}
},
created () {
this.getSomething()
},
methods: {
async getSomething () {
const response = await axios.get(this.apiUrl);
this.activity = response.data.activity;
this.type = response.data.type;
this.participants = response.data.participants;
this.price = response.data.price;
this.accessibility = response.data.accessibility;
}
}}
</script>
<!– Add “scoped” attribute to limit CSS to this component only –>
<style scoped>
.find {
padding: 15px 25px;
font-size: 24px;
text-align: center;
cursor: pointer;
outline: none;
color: #fff;
background-color: #4CAF50;
border: none;
}
.find:hover {background-color: #ff2600}
</style>
GetResults.vue
<template>
<div align=”left”>
<table>
<tbody>
<tr>
<td class=”title”>Activity:</td><td></td>
</tr>
<tr>
<td class=”title”>Type:</td><td></td>
</tr>
<tr>
<td class=”title”>Participants:</td><td></td>
</tr>
<tr>
<td class=”title”>Price:</td><td></td>
</tr>
<tr>
<td class=”title”>Accessibility:</td><td></td>
</tr>
</tbody>
</table>
</div>
</template>
<script>
export default {
name: ‘GetResult’,
props: {
activity: String,
type: String,
participants: Number,
price: Number,
accessibility: Number
}
}
</script>
<style scoped>
div {
margin-left: 20%;
}
table {
color:black;
margin-top: 20px;
}
.title {
font-weight: bold;
}
</style>
Next, you have to point the application to the relevant entry points and set the configurations.
App.vue – Root of the Application defined in Vue Component file format.
<template>
<div class=”app”>
<img class=”logo-img” alt=”Thinking” src=”./assets/thinking.jpg” >
<h1>Bored? Let’s Find Something to Do</h1>
<GetInformation/>
</div>
</template>
<script>
import GetInformation from ‘./components/GetInformation.vue’
export default {
name: ‘App’,
components: {
GetInformation
}
}
</script>
<style scoped>
.app {
font-family: Avenir, Helvetica, Arial, sans-serif;
-webkit-font-smoothing: antialiased;
-moz-osx-font-smoothing: grayscale;
text-align: center;
color: #2c3e50;
margin-top: 60px;
}
.logo-img {
height: 200px;
width: 200px;
}
h1 {
font-family: Candara
}
</style>
main.js – Initialize the root component (App.vue) and manage setting up plugins and third-party components.
import Vue from 'vue'
import App from './App.vue'
Vue.config.productionTip = false
new Vue({
render: h => h(App),
}).$mount('#app')
Folder Structure of the Application
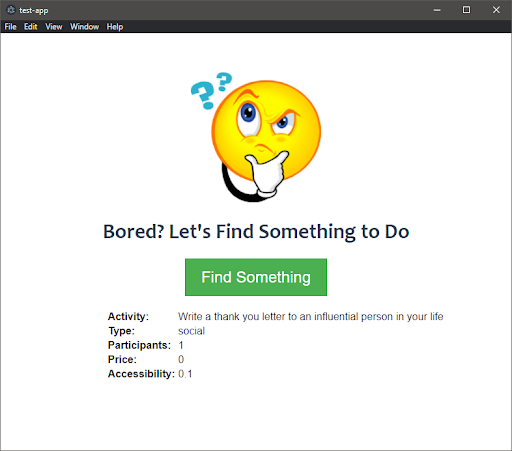
This results in a simple application that will provide you with random activity to do with additional information like activity type, no of participants required, price, and the accessibility of the activity. When you click on the “Find Something” button, it will provide you with a new activity.
Sample Application
As shown in the above examples, you can see that the structure of a basic Electron application is much simpler compared to building it with VueJS. In simpler terms, that is because you are creating a Vue application and then wrapping it with Electron to get converted into a desktop application.
When using VueJS, you need to adhere to the normal Vue application structure with the additional components added by Electron. VueJS enables users to fully utilize its UI-building powers to build interactive user interfaces and provide a great user experience. Additionally, VueJS allows developers to reduce the development time significantly by using its components.
Combining these two excellent frameworks offers users the best of both worlds. Moreover, this combination creates a perfect platform for building cross-platform desktop applications without having to worry about multiple codebases or dependencies.
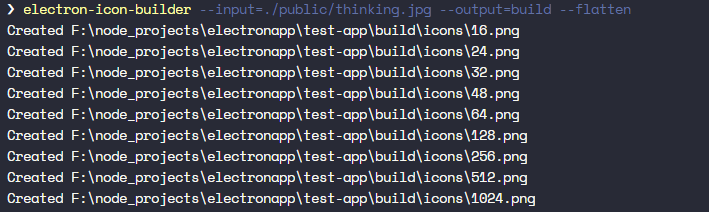
You can create a custom icon for the application using the electron-icon-builder. For that, simply install the package and run the following command.
| npm install -g electron-icon-builder |
It will create an icon using thinking.jpg in the public folder. The following command will generate icons with the build folder, and incase if the build folder is unavailable, it will create the required folders.
| electron-icon-builder –input=./public/thinking.jpg –output=build –flatten |
RESULT
Next, you need to change the background.js file to indicate the application icon and change the file as shown below. Point to the image in the public folder to generate the application icon in the title bar as below.
background.js
// Import the path Library - Add to import section
import path from 'path'
// Change the createWindow function
async function createWindow() {
const win = new BrowserWindow({
width: 800,
height: 700,
// Add the Icon property
icon: path.join(__static, 'thinking.jpg'),
webPreferences: {
nodeIntegration: process.env.ELECTRON_NODE_INTEGRATION
}
})To change the Application title, you can simply add the title property to the BrowserWindow in the background.js file. Let’s name our app as “Boring App” as shown below.
background.js
async function createWindow() {
// Change the createWindow function
const win = new BrowserWindow({
width: 800,
height: 700,
icon: path.join(__static, 'thinking.jpg'),
// Add the application title
title: 'Boring App',
webPreferences: {
nodeIntegration: process.env.ELECTRON_NODE_INTEGRATION
To prevent the application from defaulting to the title defined in index.html, you can add the following function within the createWindow code block.
win.on("page-title-updated", (event) => event.preventDefault());When that page title update event is fired, it will prevent the title from updating to the title in the index.html file. Another possible name change is changing the product name. You can do that by creating a vue.config.js file and setting the productName value there as below . vue.config.js
module.exports = {
pluginOptions:
electronBuilder: {
builderOptions: {
productName: "Boring App",
},
},
},
};
Building the Application
Now you have created the application, configured a custom icon for it, and changed the application title. The next step is to build the application. It can be done by invoking the following build command.
| npm run electron:build |
RESULT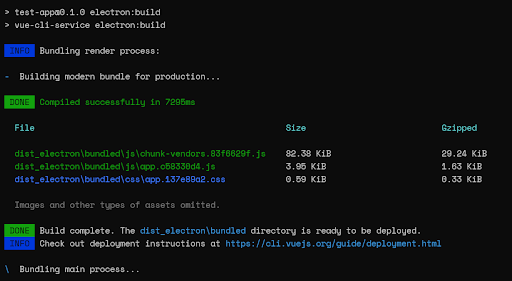
The default behavior of the build command is to target the development platform and architecture. In this instance, it is Windows. However, you can define the target platform and architecture as you wish. Refer to the electron-builder documentation to find a full list of available options for the build command.
Example: Build for both Windows and Linux
| npm run electron:build — –linux deb –win nsis |
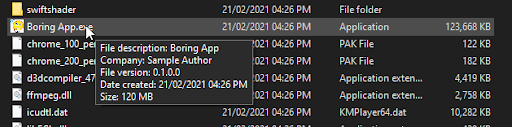
Once the build is completed, you can view the application without installing it from the dist_electron\win-unpacked folder.
Click on the “Boring App.exe,” and you can see that the custom icon and name you set earlier have been configured.
If you hover over the “Boring App.exe,” its file description shows that the productName configured in vue.config.js has also been applied to the application.
That’s it, and now you have successfully created a desktop application using VueJS and Electron.
In this article, you learned about Electron and VueJs and how to create a desktop application by leveraging both frameworks. On top of that, you could also gain proper knowledge on configuring and building the desktop application and the basic structure of the Vue.js application. This article can be used as the stepping stone for creating a cross-platform desktop application using Electron with VueJS.
Looking for an all-in-one testing framework?


