Your First Appium Test Case: IOS and Android

Sushma Kannedari
Welcome to the exciting world of test automation with Appium! In this blog post, we’ll guide you through writing your first test case using Appium 2.0. Whether you’re just starting or are an experienced developer, you’ll quickly appreciate the simplicity and power of Appium.
Appium is a powerful tool for automating tests across a variety of applications—native, hybrid, and web-based. One of its standout features is its OS-agnostic nature, allowing your Appium scripts to run seamlessly on any device or platform, whether it’s a real device, a simulator, or an emulator. This flexibility means you can execute your tests without being tied to a specific mobile OS or the application itself, making Appium a versatile choice for any automation strategy.
Under the hood, Appium serves as a wrapper that translates Selenium WebDriver commands into XCUITest for iOS and UiAutomator2 for Android. XCUITest and UiAutomator2 are testing frameworks specifically designed for Xcode and Android Studio, respectively. Additionally, Appium supports all the programming languages that Selenium does, including Java, C#, Python, Ruby, and JavaScript with Node.js, allowing you to choose the language that best fits your project’s needs.
For the examples that follow, we will be using Java, as Appium was originally developed in this language. There are many resources available online (download our free Appium eBook) to help you with both Appium and Java, making your learning journey smoother. While our examples will be demonstrated on a Mac, you can easily follow along on any supported operating system.
Note: The steps may seem a little daunting, especially when you want to write a simple test case. However, this is really a one-time effort. Once your environment is configured and you’re comfortable with concepts, such as dependency management, you’ll find that writing the Appium scripts is a relatively straightforward task. So stay with us through this section, and it will get easier, we promise.
We’ll begin by installing an IDE to create Java-based Appium scripts. You can choose between IntelliJ IDEA or Eclipse IDE (or any IDE you prefer), but we will be using IntelliJ IDEA for our examples.
To summarize, here’s what we’ll use to create our Appium script:
There are two primary goals for this chapter:
While Appium is responsible for driving and controlling the underlying mobile application for automation, you’ll still need a testing framework to implement your actual tests. For this purpose, we will be using the TestNG framework. Let’s dive in!
To set up IntelliJ IDEA, follow these steps:
You can download and install IntelliJ IDEA Community Edition from here. Install it by dragging and dropping:
Figure-1: Installation of IntelliJ IDEA Community Edition.
If you are installing IntelliJ Idea for the first time, then you need to select the “ Skip import settings” option.
Figure-2: Complete the Installation.
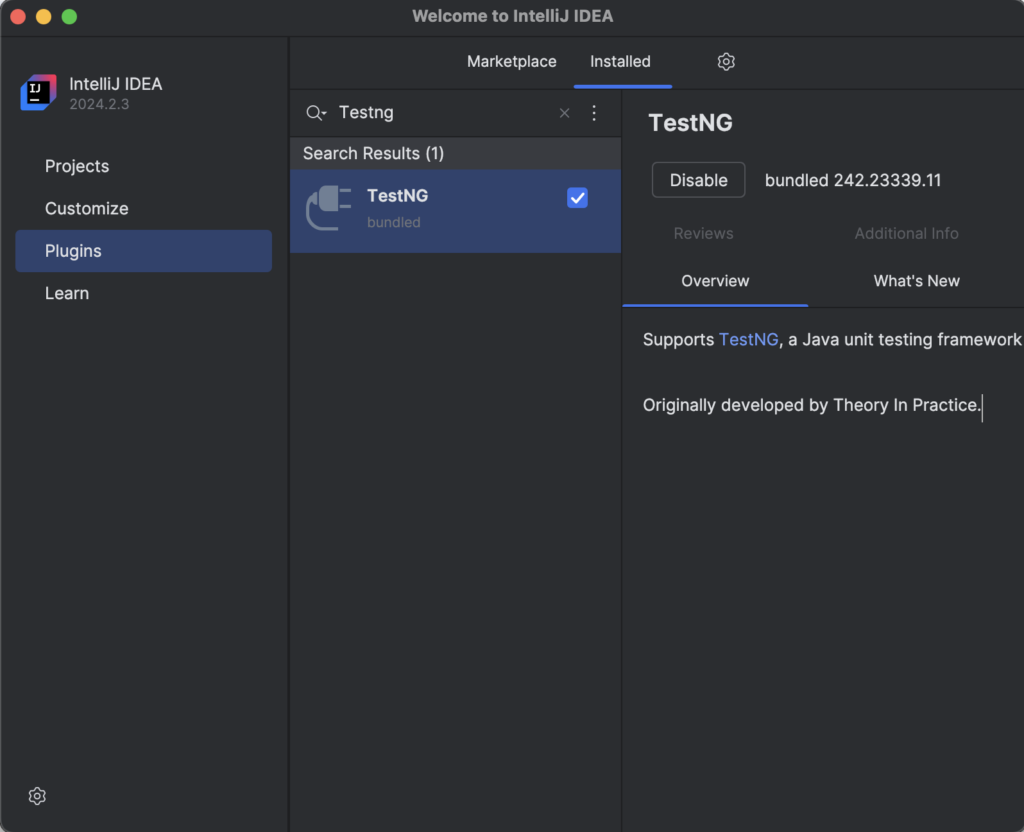
By default the TestNG plugin is installed in IntelliJ IDEA. You can check it in several ways but the best way is to check it in Plugins.
Open IntelliJ Idea and click on Plugins.
Figure-3: Go to IntelliJ IDEA Plugins.
Figure-4: Testng installation on Marketplace.
Select the “Installed” tab and search Testng. It should be installed by default. Select “Installed and ”type ‘testng’ and search it, if it is installed properly you can see the Right tick icon right next to ‘TestNg’ text. And if it is not installed you need to install it by clicking on Marketplace and Search for ‘testng’ > Install it.

Figure-5: Install Testng
Before we proceed, please ensure you have followed the Setting Up Appium Blog post and installed Appium correctly. Once you have Appium set up, we’ll focus on installing our development environment.
Check out the rest of our Appium Test Case series:
Your First Appium Test Case: Writing and Running
Your First Appium Test Case: IOS and Android
To learn more, download our free eBook, Make the Move to Automation With Appium.
