Your First Appium Test Case: IOS and Android

Sushma Kannedari
Welcome to Part 2 of our comprehensive Appium tutorial series! In this post, titled Writing and Running Your First Test Case in Appium, we’ll show you how to create, execute, and troubleshoot a basic test script for mobile automation testing. Following Part 1: Writing Your First Appium Test Case: Setting up the IDE, this guide will take you through essential steps to start running tests in Appium effectively. By the end, you’ll have a fully functional test case, ready for further expansion in Part 3, where we explore test cases for both Android and iOS. Perfect for beginners and those new to mobile test automation!
We will begin by creating a new project and then setting up an Automation script. Let’s dive right in!
For this project, we’ll be using IntelliJ IDEA, a widely popular integrated development environment (IDE) by JetBrains, known for its powerful tools that streamline coding, debugging, and testing.
Open IntelliJ IDEA and click onNew Project
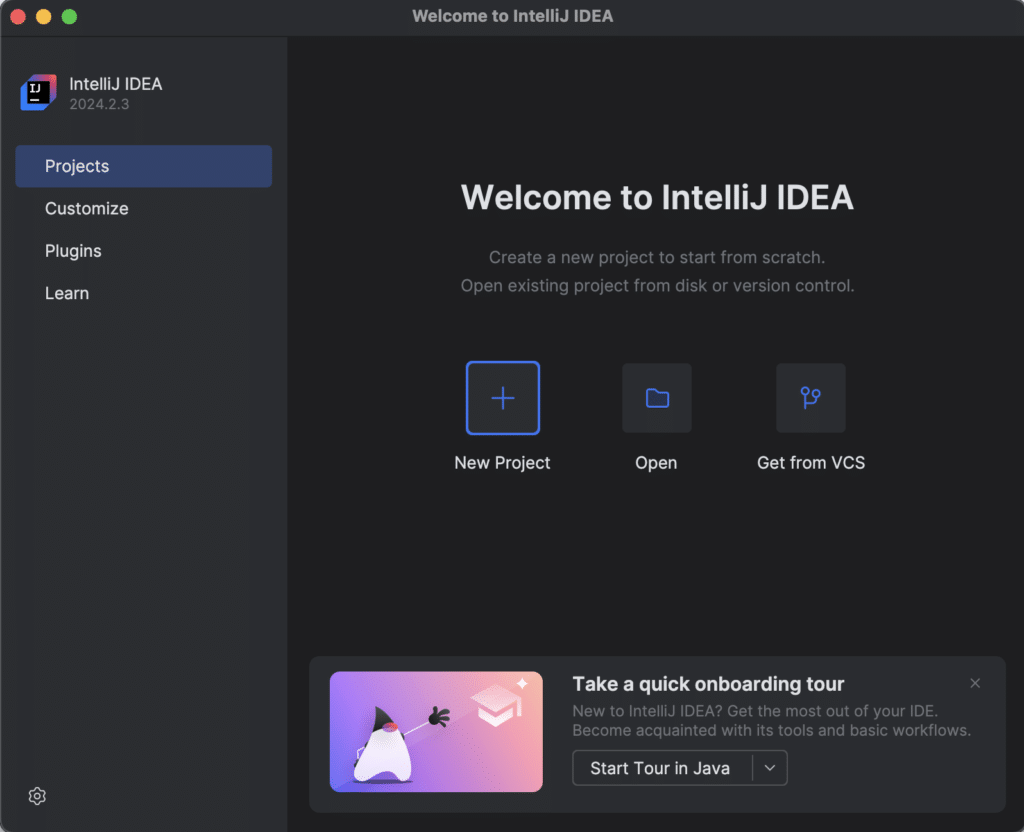
Now we need to configure the project settings, including the project type, Java version, and build tool. You can choose either Maven or Gradle; however, since Maven offers greater flexibility, we will use it for this tutorial. That said, if you prefer Gradle, you can absolutely use it as well—just keep in mind that you’ll need to add a few dependencies.
Let’s proceed with setting up the project using Maven!
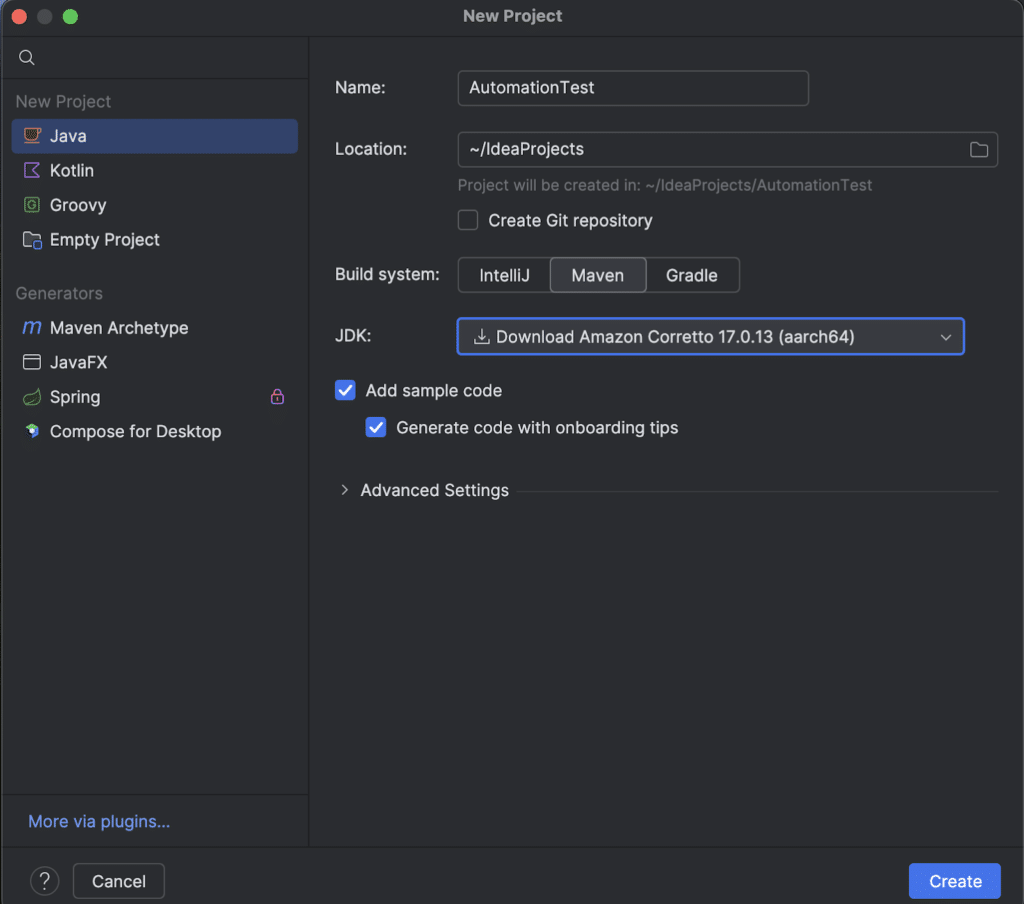
Give the proper ArtifactId(Project Name), JDK Version and Build system Confirm all the project details and click “Finish” the setup.
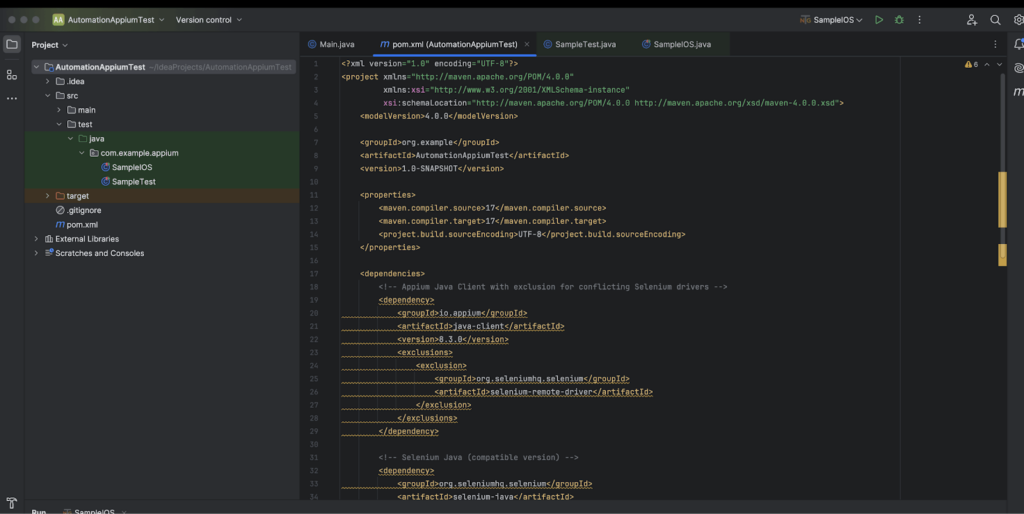
After the setup is complete, Maven will build the project. This process may take some time, especially the first time, as it downloads the necessary Maven .zip files. Once the synchronization is finished, you should see the project directory as shown in the image below.
Now that everything is set up, we’re ready to add the Appium dependencies and start coding your first automation test case!
Desired Capabilities are a fundamental aspect of Appium. They consist of a set of key-value pairs that are sent to the Appium server to specify the configuration for the automation session. These capabilities inform the server about the desired behavior and characteristics of the session you want to initiate.
There are numerous capabilities that can be used to modify the server’s behavior during automation. While we have a dedicated chapter that explores these in-depth, for the sake of getting our first test case up and running, we’ll use the following desired capabilities:
Android:
{

  "platformName": "Android",

  "deviceName": "9B151FFAZ004ZQ",

  "automationName": "UiAutomator2",

  "app": "path to apk"

}iOS:
{

  "platformName": "iOS",

  "automationName": "XCUITest",

  "deviceName": "iPhone 16 Plus",

  "platformVersion": "18.0",

  "app": "path to app",

  "bundleId": "replace this with your unique bundle ID",

  "noReset": true

}Now let’s understand these capabilities:
By setting these capabilities correctly, you ensure that your Appium session starts as intended and interacts with the right application.
The first step in any project setup is to download and link the necessary libraries/files, referred to as dependencies. Now that you have Maven and an understanding of desired capabilities, lets understand how Maven works:
Now, let’s proceed to add the required Appium dependencies for our project!
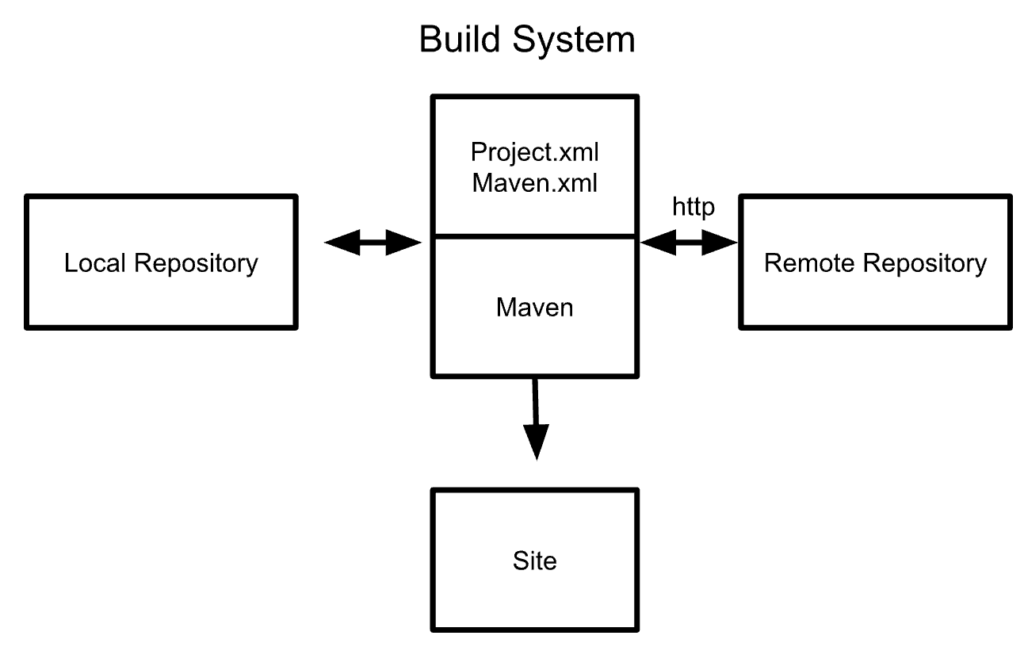
A typical example of a library in a Java project is the automation testing library, Selenium. To use Selenium in your project, you need to declare a specific version of this dependency in your pom.xml file.
Here’s how you can declare a compile-time dependency on the Selenium library:
pom.xml:
<!-- Selenium Java (compatible version) -->

<dependency>

   <groupId>org.seleniumhq.selenium</groupId>

   <artifactId>selenium-java</artifactId>

   <version>4.10.0</version>

</dependency>The above code snippet declares a compile-time dependency on the Selenium library (.JAR file). When you build the project, Maven will download the specified version of the Selenium library from Maven Central (the remote repository) and store it in your local Maven cache. This means that if you reference the same library with the same version in a different project, Maven will link to the library from the local cache, avoiding unnecessary downloads.
For our project, we need to add two dependencies:
Now, let’s open the pom.xml file and add the following dependencies:
<dependencies>
<!-- Appium Java Client with exclusion for conflicting Selenium drivers -->
<dependency>
<groupId>io.appium</groupId>
<artifactId>java-client</artifactId>
<version>8.3.0</version>
<exclusions>
<exclusion>
<groupId>org.seleniumhq.selenium</groupId>
<artifactId>selenium-remote-driver</artifactId>
</exclusion>
</exclusions>
</dependency>
<!-- Selenium Java (compatible version) -->

<dependency>

   <groupId>org.seleniumhq.selenium</groupId>

   <artifactId>selenium-java</artifactId>

   <version>4.10.0</version>

</dependency>
<!-- TestNG for testing framework -->
<dependency>
<groupId>org.testng</groupId>
<artifactId>testng</artifactId>
<version>7.7.0</version>
<scope>test</scope>
</dependency>
<!-- SLF4J Simple Logger to avoid SLF4J warnings -->
<dependency>
<groupId>org.slf4j</groupId>
<artifactId>slf4j-simple</artifactId>
<version>2.0.5</version>
</dependency>
</dependencies>
NOTE-1: Since we already have the TestNG plugin installed, we don’t strictly need to mention the TestNG dependency in the pom.xml file. However, to ensure that this project can be easily imported into other IDEs like Eclipse, and to allow for running through the command line, it’s good practice to include the dependency.
NOTE-2: We will be adding the Automation script under the src/test directory. To link the Appium and TestNG dependencies to that directory, we need to use the test scope for TestNG, which allows the dependencies to be accessible for tests without affecting the main application code.
After adding the dependencies to the pom.xml, Maven will build the project and download the specified libraries. Once the build is complete, you’ll be able to use Appium and TestNG classes within the src/test directory.
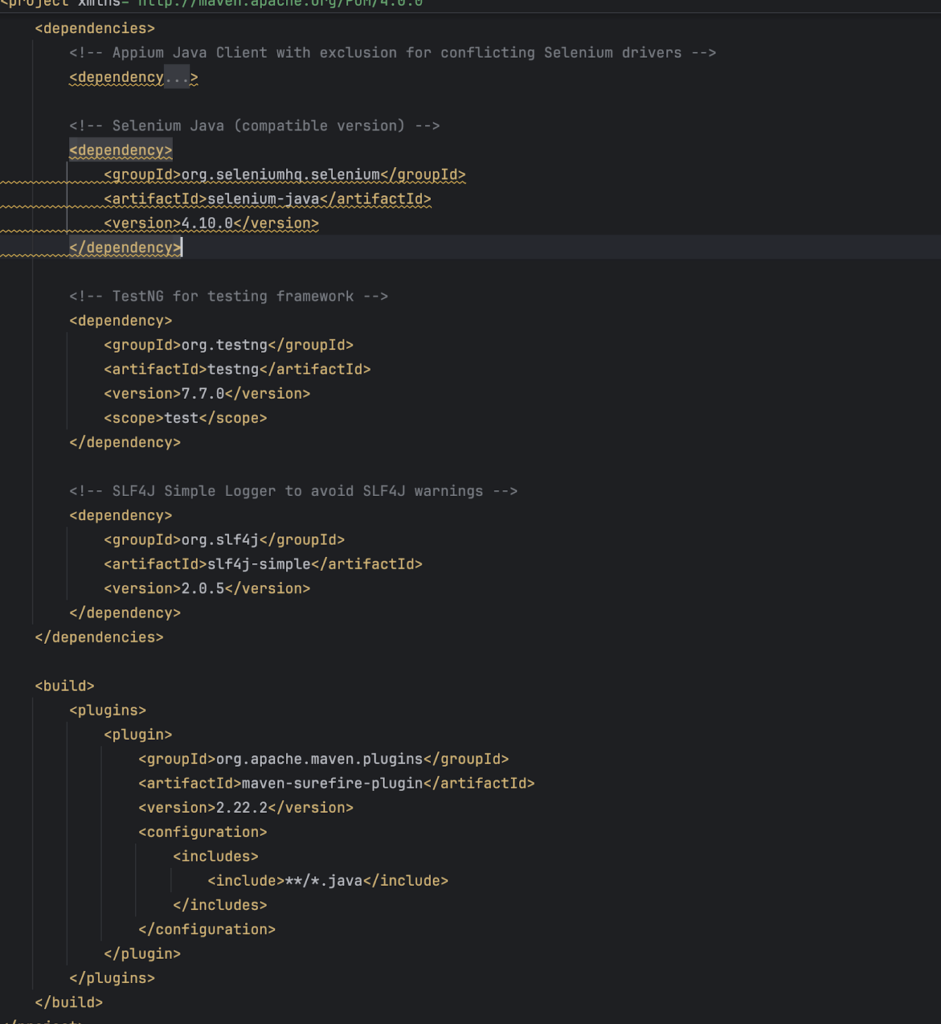
TestNG provides a powerful set of annotations that help organize and manage your test execution flow. Here are some key annotations to be aware of:
In the code, the @BeforeTest annotation indicates that the method will be executed before any tests in the <test> tag, and it runs only once. This makes it standard practice to place the AndroidDriver initialization code within this method. By doing so, the AndroidDriver object becomes accessible throughout the test execution, ensuring that it is ready to be used in the subsequent test methods.
As we wrap up this guide, you’re now well on your way to writing and running your first Appium test case. With your project set up and dependencies in place, you’re ready to dive into the world of mobile automation testing. In the next blog we will cover running your first test on IOS and Android Devices.
Check out the rest of our Appium Test Case series:
Your First Appium Test Case: Setting up the IDE
Your First Appium Test Case: IOS and Android
To learn more, download our free eBook, Make the Move to Automation With Appium.
