Learning the Accessibility Inspector and UIAutomatorViewer is a handy tool to extract the elements from Android and iOS Applications respectively. The reason why UiAutomatorViewer and Accessibility Inspector is fast is because it does not involves the application installation part. It just fetches the XML structure of the current screen on the device, no matter which application is open and displayed.
In the last article, we discussed the Appium Inspector tool and learned how we can extract the elements for any application. Appium Inspector is a great tool to extract elements from Android and iOS both. However, it can take some time to do so.
In this article, we will look into UiAutomatorViewer and Accessibility Inspector tools deeply.
1. UiAutomatorViewer:
UiAutomatorViewer is the Android SDK part and it’s packaged with it, so you don’t need to install it separately. It’s a tool like Appium Inspector, which lets you inspect the UI(XML Structure) of the application and gives you the attributes of UI element.
NOTE: Before using this tool, make sure SDK is properly downloaded and the PATH is set properly.
The first step to work with UiAutomatorViewer is to connect the Real (Physical) Android device with your computer (using USB cable).
Once you connect the device, you can find the device name using: $ adb devices
Figure-1: Android device is connected.
If your device is not connected properly, then you might get error: “No Android devices were detected by adb.
Figure-2: No Android device is connected error dialog
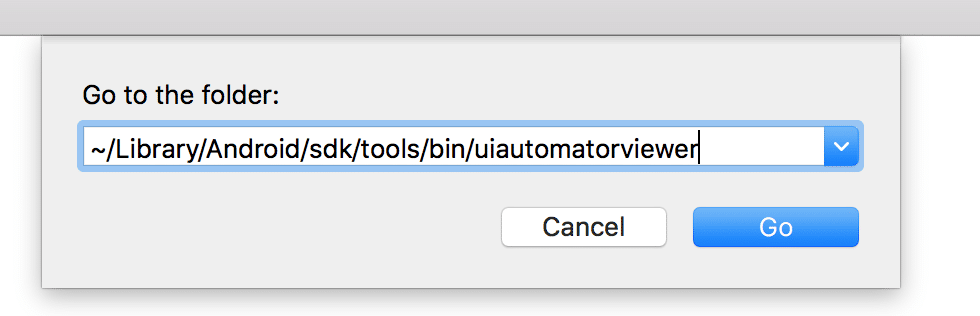
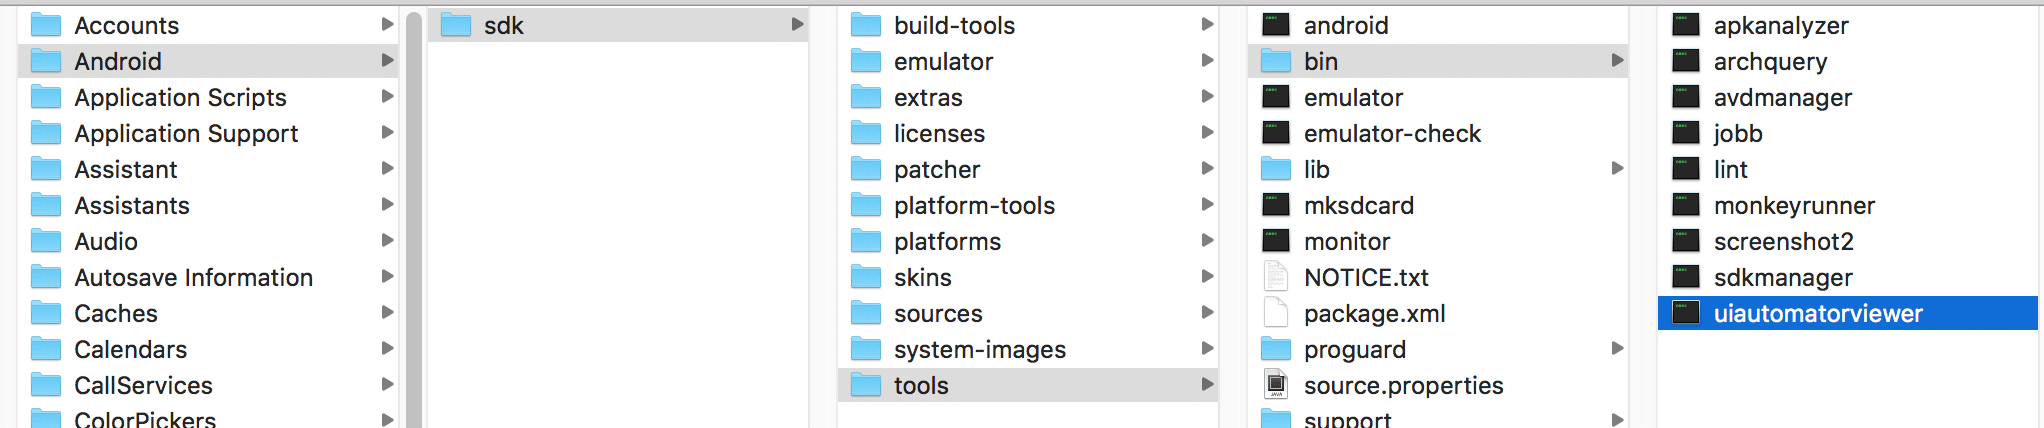
After connecting the device, you need to open UiAutomatorViewer from SDK directory. You can find UiAutomatorViewer under Android SDK>tools>bin directory.
Figure-3: Path to UiAutomatorViewer on Mac
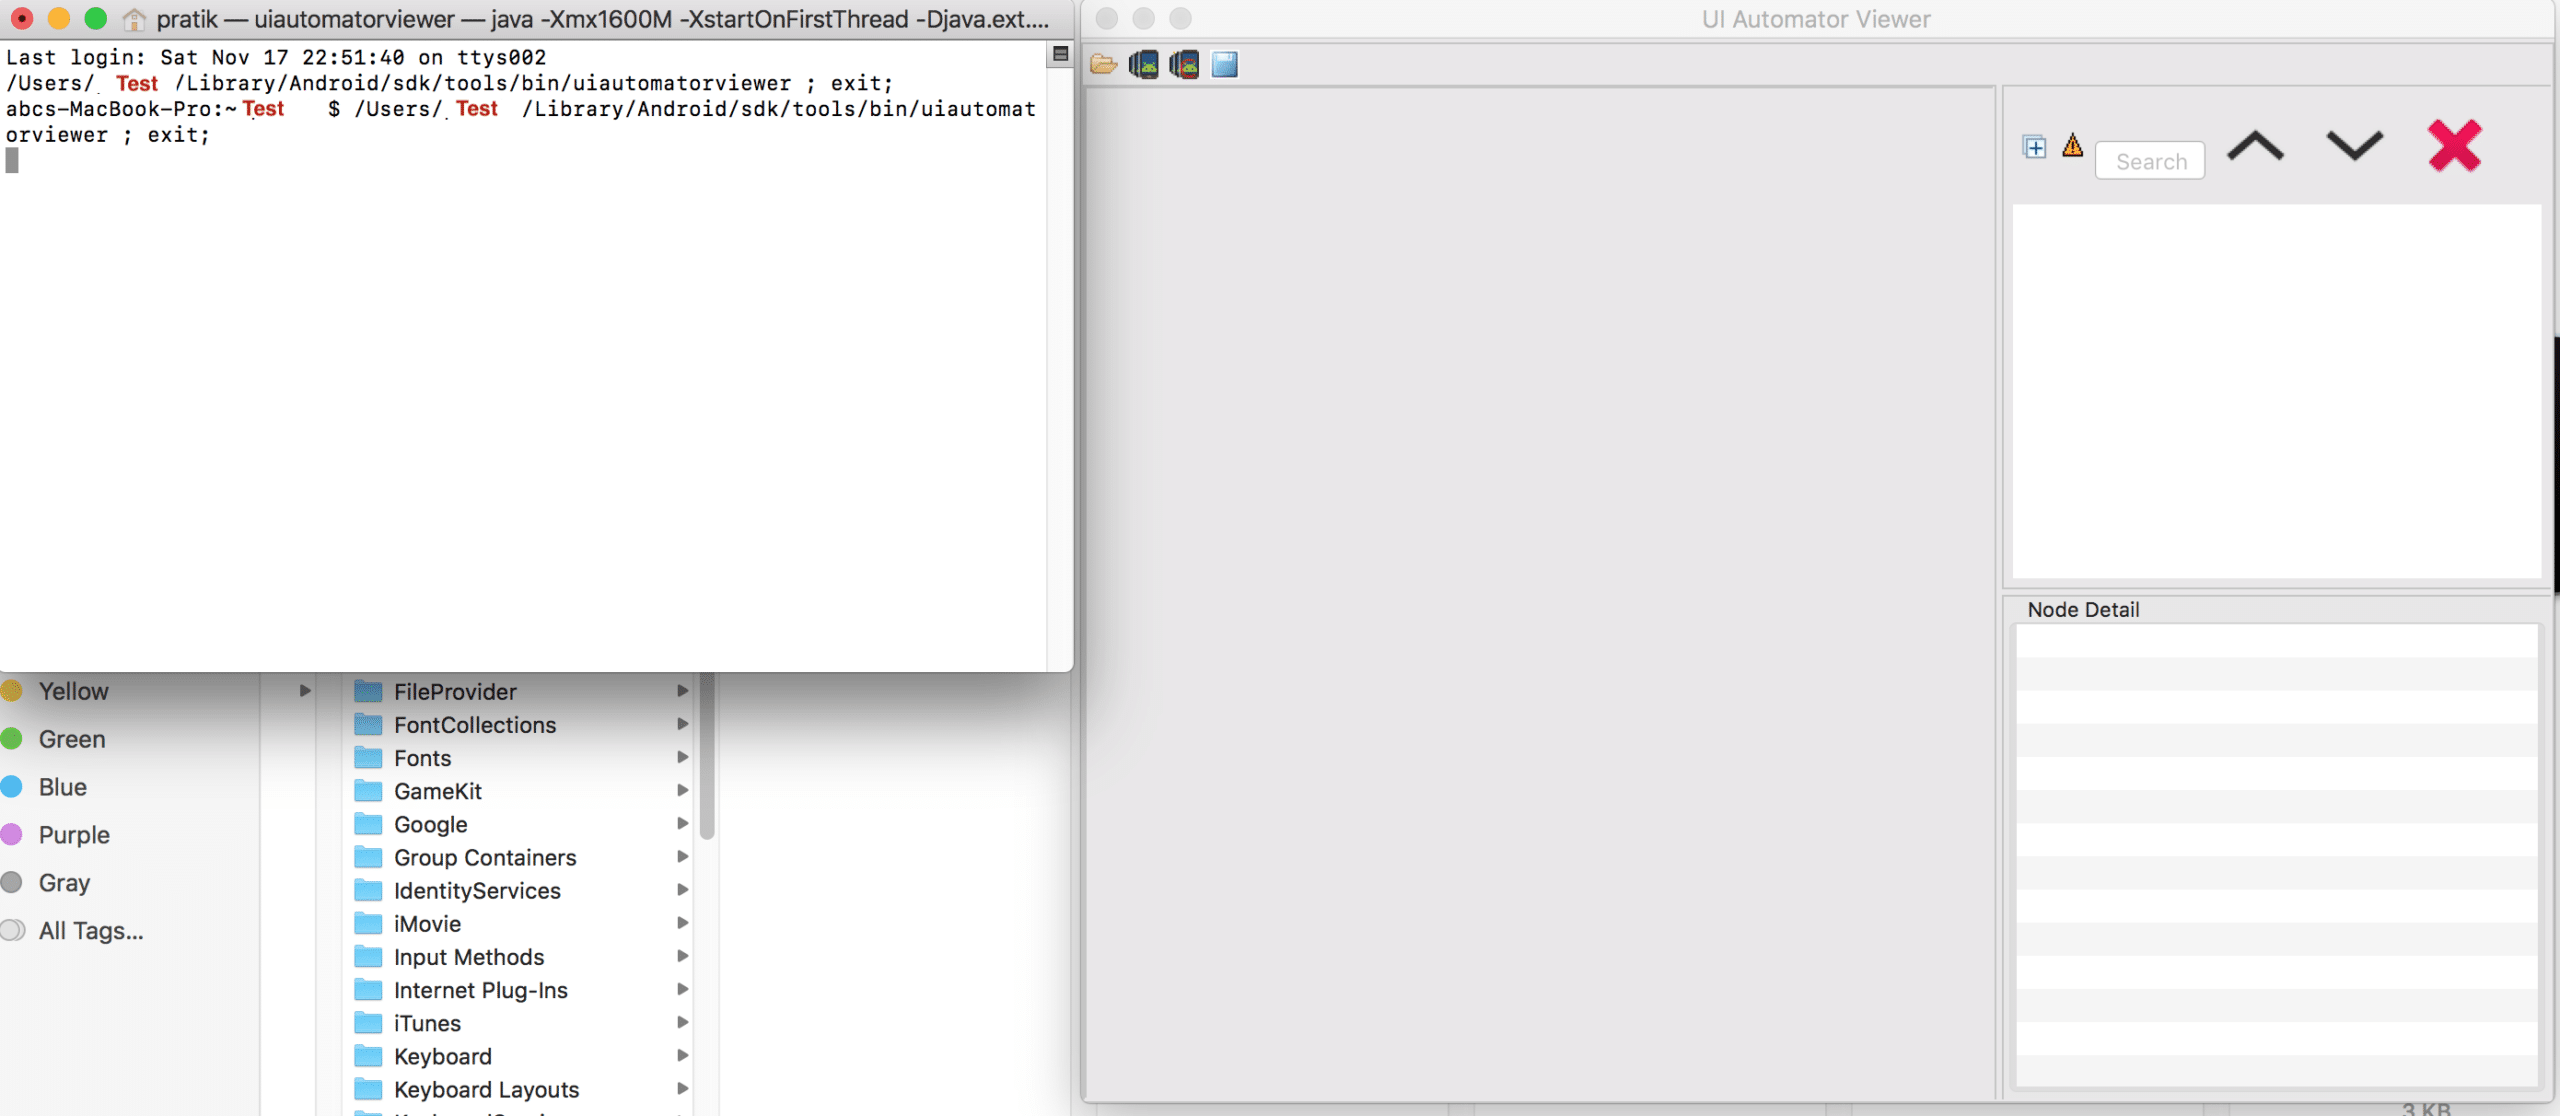
Figure-4: UiAutomatorViewer on Mac
Figure-5: Text accessibilty inspector adn UIAutomator viewer
Now, open the specific application screen on connected device for which you want to extract the elements.
In order to fetch that screen’s XML structure, you need to press the (second) mobile icon on UiAutomatorViewer window.
Figure-6: Click on second Mobile icon
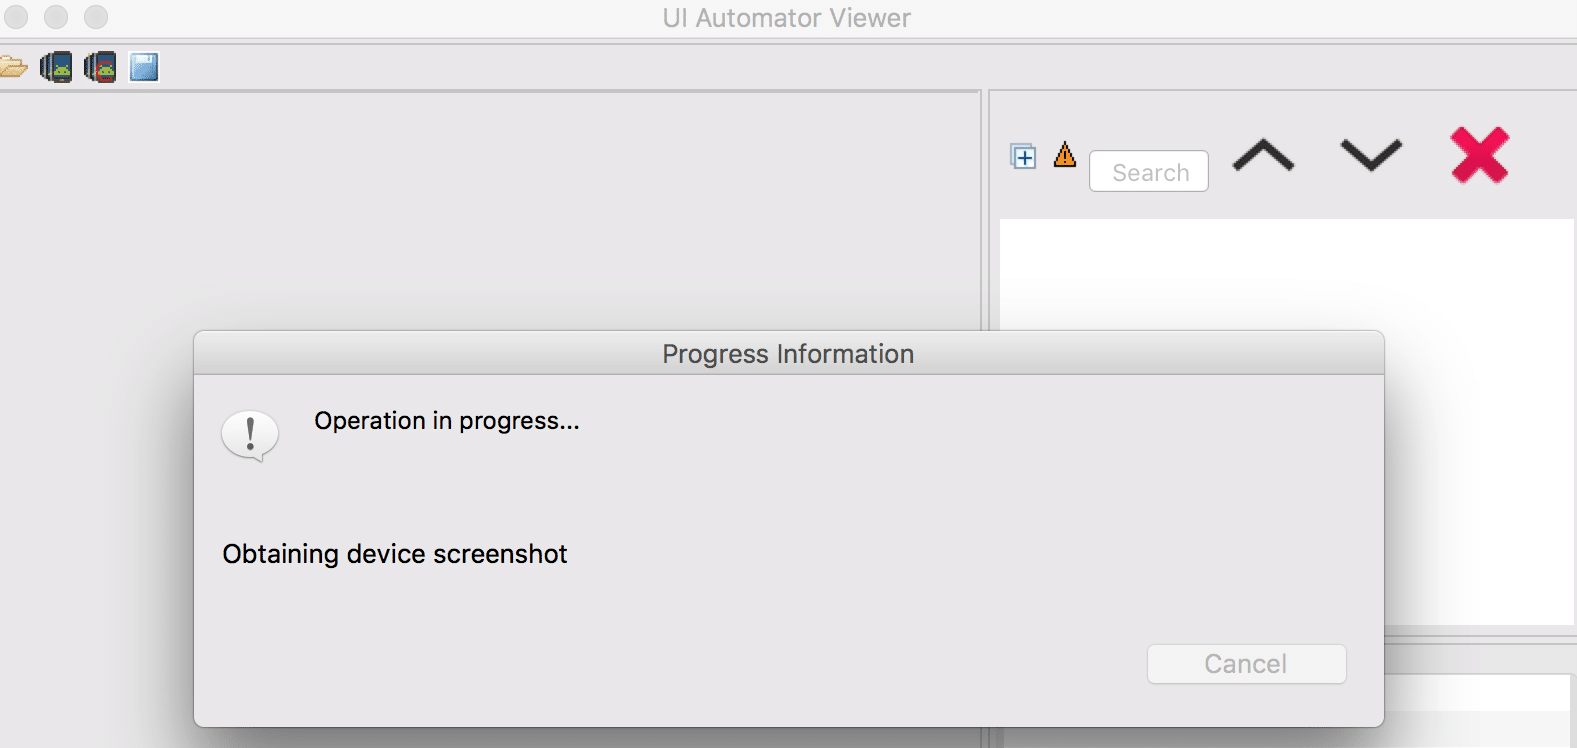
Figure-7: Obtaining Device screenshot and fetching-XML structure
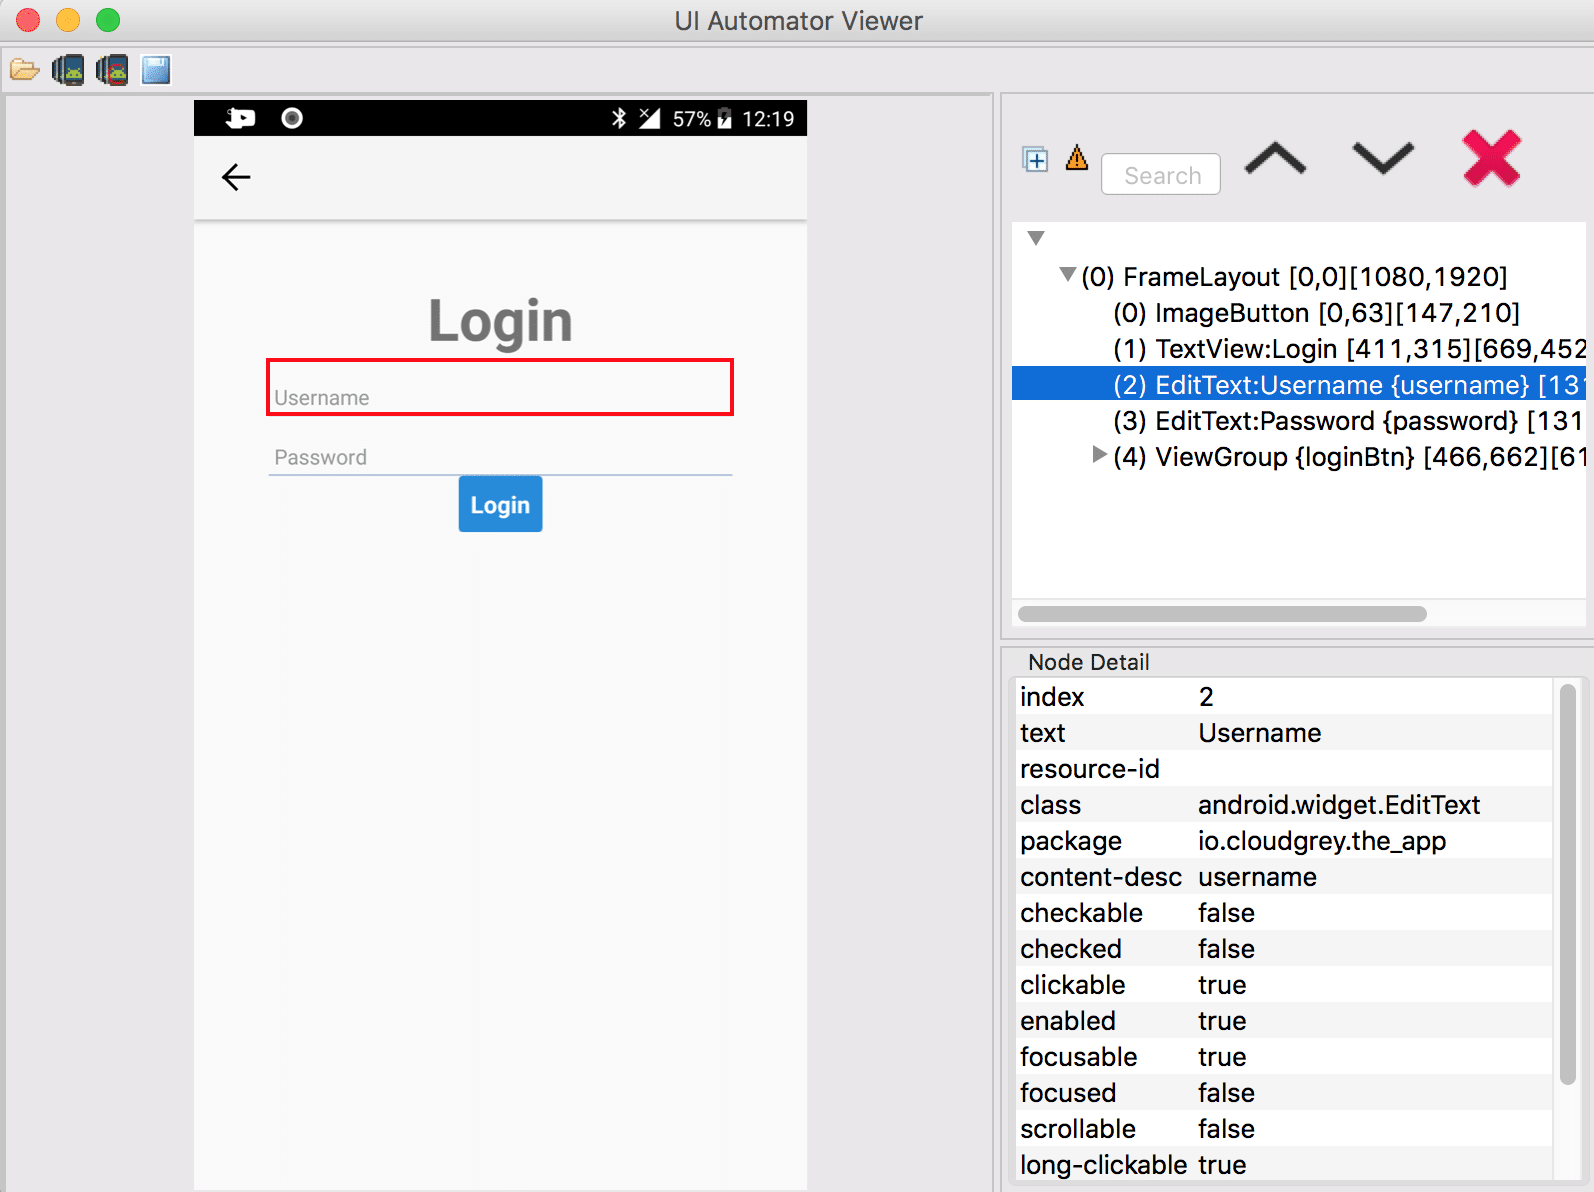
Figure-8: Sample application screen
Here, you can observe that the left side gives you the screenshot of the current screen from your connected device and the right side is divided into 2 parts
The upper half contains the XML hierarchy of Screen and selected node
The lower half contains the selected node’s attributes with their values
Now, you can get the valid selectors, such as cont-desc(accessibility id), id, class name, xpath etc. from the attributes section and start automating the application right away
Following table gives the mapping between attributes and Appium locator strategies:
Attribute
Locator Strategy
text
Name
resource-id
Id
class
Class Name
content-desc
Accessibility Id
As you can see, this tool is pretty much similar to Appium Inspector, but the only difference is this tool doesn’t take much time to get UI element locators.
You just need to connect your device and click on the mobile icon on UiAutomatorViewer
2. Accessibility Inspector:
Accessibility Inspector is a common Inspector tool included in XCode, and specially designed for Mac OS to get the basic details such as Label, Title, Value and Type for any UI element from opened application on Mac OS.
Actually, it does not gives many details and attributes of UI elements, but it is a handy tool to get the basic information about the element rapidly.
On Spotlight Search, search for the Xcode and open it.
Figure-9: XCode on Spotlight Search
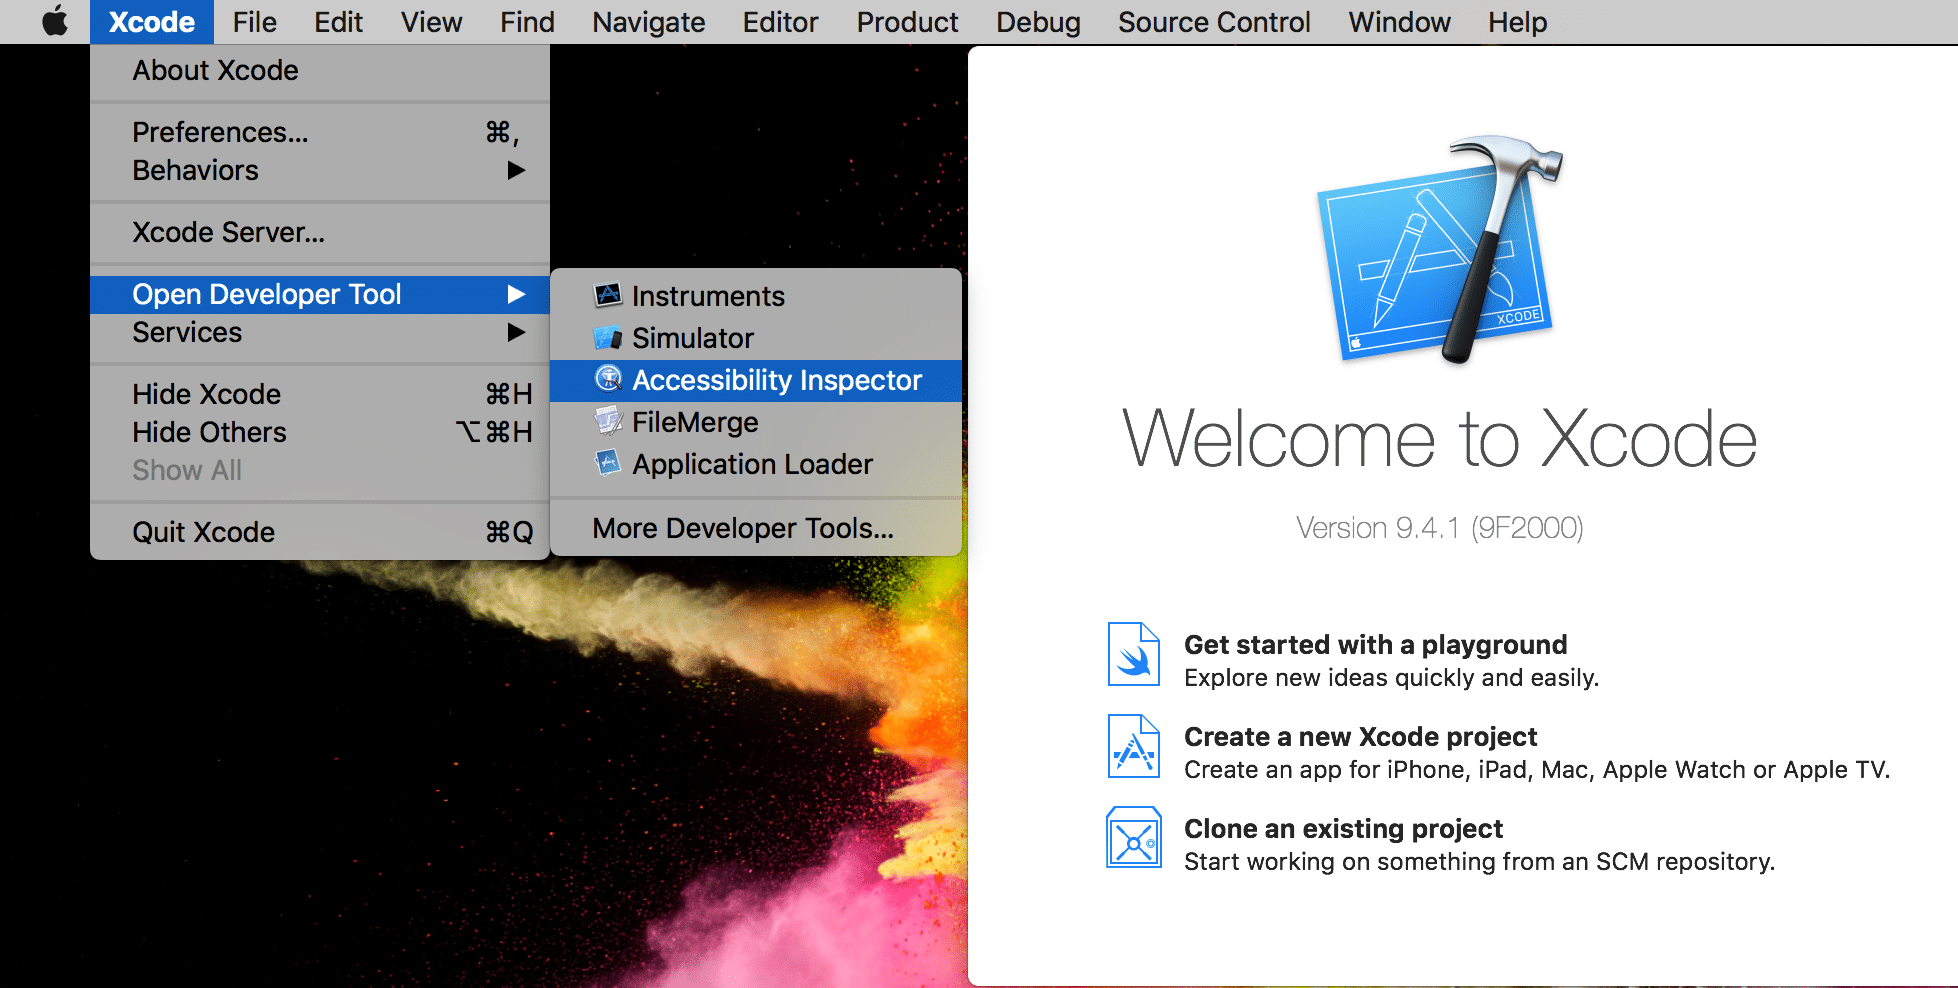
After XCode is open, on the Menu bar Select the XCode > Open Developer Tool > Accessibility Inspector
Figure-10: Accessibility Inspector on XCode
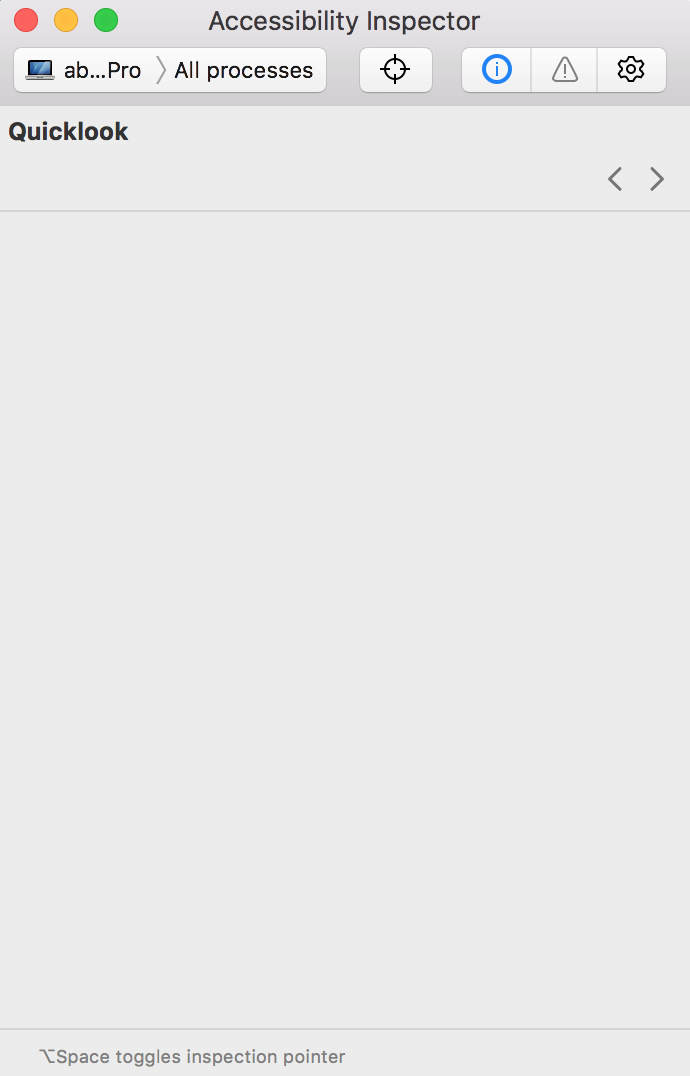
Below is the dialog of Accessibility Inspector.
Figure-11: Accessibility Inspector
Now open iOS Simulator and open the application for which you want to extract the locators
Now click on this icon: and select the “Compute Sum” textfield on Simulator.
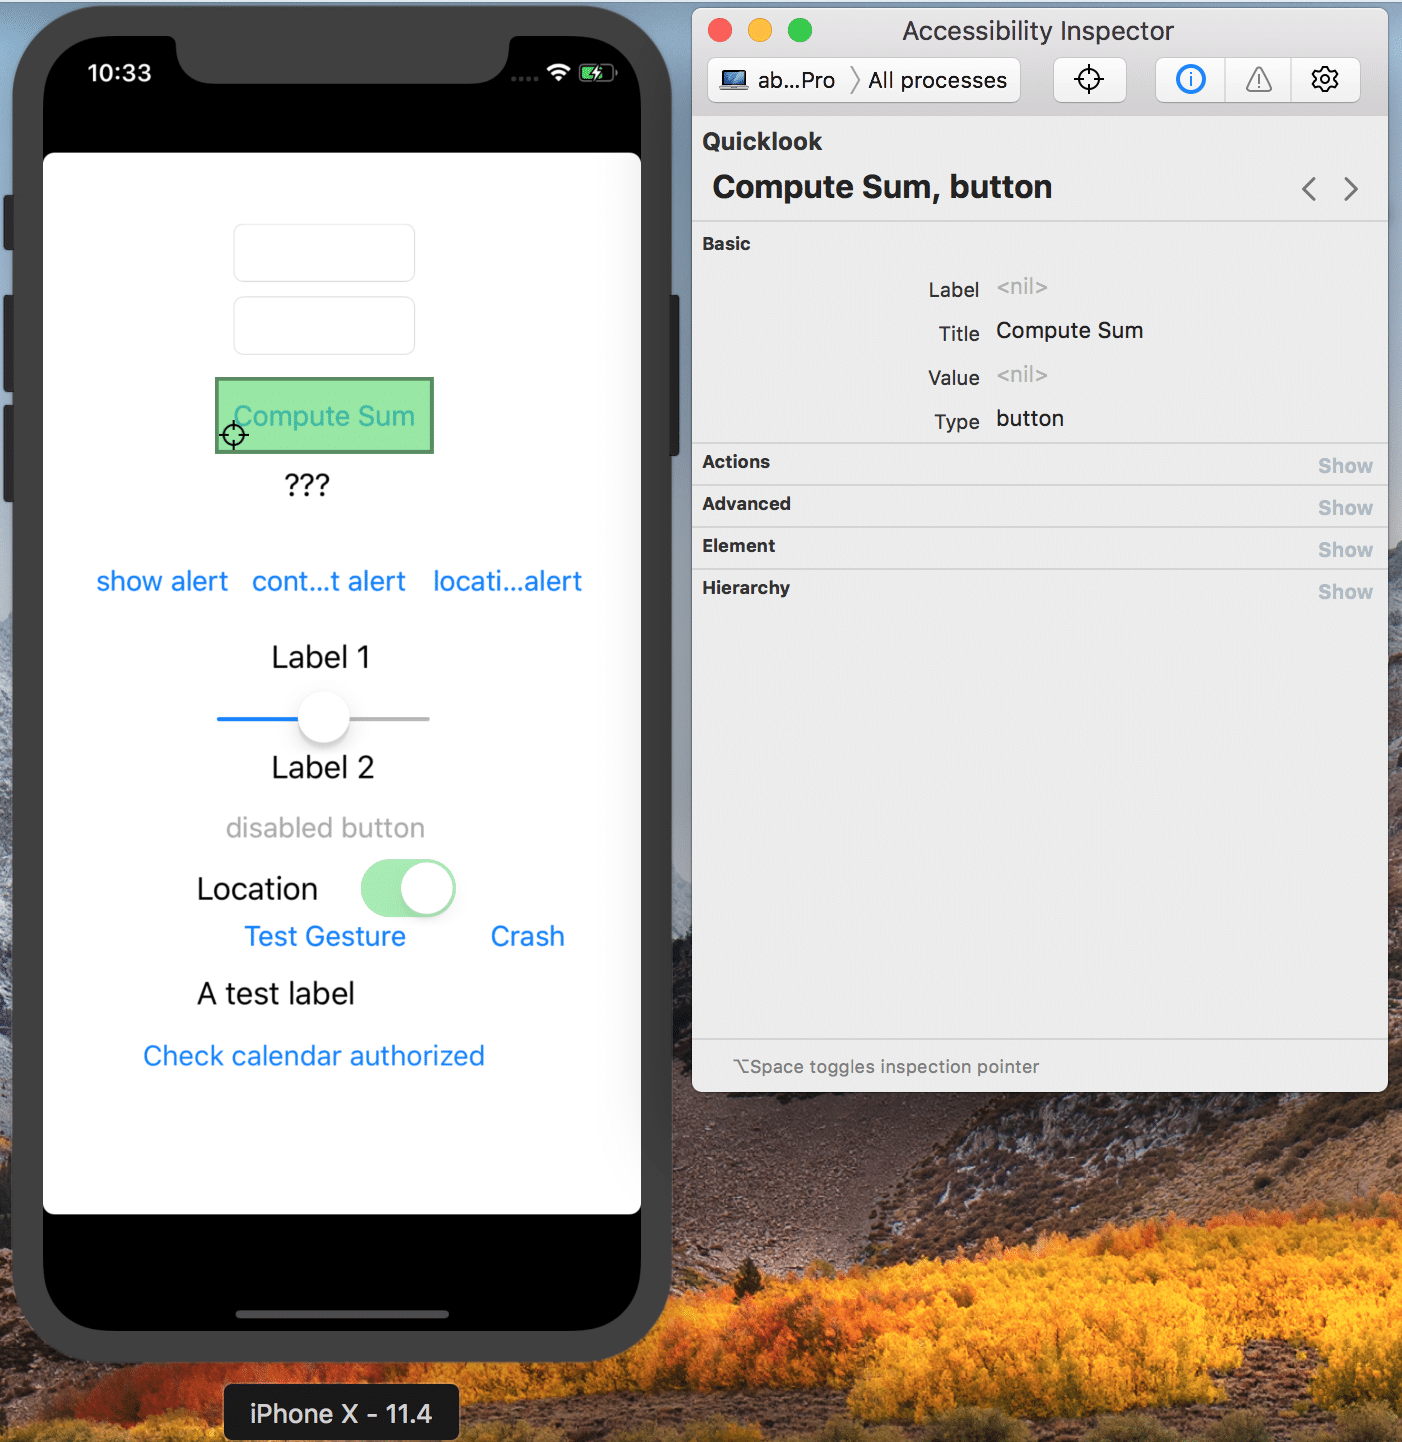
Figure-12: Locate the selector on Accessibility Inspector.
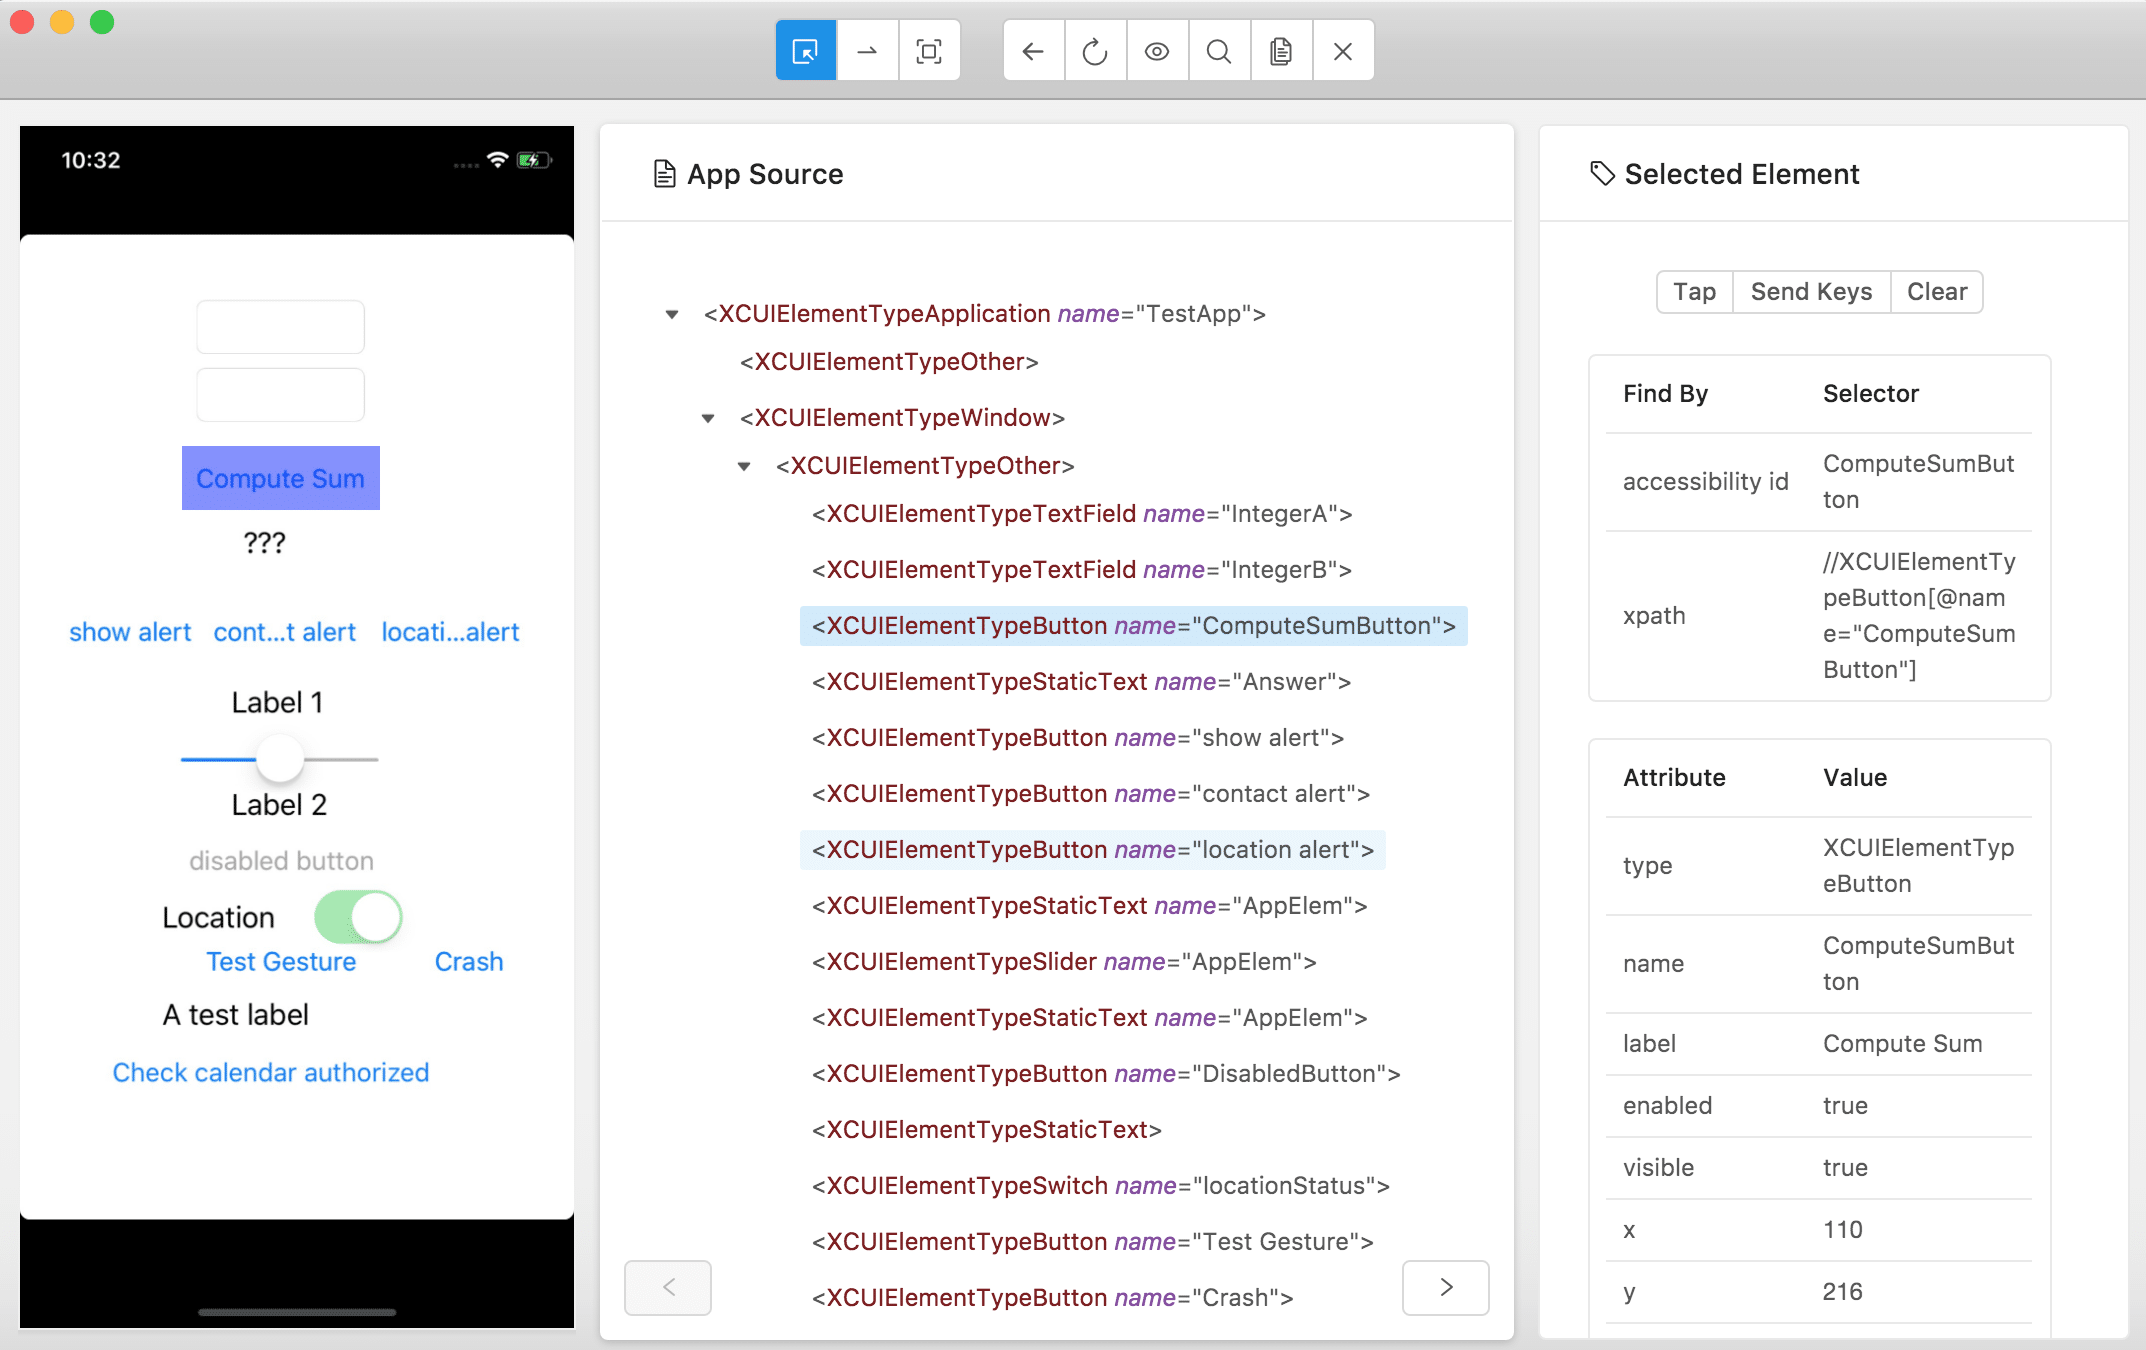
As you can see, you can get the Basic attributes such as Label, Title, Value and Type. While you use Appium Inspector you can get many attributes, please refer the image below:
Figure-13: Locate the selector on Appium Inspector.
Here, Appium Inspector adds more value to iOS part, while Accessibility Inspector provides only basics values, which in some cases, might not fruitful
There are also many third party software and tools available, which helps to identify the ui locators
Ultimately, you will figure out which tool best fits into your workflow, but it is a good idea to have a broad understanding of the choices at your disposal