Dec 20, 2023
Developing a Test Automation Framework for Appium

Frank Moyer
Read More
Robot Test Framework is a test automation framework for acceptance test-driven development and acceptance testing. Acceptance testing evaluates whether a system meets the acceptance criteria as defined in the user needs and requirements. The framework follows a keyword-driven style for writing test cases. Robot Test Framework supports tools and libraries and it can be used for robotic process automation (RPA) and test automation.
Looking for a complete mobile testing solution?
Robot Test Framework is widely supported and is actively used by many industry-leading companies in software development. The framework is open and extensible and it can be integrated with nearly every other tool to create flexible and powerful automation solutions. Being open source means that Robot Test Framework is free to use and you won’t incur any licensing costs.
Robot Test Framework comes with a tabular format where test cases are written using keywords. This makes it easy for new developers to understand and write test cases. Keyword driven testing is a testing technique that uses data files with keywords related to the application under test. The keywords describe the set of actions that are required to perform a particular step. A keyword driven test is made up of both high and low-level keywords, and the keyword arguments which describe the action of a test case.
Robot Framework is very flexible and it can be used to test web applications, mobile applications, desktop applications, and RESTful and SOAP-based services. Robot framework provides an abstraction layer on top of the physical implementation of the system being tested, making it possible to write cross-platform tests. This means that the same test can be used for both iOS and Android apps, or for testing a web application that runs on Firefox, Chrome, and Safari.
Robot Framework uses a modular framework that users can extend with self-made and bundled libraries. The test data is created in files in an easy-to-edit format. A file with tasks or tests creates a suite, and when these files are placed into directories, they create a nested structure of suites.

Source: robotframework.org
When the execution process starts, the framework first parses the data. Then the framework uses the keywords provided by the libraries to perform interactions with the target system. The libraries can communicate directly with the system or using other tools as drivers.
The task or test execution process is started from the command line. Logs and reports are generated in HTML format while the output is generated in an XML format.
Robot Framework and Appium can make the work of your team easier. The complexity of technology and software is increasing, and quality assurance teams face challenges daily. There is a need to validate software products faster and safer. The solution to this is automation.
Successful automation requires the use of the right tools by the right people. In this section, we will be discussing the process of mobile automation using Robot Framework and Appium library. The following software will be needed:
Appium is an open-source tool for automating apps on Android, iOS, and Windows. Appium can be used for automation of native apps (apps written using Android, iOS, or Windows SDKs), Hybrid apps, and Mobile web apps (web applications accessible using a mobile web browser).
It’s worth noting that Appium is cross-platform. This means that you can use it to write test cases for multiple platforms using the same API. The framework also understands both text and scripts and it uses the keyword-driven testing methodology.
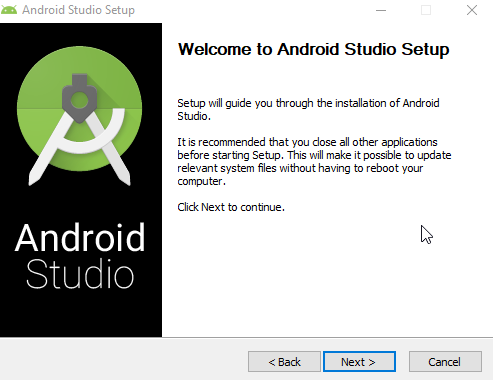
First, download Android Studio from its official website.
Download the right version based on your operating system. Once the download is complete, double click the installer to start the installation process. The on-screen installation instructions will be straight-forward as you will only have to click “Next” until the installation completes.

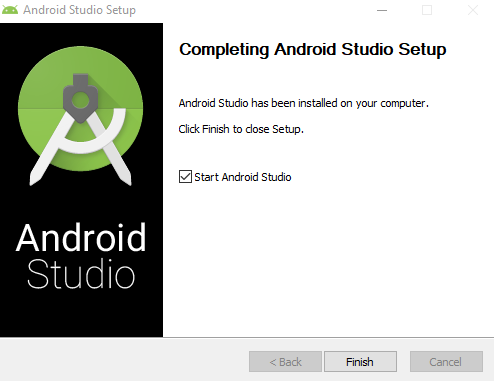
Once done, click the “Finish” button to close the installer and launch Android Studio.
Now that Android Studio has been installed, you can go ahead and create an emulator, which is an Android virtual device. Launch Android Studio and download all the required elements. This may take some time depending on the strength of your internet connection.
Once Android Studio is opened, click the “AVD Manager” icon shown on the top-right corner of the window as shown below:

This will open a window where you can create your AVD:
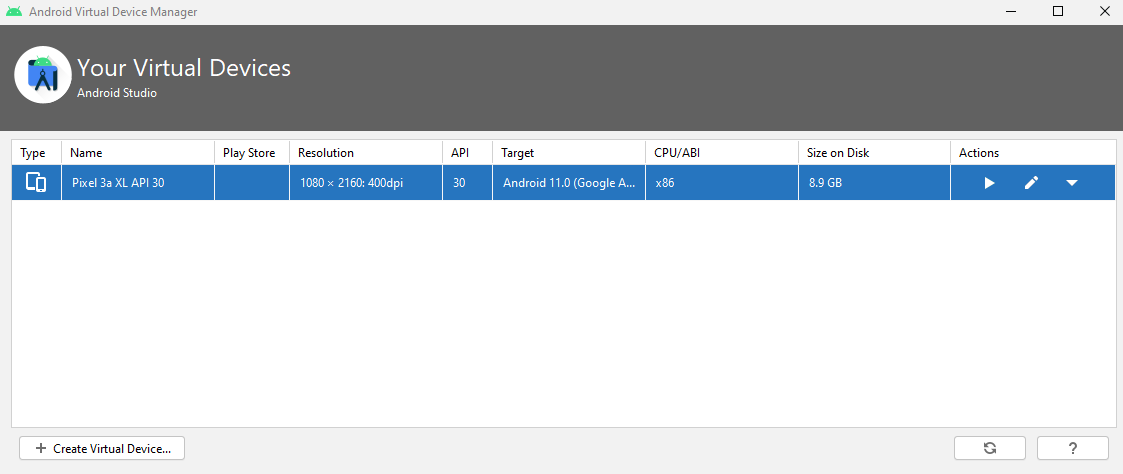
To create a new AVD, click the “Create Virtual Device” button shown in the above window. You will then be taken through on-screen instructions to create an AVD device. If you choose one with Google Play, you will be asked to download the system image.

The emulator will then be created. You can then start it.
You can also connect your Android mobile phone to your computer and ensure that its USB debugging mode is turned on under settings. You can then use the avd command to determine the devices running on your computer. Simply run the following command on the terminal:
adb devices
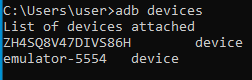
The above image shows that there are two devices currently attached to my computer. There is a real device and an emulator. We will be using the two to run tests.
After installing Android Studio, you should proceed to the next step, which is the installation of Appium.
Appium comes in two versions:
The Appium GUI Desktop app makes it easy for you to manage your test automation operations. However, to integrate your testing with CI pipelines, you must start the Appium Server using the scripts. Thus, you should install the Appium Server.
Since Appium is written in Node.js, you should install Node.js to use Appium. You can download Node.js from its official website.
Once the download is complete, double click the installer to start the installation process.
After installing Node.js, you will get npm (node package manager). You can use it to install Appium by running the following command on the terminal:
npm install -g appium

Once the installation completes, you can start to use Appium. You can start the Appium server by running the following command on the terminal:
appium -a 127.0.0.1 -p 4723

Note that we specified both the IP address and port number on which Appium is listening.
Now that we’ve installed the Appium server, we can proceed to install the Appium Desktop app. Visit the official Appium website and click the Download button.
Once the download is complete, double click the installer to start the installation.
Once the installation completes, open Appium Desktop. You will get the following screen:

To connect to the Appium server, you should enter the IP address of the host machine and the service port number.
Since Appium is simply an HTTP Server, it can’t do anything on its own. You should have client libraries to help you request and perform operations on end devices. The server port allows the client to connect to and communicate with Appium. It uses port 4723 as the default port.
Enter the host IP address and the server port and click the “Start Server…” button.
You will get the following screen:

Appium is now ready for your use.
We will use the Python’s pip package manager to install Robot Framework. This means that you should have Python installed on your computer. If you haven’t installed Python, download it from its official website. Once the download is complete, double click the installer to start the installation. You will be guided through on-screen instructions, thus, it will be easy for you.
Once the installation is complete, launch the command prompt of your OS and type the following command to install Robot Framework:
pip install robotframework

To install both Robot Framework and Appium library, run the following command:
pip install robotframework-appiumlibrary
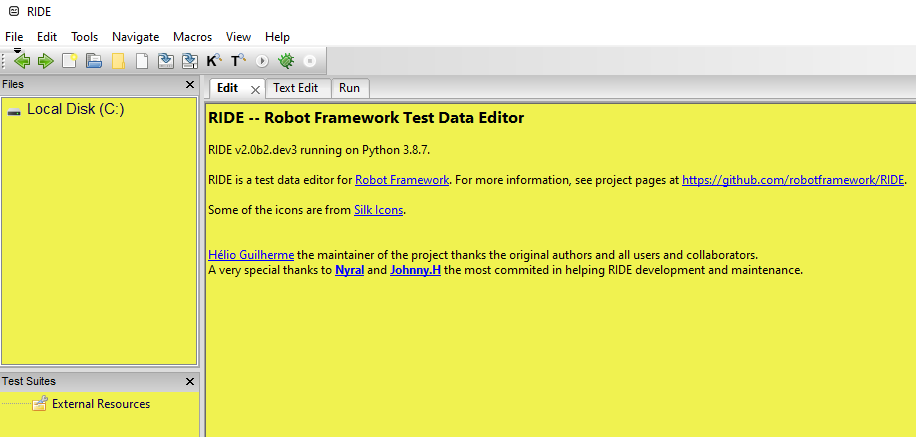
In this step, we will be installing the Ride testing editor for Robot Framework test cases. Ride requires wxPython, so ensure that you’ve installed wxPython on your computer.
We will use the pip package manager to install Ride. Run the following command on the terminal:
pip install -U https://github.com/robotframework/RIDE/archive/master.zip
Once the installation is complete, you can start the Ride editor by running the following command on the terminal:
ride.py
The Ride development environment will be opened as shown below:
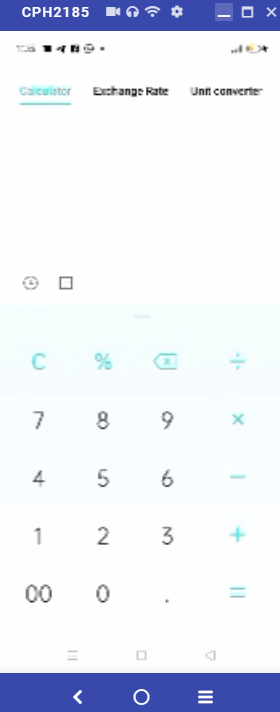
Now that our environment is ready, we can write our first test case using Robot Framework. We will be using the Calculator app to run the test case.
Follow the steps given below:
Step 1: Launch the Ride development environment. You simply have to open the terminal of your OS and run the following command:
ride.py
The command will launch the Ride development environment.
Step 2: Create a new project.
You should create a new project on the Ride IDE. Click the “File” menu and choose “New Project”.
Give the project the name “FirstTest” and choose “Directory” for type. Leave the rest at their default settings and click the OK button.
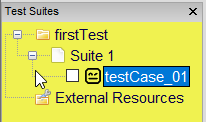
Step 3: Create a test case
We now want to create a test case within the project. Right-click the project name from the Test Suite section and choose “New Suite”. Give it the name “Suite 1” and click the “OK” button.
Now, right-click the name of the suite from under the project name and choose “New Test Case”. Give the test case the name “testCase_01” and click the “OK” button.
You have created the project, the test suite, and the test case. Your project directory should now be as follows:
Step 4: Add a keyword.
Since we want to do keyword-driven testing, we’ve to specify the keywords that we will be using. You can find the keywords for the Appium library here.
We will start with the “Open Application” keyword to help us to open the calculator app.
Open the test case “testCase_01” on Ride IDE and enter the device capabilities as shown below:
Appium Keyword: Open Application
remote_url: http://localhost:4723/
platformName=android
platformVersion=10.0
deviceName=’Pixel_3a_XL_API_30′
appPackage=com.android.Calculator
appActivity=Calculator
Ensure that the capabilities are well specified based on the capabilities of your fore example. The deviceName parameter should match the name of your emulator.

Step 5: Add the Appium Library
Let us add the Appium Library to our project. Click the test suite from the left under Test Suites.
Click the “Library” button located under “Add Import” on the far right section.
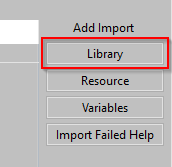
On the window that pops up, type “AppiumLibrary” in the Name field and 15 (for timeout in seconds) in the Args field. Click the “OK” button.

You will have added the Appium Library to the project.
Step 6: Launch the emulator
Let us launch the emulator. Navigate to the directory where you have installed the Android SDK and open the “tools” folder. In my case, I find it in the following directory:
C:\Users\user\AppData\Local\Android\Sdk\tools
Open the command prompt from that directory. You can simply type “cmd” in the URL bar and press the return key. The command prompt will be opened. Run the following command to open the emulator:
emulator -avd Pixel_3a_XL_API_30
Note that you should substitute the “Pixel_3a_XL_API_30” with the name of your emulator. The emulator should be opened.
Step 7: We will use the default android calculator to run the test. To inspect the individual elements of the calculator, we will be using the uiautomatorviewer that can be found in the /tools/bin folder of your SDK installation. In my case, it’s in the following URL:
C:\Users\user\AppData\Local\Android\Sdk\tools\bin
Double click to open it.
Step 8: Start Appium
You can now start Appium. Login using the default IP address and port number.

Step 9: Run the project
You can now run the project from the Ride IDE. Click “Run” and then “Start” as shown below:

The calculator app will be opened on the emulator and you will see the logs on the Ride IDE.

Step 10: Let us run another test using two other keywords namely:
We will do the following operation on the calculator app:
8 + 3 =
The Click Element keyword takes one argument, the locator.
Open the uiautomatorviewer and get the node details of the above elements. The most important thing is their class, which is android.widget.Button. So, the values for this argument for the 4 buttons should be as follows:
xpath=//android.widget.Button[@text=”8″]
xpath=//android.widget.Button[@text=”+”]
xpath=//android.widget.Button[@text=”3″]
xpath=//android.widget.Button[@text=”=”]
The Close Application keyword takes no argument.
To ensure that Appium waits for the app and its elements to be loaded before clicking, we will add the Wait Until Page Contains Element keyword. We will wait for the button that contains 8 for 5 seconds.
So, add the keywords and arguments to the RIDE IDE as shown below:

Step 11: Run the test again. When the calculator app opens up, perform the operation:
8 + 3 =
The test should run successfully.
Now that we’ve run the test on an emulator, we can go ahead and run the test on a real device. In this case, we will be using an android device.
To know the name of the device you’ve attached to your computer, run the adb devices command on the terminal of your OS.

If you want to see the Android device on your computer, you can install a tool called Vysor. You can download it from its official website here.

Launch the Ride IDE and change the name of the device in the row for “Open Application” keyword. Also, ensure that your Appium server is started.
Re-run the test to see it launch the Calculator app.
You can then perform the 8 + 3 = operation to see whether it gives you 11.
Congratulations!
That’s how to test on a real device.
View report
Robot framework generates a report for each test that you run. The purpose of the report is to give you a detailed explanation of what happened during the test.
The Ride IDE will show the location of this report after running the test. You can find this under the console log.

You can then open the specified directory and open your report in the web browser of your choice.
Robot Framework is a testing framework that uses the keyword-driven testing approach. Keyword-driven testing uses data files with keywords related to the application under test. The keywords describe the actions that are required to perform a particular action.
Robot Framework is a very versatile framework as it can be used to test web applications, desktop applications, mobile applications, and RESTful and SOAP-based services. It also has an abstraction layer on top of the physical implementation of the system being tested, making it possible for us to write cross-platform tests. This way, one test can be used to test both iOS and Android apps, or to test a web application that runs on Chrome, Firefox, and Safari.
Which mobile testing solution should you choose?